audi Workshop Repair Guides

Audi Workshop Service and Repair Manuals

Checking cooling system for leaks > < Removing and installing radiator outlet coolant temperature senderG83
Removing and installing radiator
Special tools and workshop equipment required
   
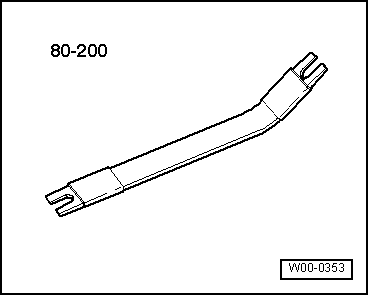
t  Removal lever -80 - 200-
  W00-0353
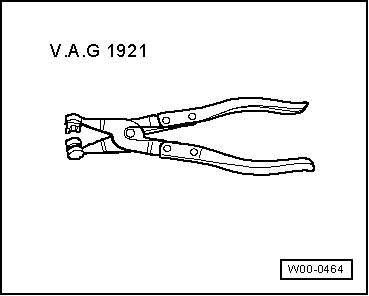
t  Hose clip pliers -V.A.G 1921-
  W00-0464
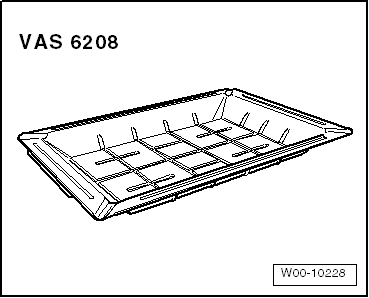
t  Drip tray for workshop hoist -VAS 6208-
Removing
  Note
Even when the radiator and condenser are correctly installed, slight impressions may be visible on the fins of these components. This does not mean that the components are damaged. If the fins are only very slightly distorted, this does not justify renewal of the radiator or the condenser.
–  Drain coolant → Chapter.
–  Remove bumper cover (front) → Rep. gr.63.
  W00-10228
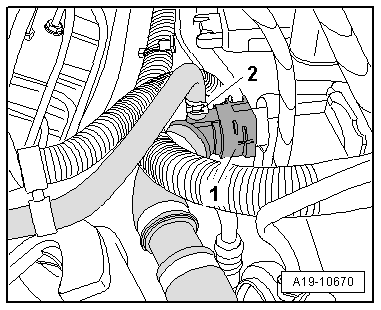
–  Disconnect coolant hose -1- from radiator (pull out retaining clip).
  Note
Disregard item -2-.
  A19-10670
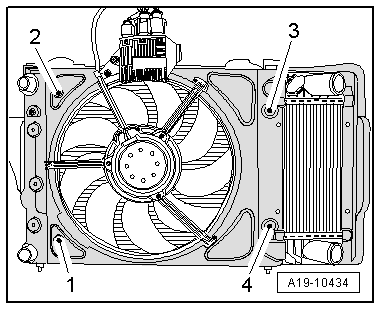
–  Remove bolts -1- and -4- securing radiator at bottom of radiator cowl.
  A19-10434
–  Unplug electrical connector at horn.
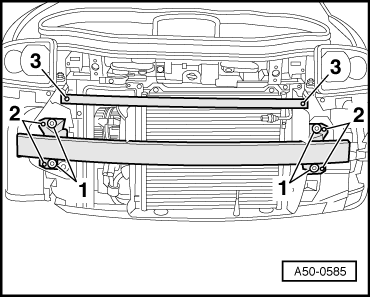
–  Remove bolts -3- (2x) on both sides and detach reinforcement rail.
–  Prise off securing clips -2-.
–  Remove bolts -1- on both sides and detach impact bar for bumper.
  A50-0585
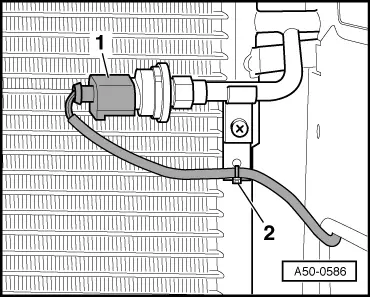
–  Unplug electrical connector -1- at high-pressure sender -G65-.
–  Cut open cable tie -2-.
  A50-0586
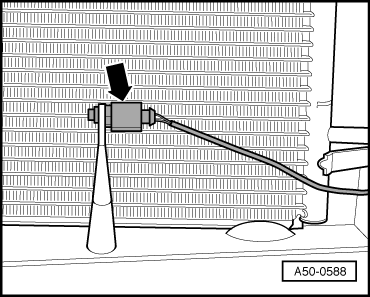
–  Detach ambient temperature sensor -G17--arrow- from bracket.
  A50-0588
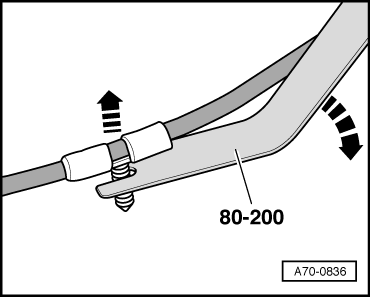
–  Use removal lever -80 - 200- to press off electrical wiring harness leading to high-pressure sender -G65- and ambient temperature sensor -G17- from air duct (left-side).
  A70-0836
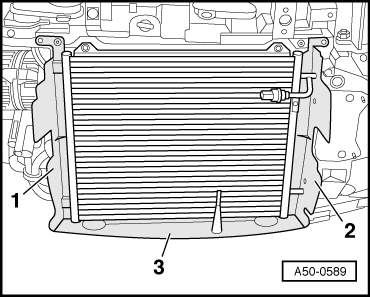
–  Remove air ducts -1, 2, 3- from lock carrier.
  A50-0589
  WARNING
Risk of injury caused by refrigerant.
The air conditioner refrigerant circuit must not be opened.
  Caution
Make sure that condenser and refrigerant pipes and hoses are not damaged.
Do NOT stretch, kink or bend refrigerant lines and hoses.
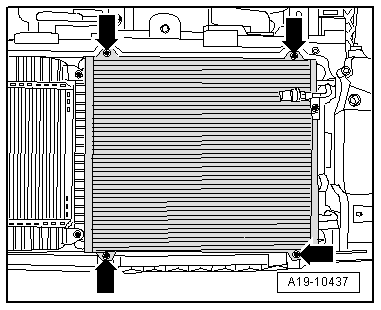
–  Remove bolts -arrows-.
  A19-10437
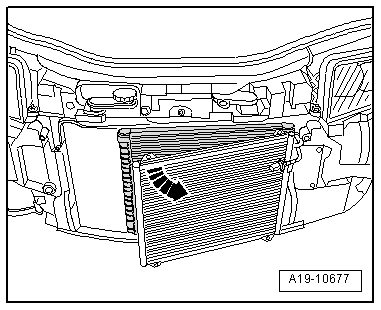
–  Pivot condenser slightly forward on right side of vehicle -arrow-.
–  Carefully pull condenser forward as far as possible on left side (connection side).
–  Place drip tray for workshop hoist -VAS 6208- beneath radiator.
–  Guide radiator connections out of radiator cowl one by one, moving radiator up or down as required.
–  Detach radiator.
Installing
l  Tightening torques:
  A19-10677
ComponentNm
Radiator to radiator cowl6
Condenser to radiator cowl6
Air ducts to radiator cowl1.5

Installation is carried out in the reverse order; note the following:
  Note
Secure all hose connections with the correct type of hose clips (same as original equipment) → Electronic parts catalogue.
   
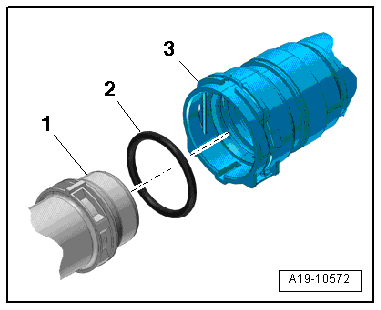
–  Connect coolant hose with plug-in connector to radiator as follows:
1.  Remove old O-ring -2- from coolant hose -3-.
2.  Lubricate new O-ring with coolant additive and fit O-ring in coolant hose.
3.  Press coolant hose onto radiator -1- until it engages with a click.
4.  Press coolant hose in again and then pull to check that plug-in connector is correctly engaged.
–  Install impact absorber and reinforcement rail → Rep. gr.63.
–  Install bumper cover (front) → Rep. gr.63.
  Note
The coolant in the entire system must be changed if the radiator is renewed.
–  Fill up with coolant → Anchor.
  A19-10572

Checking cooling system for leaks > < Removing and installing radiator outlet coolant temperature senderG83