audi Workshop Repair Guides

Audi Workshop Service and Repair Manuals

Tightening torque > < Removing
Installing
Installing
   
Face of bonded rubber bush is provided with markings -1-.
These must align with the edge -arrow- of the trailing arm -2-.
–  Identify position of markings -1- on outer circumference of bonded rubber bush.
  A42-0311
–  Attach special tools to bonded rubber bush -1-.
  A42-0451
The illustration shows the set-up for installing the bush on the left side of the rear axle.
–  Now bring bonded rubber bush -1- with special tools into position at rear axle -2-.
–  Make sure that the marking on the bonded rubber bush aligns with the edge of the trailing arm.
–  Pull in bonded rubber bush by turning spindle.
  A42-0452
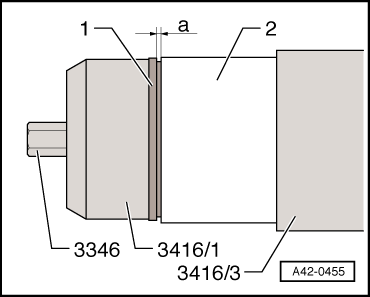
–  Pull in bonded rubber bush only up to the point where gap a = 0.2 mm remains between collar on bush -1- and mounting eye on rear axle -2-. This prevents the collar from shearing off during installation.
–  Measure gap with feeler gauge.
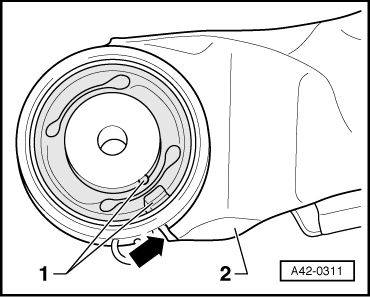
–  Check position of bonded rubber bush after installing.
–  Before installing rear axle in mounting brackets, grease kidney-shaped cavities of bonded rubber bushes with assembly paste G 052 150 A2.
Noises can occur when the vehicle is driven if the rear axle is installed “dry”.
Further installation of rear axle is carried out in reverse sequence.
–  Fit and secure wheels → Chapter.
  A42-0455

Tightening torque > < Removing