
A2
 Note
Note
Note
|
Note
|
|
|
|
|
|
|
|
|
|
Note
|
|
|
|
|
|
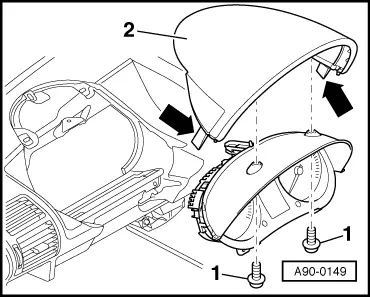
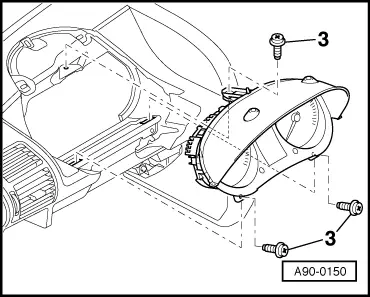
| Component | Nm | |||
| Dash panel insert to dash panel | top | 3.5 1) | ||
| bottom | 3.5 | |||
| ||||