
Removing and Installing Headlights - Automotive Lighting Solutions
|
|
|
|
|
 Note
Note |
|
Note |
|
Note
|
|
Note
|
|
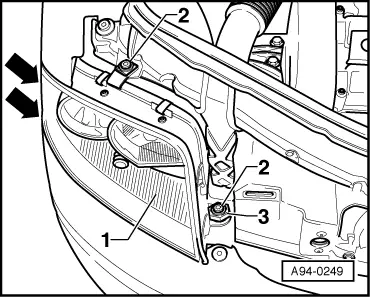
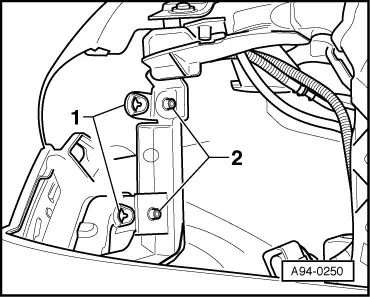
| Component | Nm |
| Headlight to lock carrier | 6 |