audi Workshop Repair Guides

Audi Workshop Service and Repair Manuals

Installation instructions > < Removing a broken rear window
General Body Assembly Exterior (Repair groups 50, 55, 57, 58, 60, 63, 64, 66)
Removing and installing rear window
Preparation for rear window installation

Window removed intact

Note:

If an intact window is to be re-used, trim back adhesive sealant left on window and window flange with electric cutter V.A.G 1510 and scraper V.A.G 1510/8, but do not remove adhesive sealant completely.

The remaining material serves as a bonding surface for new adhesive sealant to be applied.

Keep bonding surfaces clean and free from grease.

Do not prime bonding surfaces and do not treat with cleaning fluid.

If the window flange is damaged when the window is cut out, make good the paint coating as specified in the vehicle paintwork manual and apply corrosion protection, if necessary as described in the "Surface Treatment/Chemical Materials" binder.

New window

  • ‒ Clean window all around bonding area with cleaning fluid Part-No. D 009 401 04.
  • ‒ Primer window all around bonding area with
    D 009 200 02.
Important
Ceramic layer on windscreens is not a primer. Priming must always be performed before applying adhesive sealant.
 
V64-0382
  • ‒ → Apply primer -2- D 009 200 02 evenly all around the window using applicator -1- Part-No. D 009 500 25 (felt pad with wire).
  • ‒ Distance from edge of window at top and bottom 12 mm ±2 mm.
  • ‒ Distance from side edges of window 38 mm -1.5 mm.
  • ‒ Drying time approx. 10 minutes.
  • ‒ Primer width = 22 mm.

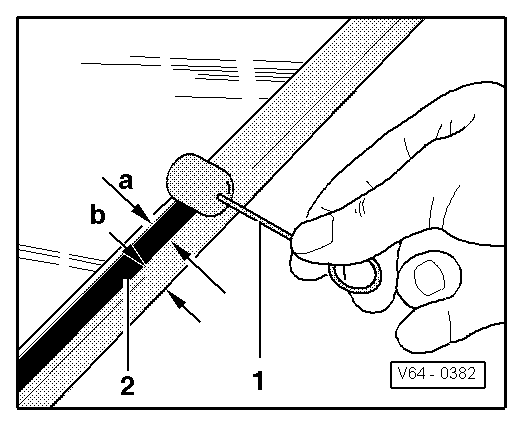
Note:

Allow primer to dry before touching-up primer strip.

 
V64-0391

→ Cross-section of adhesive bead.

  • ‒ Adhesive bead- 1-.
  • ‒ Primer -2-
  • ‒ Windscreen -3-.
  • ‒ Dimension -a- = 8 mm
  • ‒ Dimension -b- = 12 mm.
  • ‒ Distance from edge of window at top and bottom 12 mm ±2 mm.
  • ‒ Distance from side edge of window 38 mm -1.5 mm.

Installation instructions > < Removing a broken rear window