audi Workshop Repair Guides

Audi Workshop Service and Repair Manuals

Disassembling and assembling evaporator housing > < Removing and installing the air conditioner heat exchanger
Heating, Air Conditioner
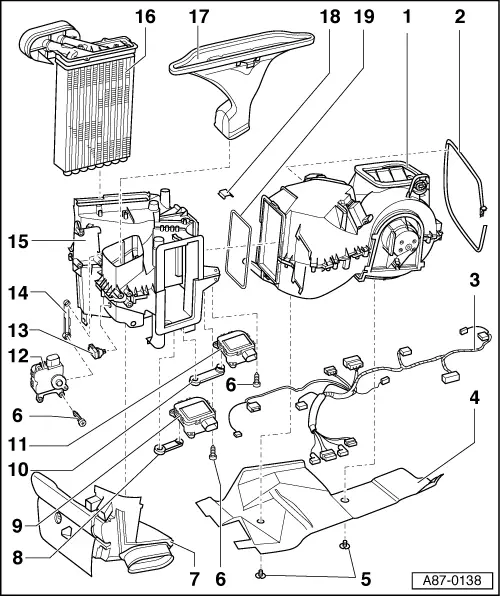
Dismantle and assemble air conditioner (version 1)
 
A87-0138

Notes:

  • ◆ As of June 1997, AC version "1" has been gradually phased out of production and AC version "2" gradually phased in.
  • ◆ Dismantle and assemble air conditioner, design "2".
  • ‒ Remove air conditioner .
  • Evaporator housing
    • ◆ Dismantling and assembling => Page 87-138.
  • Tensioning strap
    • ◆ Ensure correct routing => Fig.1.
 
A87-0138
  • Air conditioner wiring harness
    • ◆ Ensure clearance to moving components is maintained when installing => Fig.2.
  • Cover
    • ◆ Fastened to the evaporator housing via tensioning strap Item 2 and both bolt clips Item 5.
  • Bolt clip
  • Bolt
  • Footwell vent
    • ◆ Removing and installing .
  • Connecting link
 
A87-0138
  • Central flap positioning motor -V70
    • ◆ With potentiometer -G112
    • ◆ Removing and installing .
    • ◆ "Green" pivot arm
  • Connecting link
  • Temperature flap positioning motor -V68
    • ◆ With potentiometer -G92
    • ◆ Removing and installing .
    • ◆ "Black" pivot arm
  • Footwell/defroster flap positioning motor -V85
    • ◆ With potentiometer -G114
    • ◆ Removing and installing .
    • ◆ "yellow" pivot arm
 
A87-0138
  • Footwell vent temperature sender
    -G192
    • ◆ Removing and installing .
  • Connecting link
  • Heater flap unit
    • ◆ Do not dismantle.
  • Heat exchanger
    • ◆ Removing and installing => Page 87-130.
  • Air duct to defroster vent
    • ◆ Removing and installing .
  • Bracket
    • ◆ Use a screwdriver to prise off.
  • Gasket
    • ◆ Install in evaporator =>Fig.3.
 
A87-0139

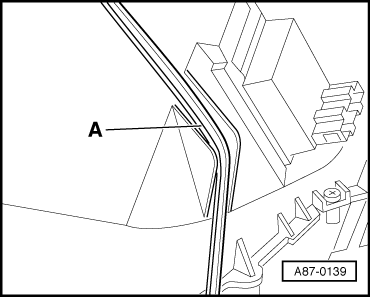
Fig.1    → Routing securing strap

Notes:

  • ◆ Ensure that tensioning strap -A- is properly fitted around evaporator housing.
  • ◆ The tensioning strap keeps the cover secured to the evaporator housing.

 
A87-0140

Fig.2    → Installing air conditioner wiring harness

Notes:

  • ◆ Install wiring harness -A- so that it cannot come into contact with moving parts (e.g. positioning motor lever -B-).
  • ◆ Route wiring harness so that it does not rattle.
 
A87-0141

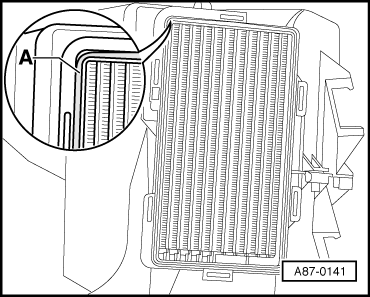
Fig.3    → Installing gasket on evaporator housing

Note:

Seal -A- must be fitted in the groove all around the evaporator housing.

Disassembling and assembling evaporator housing > < Removing and installing the air conditioner heat exchanger