audi Workshop Repair Guides

Audi Workshop Service and Repair Manuals

Removing and installing heating system heat exchanger > < Special tools, testers, measuring instruments and auxiliary items required
Heating, Air Conditioner
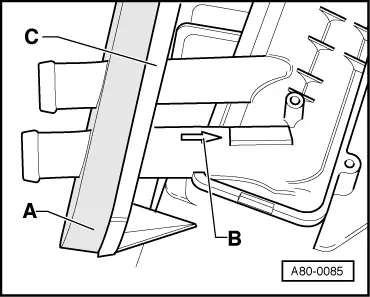
Removing and installing heater
  • ‒ Remove dust and pollen filter .
  • ‒ Disconnect battery.

Notes:

  • ◆ If necessary, obtain radio code before disconnecting battery.
  • ◆ In vehicles with electrically adjustable seats, move the seats back as far as possible before disconnecting the battery.
  • ◆ A heat exchanger has been installed in vehicles with map-controlled cooling (to be introduced gradually as of model year 1999 vehicles with 1.6 l engine) which has been adapted to the different usage conditions. The following must be noted for this heat exchanger:
 
A80-0142
  • ‒ → The flow direction of the refrigerant in the heat exchanger is not marked at the refrigerant connections (observe feed and return flow).
  • ‒ The heat exchanger can be recognised when installed by the metal refrigerant pipes (as opposed to plastic pipes as in other versions).
  • ‒ Reduce pressure in cooling system by opening the lock on the refrigerant expansion tank
  • ‒ Unclamp and disconnect both refrigerant hoses to heat exchanger in heater (e.g. using special tool V.A.G 3094).

Notes:

  • ◆ Mark both refrigerant hoses before disconnection.
 
A80-0080
  • ◆ The refrigerant hoses are to be connected on the correct side. Different connection and flow direction of the refrigerant dependent on the type of heat exchanger.
  • ◆ → Arrangement in a vehicle without map-controlled cooling and a heat exchanger without quick release couplings:
    • ‒ Refrigerant hose -A-: supply hose from cylinder head
    • ‒ Refrigerant hose -B-: return hose to water pump
    • ‒ The flow direction is marked by an arrow at the connection pipes of the heat exchanger (not visible when installed).
 
A80-0143
  • ◆ → Arrangement in a vehicle without map-controlled cooling and a heat exchanger with quick release couplings:
    • ‒ Refrigerant hose -A-: supply hose from cylinder head
    • ‒ Refrigerant hose -B-: return hose to water pump
    • ‒ The flow direction is marked by the arrows -C- at the connection pipes of the heat exchanger (visible when installed).
 
A80-0142
  • ◆ → Arrangement in a vehicle with map-controlled cooling:
    • ‒ Refrigerant hose -A-: supply hose from cylinder head
    • ‒ Refrigerant hose -B-: return hose to water pump
    • ‒ The connection pipes of the heat exchanger are made of metal, the flow direction of the refrigerant is not marked.
  • ◆ Bleeding refrigerant circuit.

=> Relevant Workshop Manual Engine; Mechanical Components; Repair group 19

 
A80-0081
  • ‒ → Fold up pre-punched points -A- of the thermal insulation mat and remove the hexagon nuts located behind with washer -B- (tightening torque 15 Nm).
  • ‒ Remove hexagon nuts with washer -C-.

Note:

A fitting must accompany the seal at the hexagon nut washers.

 
A80-0131
  • ‒ → Place a container under connection -B- and carefully blow out the refrigerant from the heat exchanger (in flow direction of refrigerant using compressed air) via connection -A- (different types, observe flow direction of refrigerant).
  • ‒ Remove glove compartment.

=> Inner Body Assembly; Repair group 68

  • ‒ Remove driver's storage compartment, centre console and dash panel fascia.

=> Inner Body Assembly; Repair group 70

 
A80-0076
  • ‒ → Remove air duct -A- to defroster vent.
  • ‒ Remove footwell vent .
  • ‒ Remove passenger side complete airbag unit with left bracket to dash panel cross member.

=> Electrical System; Repair group 96

  • ‒ Disconnect earth connection from the heater to pillar-A right bottom earthing point.

=> Current Flow Diagrams, Electrical Fault-Finding and Fitting Locations

  • ‒ Cover all open connectors and heater air ducts to protect metal particles from entering.
 
A80-0132
  • ‒ → Drill a 7 mm diameter hole at each of the points on the dash panel support (weld points) designated by -A- (drill through both panels at the weld points).
  • ‒ Use a saw to cut through support at point designated by -B- (e.g. use body saw V.A.G 1523 A).

Note:

Do not saw through section -C- of the support (reinforcement plate).

Note for model year 1997 vehicles

 
A80-0083

Vehicles at the start of production still have dash panel cross members installed without a break section - proceed as follows for these vehicles:

    • ‒ → Cut to size a section of bodywork panel -B- (shaded in grey in the drawing) over 2.5 mm thick to conform with contour -B- (deburr edges).
    • ‒ Drill 4 holes -C- (according to drawing) in the bodywork panel and in the support and deburr (drill upper holes so that bolts to be installed do not contact bracket for the passenger airbag unit, or use flat-head bolts).
    • ‒ Use a suitable saw to cut through support at the point marked -A-.
    • ‒ After the heater is installed, screw together both sections of the support and bodywork panel -B- (e.g. using 4 M 6 x 10 mm bolts) at holes -C-.
 
A80-0133
  • ‒ Remove tunnel brace.
  • ‒ → Bend aside or break off section -A- of support at break section -B-.
  • ‒ Deburr holes drilled in sections -C- and -D- of the support.
  • ‒ Mask over all resulting sharp edges e.g. with adhesive tape so that is no possibility of injury.
  • ‒ Disconnect all the electrical connections between body and heater at the connectors.
 
A80-0084
  • ‒ → Remove heater towards passenger's side.

Installation notes:

  • ◆ Check all seals on the heater for damage before installation and replace any damaged seals.
 
A80-0085
  • ◆ When installing the heater, ensure that the intake duct gasket makes contact with the vehicle body.
  • ◆ → Replace gasket -A- and check for correct positioning on contact surface -C-.
  • ◆ The refrigerant hoses are to be connected on the correct side. Different connection and flow direction of the refrigerant dependent on the type of heat exchanger . This illustration shows a heat exchanger for a vehicle without map-controlled cooling and without quick release couplings (flow direction marked with arrow -B-).
  • ◆ After assembling, all cable ties that were removed in order to take out the heater must be refitted in their original positions.
 
A80-0134
  • ◆ → After the heater is installed:
    • ‒ Bend back section -A- of the support.
    • ‒ Screw together section -B- (welded to support -A-) and section -C- of the support using two bolts -D- (e.g. M 6 x 10) and two combi nuts -E-.
  • ◆ When inserting bolts -D- into holes, ensure that bolts do no come into contact with the airbag unit bracket.

Removing and installing heating system heat exchanger > < Special tools, testers, measuring instruments and auxiliary items required