
A3 Mk1
| Servicing gearbox housing and clutch housing |

| Special tools and workshop equipment required |
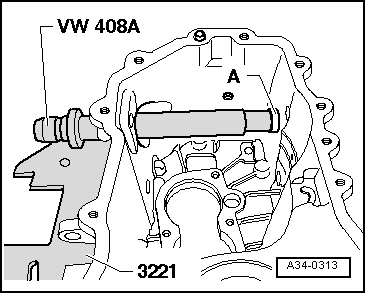
| t | Press tool -VW 408 A- |
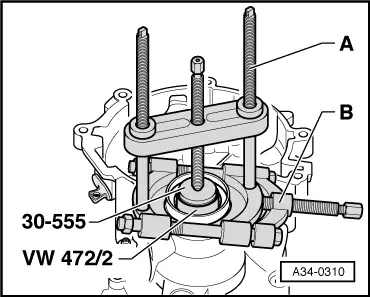
| t | Spacer sleeve -VW 472/2- |
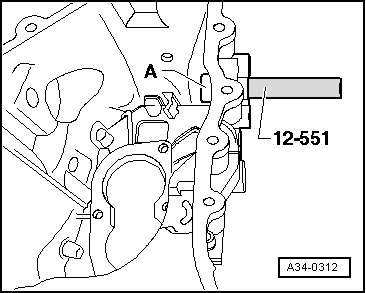
| t | Centring mandrel -12 - 551- |
| t | Press tool -30 - 555- |
| t | Assembly device -3066- |
| t | Thrust piece -3124- |

| t | Gearbox support -3221- (modifying → ) |
| t | Multi-point bit -3357- |
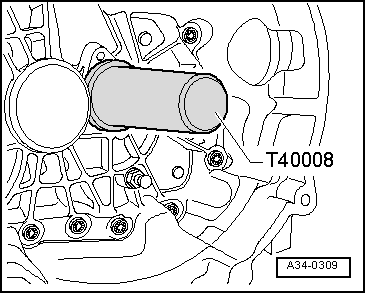
| t | Thrust piece -T40008- |
| t | Torque wrench -V.A.G 1331- |
| t | -2-puller, e.g. -Kukko 18/1- |
| t | -3-Splitter 12...75 mm, e.g. -Kukko 17/1- |
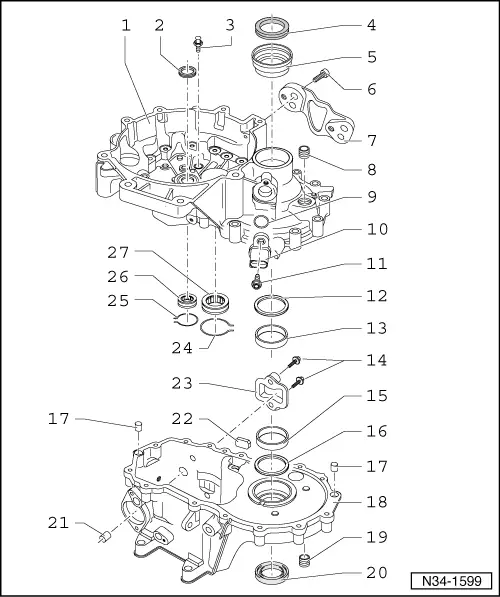
| 1 - | Clutch housing |
| q | If renewed: adjust differential → Chapter |
| 2 - | Input shaft oil seal |
| q | Lever out with screwdriver |
| q | Driving in → Fig. |
| 3 - | Ball head stud |
| q | 20 Nm |
| q | Lubricate with MoS2 grease |
| 4 - | Oil seal |
| q | For flange shaft (right-side) |
| q | Renewing with gearbox installed → Chapter |
| 5 - | Sleeve |
| q | For oil seal |
| q | Pulling out → Fig. |
| q | Drawing in → Fig. |
| 6 - | Bolt |
| q | 40 Nm and turn 45° further |
| q | 4x |
| q | Always renew |
| q | Not fitted on all versions |
| 7 - | Bracket |
| q | For pendulum support |
| q | Installation position → Anchor |
| q | Not fitted on all versions |
| 8 - | Oil filler plug |
| q | 25 Nm |
| 9 - | O-ring |
| q | Always renew |
| 10 - | Speedometer sender -G22- |
| 11 - | Bolt |
| q | 5 Nm and turn 90° further |
| q | Always renew |
| 12 - | Shim S2 |
| q | For differential |
| q | Determining thickness → Chapter |
| 13 - | Tapered roller bearing outer race |
| q | For differential |
| q | Pulling out and pressing in → Chapter |
| q | If renewed: adjust differential → Chapter |
| 14 - | Bolt |
| q | 5 Nm and turn 90° further |
| q | Always renew |
| 15 - | Tapered roller bearing outer race |
| q | For differential |
| q | Pulling out and pressing in → Chapter |
| q | If renewed: adjust differential → Chapter |
| 16 - | Shim S1 |
| q | For differential |
| q | Always 1 mm thick |
| 17 - | Dowel sleeve |
| q | 2x |
| 18 - | Gearbox housing |
| q | Modification from gearbox build date 06 05 2 onwards: enlarged bearing seat for tapered roller bearing/differential → Chapter |
| q | If renewed: adjust differential → Chapter |
| 19 - | Oil drain plug |
| q | 25 Nm |
| 20 - | Oil seal |
| q | For flange shaft (left-side) |
| q | Renewing with gearbox installed → Chapter |
| 21 - | Sleeve |
| q | For selector shaft |
| q | Driving out → Fig. |
| q | Driving in → Fig. |
| 22 - | Magnet |
| q | Held in place by joint surface of housing |
| 23 - | Sealing cap |
| q | Before tightening apply sealant -AMV 188 200- to sealing surface |
| 24 - | Circlip |
| q | Fit in groove of roller bearing → Item |
| 25 - | Circlip |
| q | Fit in groove of roller bearing → Item |
| 26 - | Roller bearing |
| q | For input shaft |
| q | Removing and installing → Chapter |
| 27 - | Roller bearing |
| q | For output shaft |
| q | Removing and installing → Chapter |
|
|
|
|
 Note
Note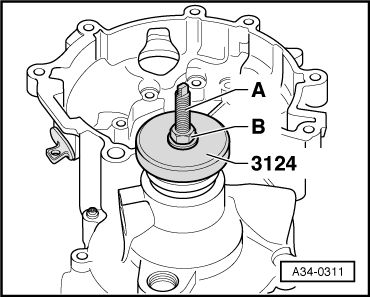
|
|
|
|