audi Workshop Repair Guides

Audi Workshop Service and Repair Manuals

Removing and installing flange shaft (right-side) > < Exploded view - flange shafts
Removing and installing flange shaft (left-side)
Special tools and workshop equipment required
   
t  Puller -3109-
  W00-0280
t  -2- Kukko 18/0 puller
t  Bolts M8x35 (2x)
t  Washers Ø 8 mm (2x)
  W00-0633
Removing
l  Gearbox in vehicle
–  Remove front left wheel.
–  Remove centre noise insulation (loosen fasteners -arrows-).
  N37-0673
–  Remove left noise insulation -arrows-.
–  Unbolt drive shaft (left-side) from flange shaft.
  N37-0674
–  Remove bolts -arrows- for pendulum support at subframe.
  A40-0131
–  Remove bolts -arrows- for swivel joint.
  N40-0259
–  Unscrew coupling rod (left-side) -1- from wishbone and move upwards.
–  Swing wheel bearing housing outwards -arrow-.
–  Guide drive shaft out between subframe and gearbox; at the same time have a 2nd mechanic push the engine/gearbox assembly forwards.
–  Lift drive shaft and secure to suspension strut with wire.
–  Pierce and prise out cap in drive flange using screwdriver.
  N39-0597
–  Attach puller Kukko 18/0 to drive flange with 2 bolts 8x35 and Ø 8 mm washers.
–  Detach flange shaft.
  N39-0175
Installing
–  Attach flange shaft, dished spring and circlip.
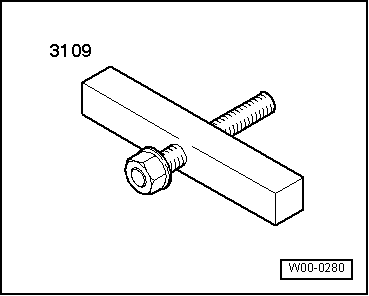
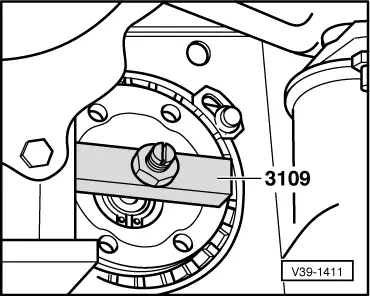
–  Use puller -3109- or drive flange installing tool -VW 391- to draw in flange shaft.
The remaining installation steps are carried out in reverse sequence; note the following:
–  Install drive shaft (left-side) → Rep. Gr.40.
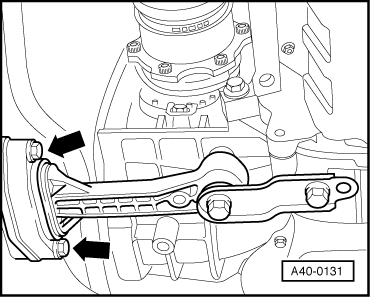
–  Install wishbone and swivel joint with new bolts and new locking plate → Rep. Gr.40.
–  Install noise insulation → Rep. Gr.50.
–  Check gear oil level in final drive → Chapter.
  Caution
Perform wheel alignment after installation.
  V39-1411

Removing and installing flange shaft (right-side) > < Exploded view - flange shafts