
A3 Mk1
|
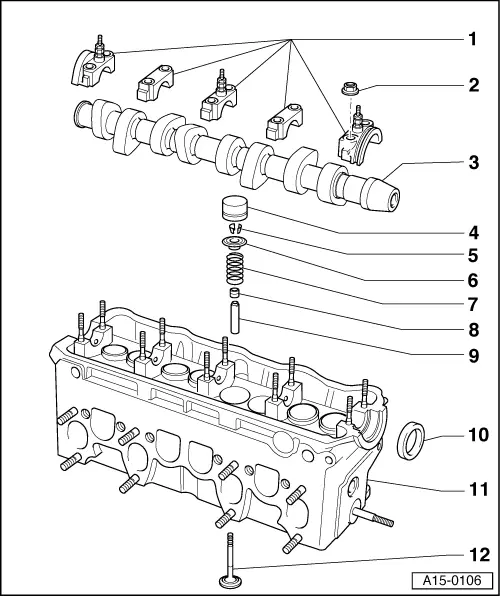
Servicing valve gear
Different valve gear designs
As of engine No. AGR 044 442 or AHF 006 066, respectively as well as for all ALH and ASV engines, a "light valve gear" is used in place of the "old valve gear". Identification characteristics for the "light valve gear":
Notes:
|
 |
|
|
|
|
|
|
|
|
 |
|
|
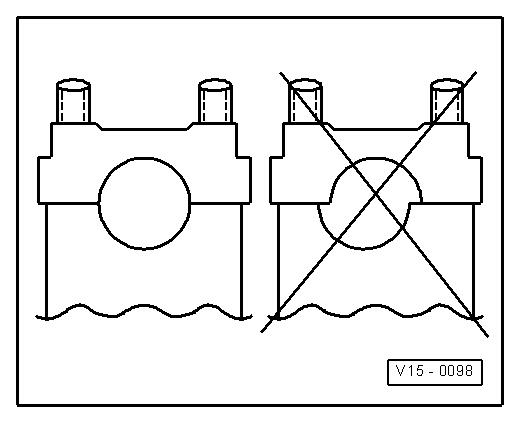
→ Fig. 1 Location of camshaft bearing cap Note offset. Before installing camshaft fit bearing caps and determine installation position. |
 |
|||||||||||||||||||||
|
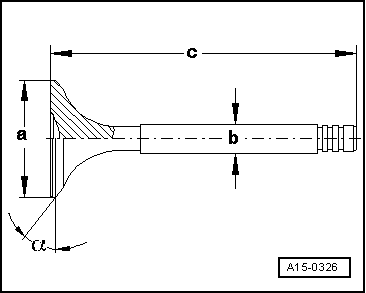
→ Fig.3 Valve dimensions Note: Valves must not be reworked. Only grinding in is permitted.
| |||||||||||||||||||||