audi Workshop Repair Guides

Audi Workshop Service and Repair Manuals

Removing and installing intake manifold > < Removing and installing cylinder head cover
Removing and installing cylinder head
Removing
l  Engine in vehicle.
  Note
All cable ties which are released or cut open when removing must be fitted in the same position when installing.
–  Drain off coolant → Chapter.
   
–  Remove air intake hose -1- between top air pipe and bottom air pipe.
–  Unbolt bracket -2- or retaining clip (depending on version) for top air pipe.
  Note
Disregard -item 3-.
–  Remove intake manifold → Chapter.
  A21-0023
–  Detach air intake hose -1- leading to secondary air pump at air cleaner housing.
–  Release hose clip -2- and detach air duct from air mass meter -G70-.
–  Unplug electrical connector at air mass meter -G70- -item 3-.
–  Unscrew bolts -4- and -5- and remove air cleaner housing.
  A10-0443
–  Detach mechanical air recirculation valve -3-, pressure control valve for crankcase breather -6- and charge pressure control solenoid valve -N75--item 4- from air duct.
–  Pull locking clip out at turbocharger connection and detach air duct -5-.
  Note
Seal off opening in turbocharger intake system with a clean cloth.
–  Detach hoses -1- and -2- from top air pipe.
  A15-0583
–  Disconnect air intake hose -3- leading to turbocharger from top air pipe.
–  Unscrew bolts -2- and -5- on retaining clip for top air pipe.
–  Unscrew bolts -1- and -4- for heat shield at back of cylinder head.
–  Remove top air pipe and heat shield.
  A21-0078
–  Unbolt turbocharger from exhaust manifold -arrows-.
  Note
Seal off opening in turbocharger intake system with a clean cloth.
  A26-0246
Vehicles with variable valve timing:
–  Unplug electrical connector -arrow- at inlet camshaft control valve 1 -N205-.
  A15-0571
All models:
–  First unscrew coolant flange and then flange for combination valve for secondary air system at cylinder head -arrows-.
  Note
The electrical connectors and hoses remain attached.
–  Remove toothed belt from camshaft sprocket → Chapter.
–  Remove cylinder head cover → Chapter.
  A15-0584
–  Slacken cylinder head bolts in the sequence: -1 ... 10-.
–  Remove cylinder head bolts and detach cylinder head.
Installing
  Note
t  Renew the cylinder head bolts.
t  Renew self-locking nuts and bolts when performing assembly work.
t  Renew bolts which are tightened to a specified angle as well as oil seals and gaskets.
t  Carefully remove any sealant residue from the cylinder head and cylinder block. Ensure that no long scores or scratches are made on the surfaces.
t  Carefully remove any remaining emery and abrasive material.
t  No oil or coolant must be allowed to remain in the blind holes for the cylinder head bolts in the cylinder block.
t  Do not remove new cylinder head gasket from packaging until it is ready to be fitted.
t  Handle gasket very carefully. Damage to the silicone coating or the indented area will lead to leaks.
t  Cylinder heads which have cracks between the valve seats or between a valve seat insert and the spark plug thread can be re-installed without reducing service life, provided the cracks are only slight and do not exceed a maximum of 0.3 mm in width, and no more than the first 4 turns of the spark plug threads are cracked.
t  When installing an exchange cylinder head with fitted camshafts, the contact surfaces between the bucket tappets and cams must be oiled after installing the cylinder head.
t  The plastic protectors fitted to protect the open valves must only be removed immediately before fitting the cylinder head.
t  Hose connections and hoses for charge air system must be free of oil and grease before assembly.
t  Secure all hose connections with the correct type of hose clips (same as original equipment) → Parts catalogue.
t  Fit all cable ties in the original positions when installing.
t  When fitting a new cylinder head or cylinder head gasket, drain off all the old coolant and refill with new coolant.
  A15-0134
–  Set camshaft to “TDC for No. 1 cylinder” before fitting cylinder head -arrows-.
  A13-0377
–  Check again whether the crankshaft is positioned at TDC -arrow-.
l  Vehicles with manual gearbox
  A13-0045
l  Vehicles with automatic gearbox
  A13-0043
–  Unscrew bolts -1 ... 3- on turbocharger bracket (about 2 full turns each) to avoid stressing when installing the cylinder head.
  A21-0085
–  Fit cylinder head gasket.
l  Note position of centering pins -arrows- in cylinder block.
l  The Part No. should be legible from inlet side.
–  Fit the cylinder head.
–  Fit cylinder head bolts and tighten hand-tight.
  A15-0135
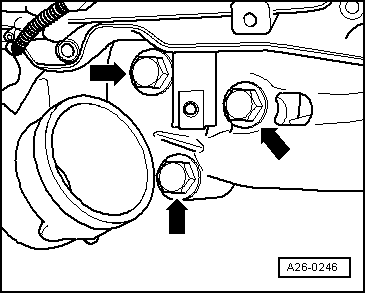
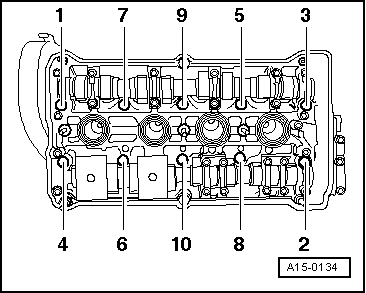
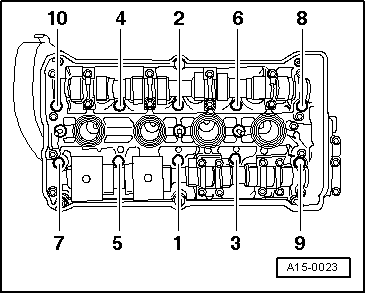
–  Tighten cylinder head bolts as follows in the sequence shown:
1.  Tighten with torque wrench to 40 Nm.
2.  Turn 90° (1/4 turn) further using a rigid wrench.
3.  Turn 90° (1/4 turn) further using a rigid wrench.
  Note
Cylinder head bolts do not have to be torqued down again later after repair work.
Remaining installation steps are carried out in reverse sequence; note the following:
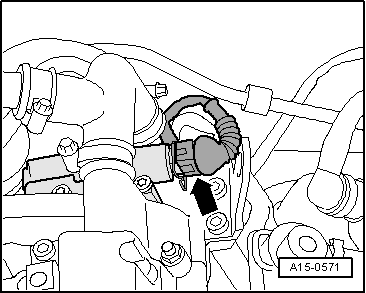
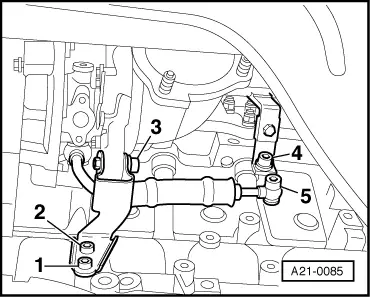
–  Secure turbocharger with new gasket to exhaust manifold and secure bracket to cylinder block.
–  Install cylinder head cover → Chapter.
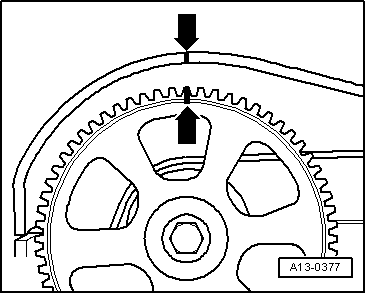
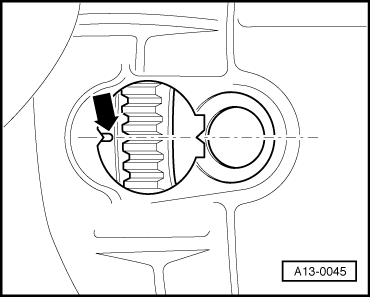
–  Install toothed belt (adjust valve timing) → Anchor.
–  Install intake manifold → Chapter.
–  Check oil level → Chapter.
  Note
If engine oil is contaminated, perform oil change → Booklet806.
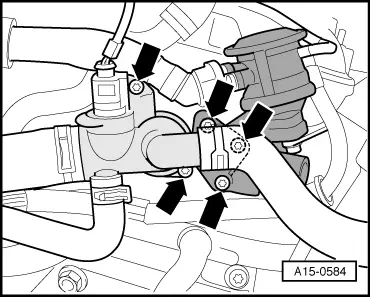
–  Fill cooling system with fresh coolant → Anchor.
  Note
t  When the battery is reconnected, please ensure that the vehicle equipment (e.g. radio, radio/navigation system, clock, electric window lifters) is activated as described in the operating instructions.
t  For further operations after reconnecting power supply, refer to → Rep. Gr.24.
Tightening torques
  A15-0023
ComponentNm
Turbocharger to exhaust manifold35 1)2)
Bracket for turbocharger toTurbocharger45
Cylinder block25
Bracket for air pipe to cylinder block25
Flange for coolant to cylinder head10
Flange for combination valve for secondary air system to cylinder head10
Hose clips for air hoses3.5
l  1) Renew bolts.
l  2) Coat threads and contact surface of bolt heads with high-temperature paste; for high-temperature paste refer to → Parts catalogue.


Removing and installing intake manifold > < Removing and installing cylinder head cover