audi Workshop Repair Guides

Audi Workshop Service and Repair Manuals

1.8l turbo engine - Audi A3 > < Removing and installing alternator
Electrical system
Removing and installing alternator
1.6 l and 1.8 l engine
 
W00-1040

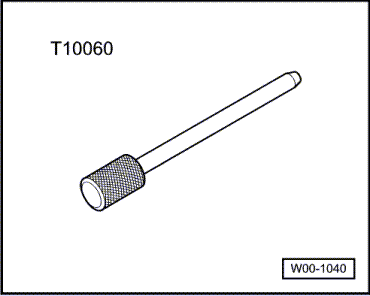
Special tools and workshop equipment required

  • ◆ Mandrel T10060

 
A27-0055

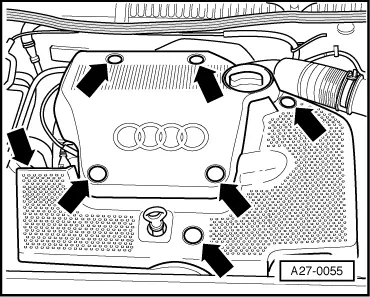
Removing

Vehicles with 1.6 l engine:

  • ‒ Prise plugs out of cover in front of intake manifold.
  • ‒ → Remove engine cover and cover in front of intake manifold -arrows-.

Note:

Fig. shows bolted-on engine cover.

 
A10-1321

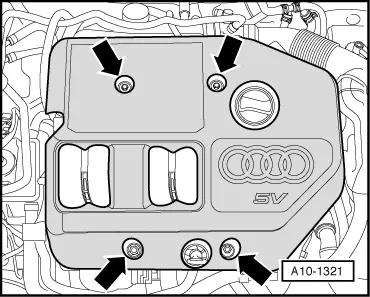
Vehicles with 1.8 l engine:

  • ‒ → Remove engine cover -arrows-.

 
A13-0083

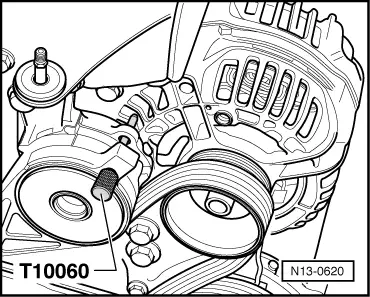
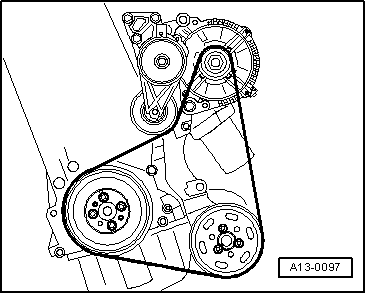
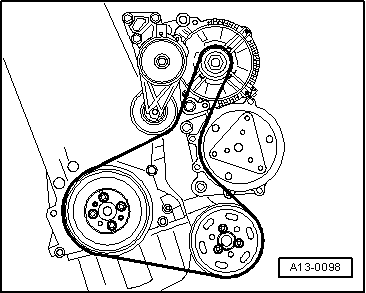
All models:

Note:

Before removing, mark direction of ribbed belt with chalk or felt-tipped pen. Running a used belt in the opposite direction could destroy it.

  • ‒ → Swivel tensioner in direction of arrow to slacken off ribbed belt.
 
N13-0620
  • ‒ → Use mandrel T10060 or offset Allen key to lock ribbed belt tensioner.
  • ‒ Detach ribbed belt.

 
A13-0361
  • ‒ → Unplug connector -2-.
  • ‒ Unscrew wire -1- at alternator.

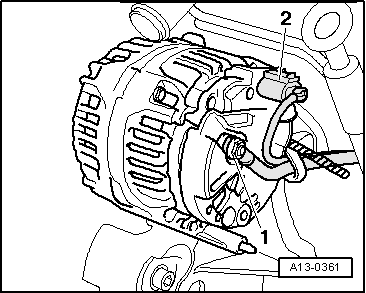
Note:

If fitted, unscrew clamp with alternator detached and lay bare wire.

 
A13-0375
  • ‒ → Screw out bolts -arrows-.
  • ‒ Detach alternator and guide it upwards out of engine compartment.

 
A13-0097

Installing

Install in reverse order, paying attention to the following:

  • ‒ To facilitate positioning of alternator, drive back bushings for retaining bolts slightly.
  • ‒ Make sure ribbed belt is properly positioned and correctly routed.
    • ‒ → Ribbed belt routing on vehicles with no air conditioner
 
A13-0098
    • ‒ → Ribbed belt routing on vehicles with air conditioner
  • Connect battery. Action to be taken .
  • Start engine and check belt running.

Tightening torques

Component

Nm

Alternator to bracket

25

Terminal 30/B+ to alternator

16

1.8l turbo engine - Audi A3 > < Removing and installing alternator