
A3 Mk2
| Exploded view - hydraulics (LHD) |
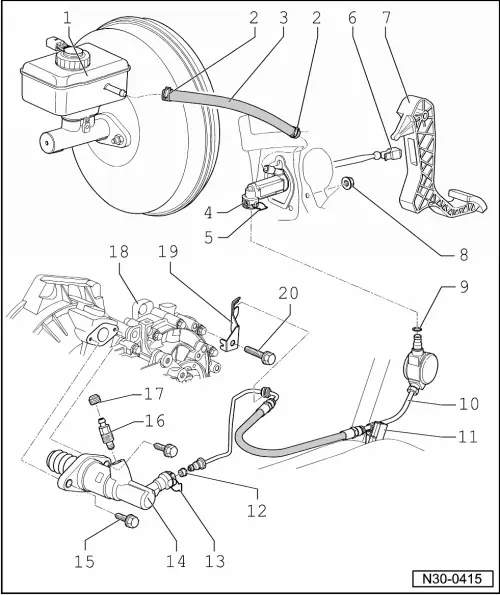
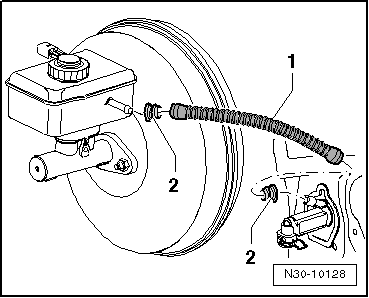
| 1 - | Brake fluid reservoir |
| 2 - | Hose clip (spring-type clip) |
| q | Not fitted in all vehicles |
| 3 - | Supply hose |
| q | Made of rubber or plastic, depending on version |
| q | Plastic supply hose with additional seals → Fig. |
| 4 - | Clutch master cylinder |
| q | Removing and installing → Chapter |
| 5 - | Clip |
| q | To remove and install pipe/hose assembly, pull out clip as far as it will go |
| 6 - | Retaining clip |
| q | For operating rod on clutch master cylinder |
| q | To remove and install retaining clip first detach clutch master cylinder from clutch pedal → Chapter |
| 7 - | Clutch pedal |
| q | Removing and installing → Chapter |
| 8 - | Nut |
| q | For securing mounting bracket to plenum chamber partition panel |
| q | Tightening torque → Item |
| q | Always renew |
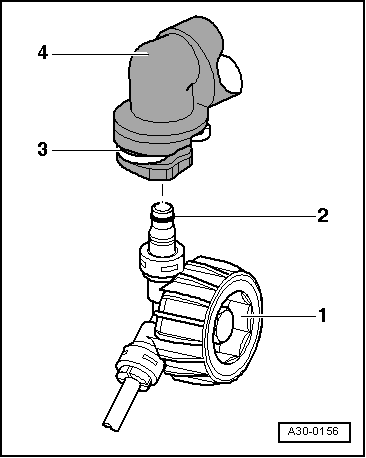
| 9 - | Seal or O-ring |
| q | Whether a seal or an O-ring is used depends on the type of connection → Fig. |
| q | For correct version, refer to → Electronic parts catalogue |
| q | Renew damaged seals or O-rings |
| q | Push onto pipe connection |
| q | Lubricate with brake fluid before installing |
| 10 - | Pipe/hose assembly |
| q | With frequency modulator (vibration damper) on some versions |
| q | For correct version, refer to → Electronic parts catalogue |
| q | Removing and installing → Chapter |
| q | Disconnecting from clutch master cylinder and clutch slave cylinder → Fig. |
| 11 - | Bracket |
| q | For pipe/hose assembly → Item |
| q | Secured on body |
| 12 - | Seal or O-ring |
| q | Whether a seal or an O-ring is used depends on the type of connection → Fig. |
| q | For correct version, refer to → Electronic parts catalogue |
| q | Renew damaged seals or O-rings |
| q | Push onto pipe connection |
| q | Lubricate with brake fluid before installing |
| 13 - | Clip |
| q | To remove and install pipe/hose assembly, pull out clip as far as it will go |
| 14 - | Clutch slave cylinder |
| q | Removing and installing → Chapter |
| 15 - | Bolt |
| q | 20 Nm |
| q | 2x |
| 16 - | Bleeder screw |
| q | 6 Nm |
| q | Bleeding clutch system → Chapter |
| 17 - | Dust cap |
| 18 - | Gearbox |
| 19 - | Bracket |
| q | For pipe/hose assembly |
| 20 - | Bolt |
| q | 20 Nm |
|
|
|

|
| Item | Type of connection |
| 1 | Connection with annular groove -arrow 1- |
| 2 | Connection with shoulder -arrow 2- |
| 3 | Connection with shoulder -arrow 2- and annular groove -arrow 3- |
|
 Note
Note
|
|