audi Workshop Repair Guides

Audi Workshop Service and Repair Manuals

Gearbox mechanics,operation, construction,diff. > < Exploded view - LuK version clutch
Removing and installing clutch (LuK version)
Special tools and workshop equipment required
   
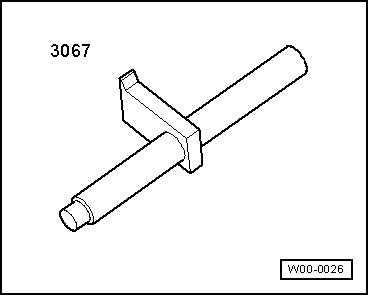
t  Counterhold tool -3067-
  W00-0026
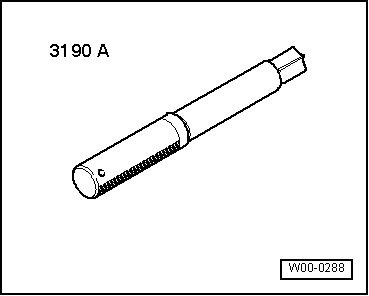
t  Centring mandrel -3190 A-
t  Grease for clutch plate splines -G 000 100-
  W00-0288
Removing
–  Remove gearbox → Chapter „Removing and installing gearbox on vehicles with 1.8 ltr. TFSI engine“ or → Chapter „Removing and installing gearbox on vehicles with 2.0 ltr. FSI engine“.
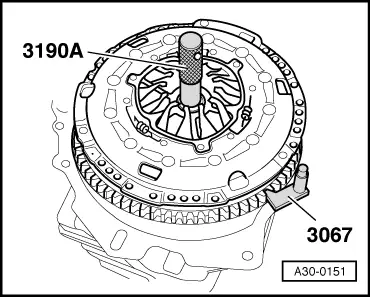
–  Attach counterhold tool -3067- before loosening bolts.
To prevent the pressure plate from becoming distorted during removal (causes clutch grab when driving off), always adhere to the following procedure when unbolting the pressure plate:
–  Working clockwise, loosen all six bolts consecutively in steps of 90° (1/4 turn) until the pressure plate is released.
–  Take off pressure plate and clutch plate.
Installing
Installation is carried out in reverse sequence; note the following:
  Note
t  The dual-mass flywheel, pressure plate and clutch plate are matched together; components from another manufacturer must not be installed on the same vehicle.
t  Always renew clutch plate and pressure plate together and select the correct parts according to engine code → Electronic parts catalogue.
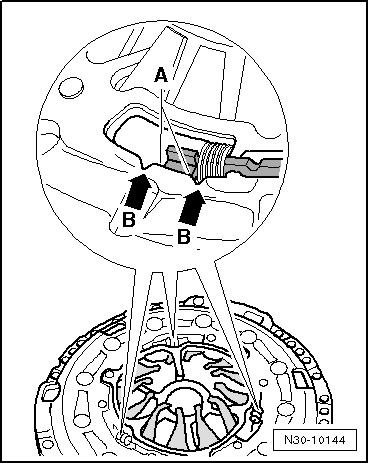
t  Checking position of adjuster ring on new pressure plate → Fig.
t  If the clutch has burnt out, thoroughly clean the clutch housing, flywheel and parts of the engine facing the gearbox in order to reduce the smell of burnt linings.
t  Clean input shaft splines and (in the case of used clutch plates) the hub splines. Remove corrosion and apply only a very thin coating of grease for clutch plate splines -G 000 100- to the splines. Then move clutch plate backwards and forwards on input shaft until hub moves freely on shaft. It is important to remove excess grease.
t  Pressure plates have an anti-corrosion coating and are greased. Only the contact surface may be cleaned, otherwise the service life of the clutch will be considerably reduced.
t  Pressure plate contact surface and clutch plate lining must make full contact with flywheel. Only then insert bolts.
t  Check that dowel sleeves for centralising engine/gearbox are in the cylinder block; install if necessary.
t  If the dowel sleeves are not fitted, this will lead to gear-change problems, clutch malfunction and in some cases gearbox noise (gears will make rattling noises).
  A30-0151
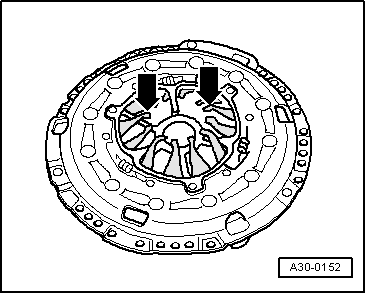
Checking ends of diaphragm spring
l  Wear up to half the thickness of the diaphragm spring -arrows- is permissible.
  A30-0152
Checking spring connections and rivets
–  Check spring connections -arrows A- for damage and make sure riveted joints -arrows B- are seated tightly.
l  Renew pressure plate if spring connections are broken or badly bent, or if riveted joints are loose.
  A30-0153
Checking position of adjustment mechanism (new SAC pressure plates only)
l  The two edges -A- of the adjuster ring should be located between the two notches -arrows B-.
l  If the adjuster ring is in a different position on a new pressure plate, the pressure plate and clutch plate must not be installed.
l  The position of the adjuster ring can be outside the notches on used clutches.
  N30-10144
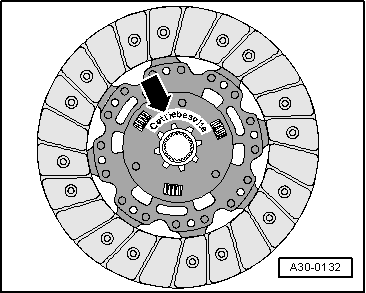
Installation position of clutch plate:
l  The marking „Getriebeseite“ (gearbox side) faces towards the gearbox
  A30-0132
–  Use counterhold tool -3067-.
–  Position pressure plate on centring pins.
–  Use centring mandrel -3190 A- to centre clutch plate.
To prevent the pressure plate from becoming distorted during installation (causes clutch grab when driving off), always adhere to the following procedure when installing the pressure plate:
–  Screw in all 6 bolts evenly by hand until bolt heads make contact with pressure plate.
–  Working clockwise, tighten all six bolts consecutively in steps of 90° (1/4 turn) until the housing makes contact with the flywheel.
–  Working clockwise, tighten all 6 bolts to final torque consecutively. Tightening torque → Item
–  Install gearbox → Chapter or → Chapter.
  A30-0151

Gearbox mechanics,operation, construction,diff. > < Exploded view - LuK version clutch