audi Workshop Repair Guides

Audi Workshop Service and Repair Manuals

Removing and installing radiator cowl > < Removing and installing radiator
Removing and installing water radiator for charge air cooler
Special tools and workshop equipment required
   
t  Drip tray for workshop hoist -VAS 6208-
  W00-10228
Removing
–  Remove radiator → Chapter.
–  Remove bumper cover (front) → Rep. Gr.63.
–  Place drip tray for workshop hoist -VAS 6208- beneath engine.
–  Disconnect coolant hose -arrow- (bottom right) from water radiator for charge air cooler (pull out retaining clip).
  A19-10608
–  Disconnect coolant hose -arrow- (top right) from water radiator for charge air cooler (pull out retaining clip).
  A19-10610
–  Release air ducts (left and right) and push to one side in order to remove bolts -arrows-.
–  Swivel top edge of water radiator for charge air cooler slightly to rear.
–  Lift water radiator for charge air cooler out of bottom mounting points.
–  Push water radiator for charge air cooler towards engine.
–  Support water radiator for charge air cooler from below to prevent it from dropping.
  A19-10368
  WARNING
Risk of injury caused by refrigerant.
The air conditioner refrigerant circuit must not be opened.
  Caution
Make sure that condenser and refrigerant pipes and hoses are not damaged.
Do NOT stretch, kink or bend refrigerant lines and hoses.
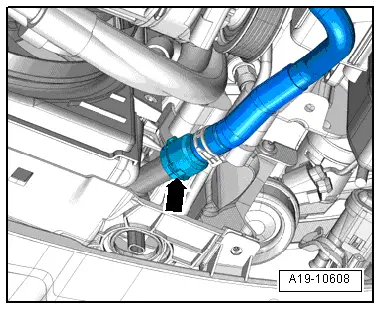
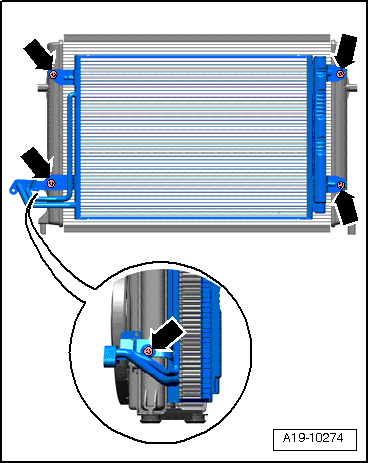
–  Remove bolts -arrows-.
–  Disconnect condenser from radiator.
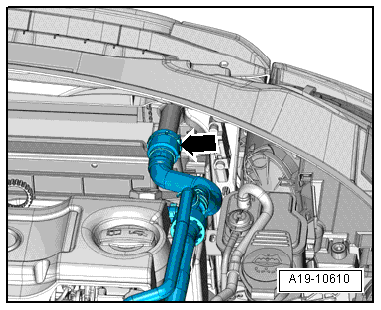
–  Move condenser to front and place in lock carrier, then secure with cable ties to prevent from dropping.
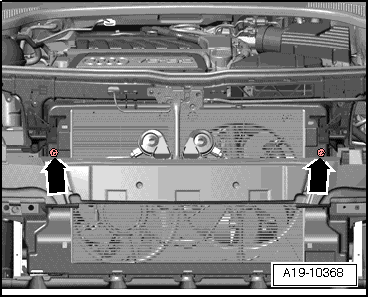
–  Take out water radiator for charge air cooler downwards
Installing
l  Tightening torques → Chapter
Installation is carried out in the reverse order; note the following:
–  Install condenser → Rep. Gr.87.
–  Install radiator → Chapter.
–  Install bumper cover (front) → Rep. Gr.63.
–  Fill up with coolant → Anchor.
  A19-10274

Removing and installing radiator cowl > < Removing and installing radiator