
A3 Mk2
 Note
Note
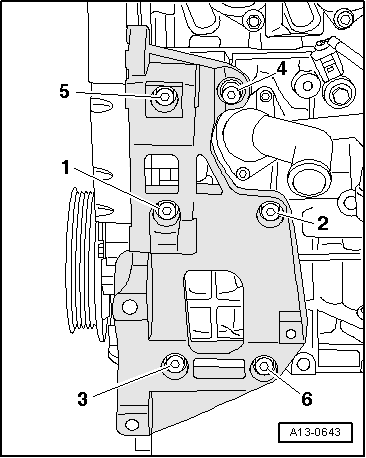
| 1 - | Pulley |
| q | For poly V-belt |
| q | Removing and installing → Chapter |
| 2 - | Bolt (special type) → Parts catalogue |
| q | Renew |
| q | 10 Nm + 90° |
| 3 - | 23 Nm |
| 4 - | Engine lifting eye |
| 5 - | Tensioner for poly V-belt |
| q | Pivot with open-end spanner to slacken poly V-belt |
| q | Secure tensioner in position using locking pin -T10060 A- |
| 6 - | Bracket for ancillaries |
| q | Removing and installing → Chapter |
| 7 - | 23 Nm |
| 8 - | 23 Nm |
| 9 - | Alternator |
| q | Removing and installing: → Electrical system; Repair group 27 |
| q | To facilitate attachment of alternator, knock back threaded bushes for alternator securing bolts slightly |
| 10 - | Bolt |
| q | Apply locking fluid when fitting |
| q | Locking fluid → Parts catalogue |
| q | Tightening sequence → Fig. |
| 11 - | Bush |
| q | 2x |
| 12 - | 25 Nm |
| 13 - | Air conditioner compressor |
| q | Removing and installing: → Air conditioning; Repair group 87 |
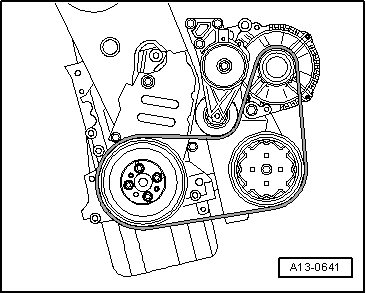
| 14 - | Poly V-belt |
| q | Routing of poly V-belt → Fig. |
| q | Check for wear |
| q | Do not kink |
| q | Removing and installing → Chapter |
|
|
|
|