audi Workshop Repair Guides

Audi Workshop Service and Repair Manuals

Crankshaft > < Removing and installing dual-mass flywheel
Removing and installing sealing flange (rear)
Special tools and workshop equipment required
t  Electric drill with plastic brush attachment
t  Safety goggles
t  Sealant → Parts catalogue
Removing
l  Gearbox removed
–  Remove dual-mass flywheel → Chapter.
   
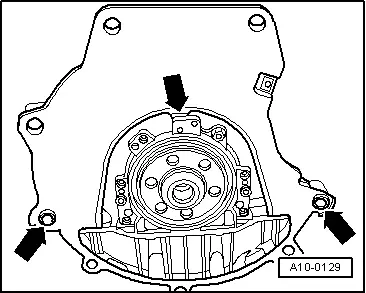
–  Detach intermediate plate at sealing flange and dowel sleeves -arrows-.
  A10-0129
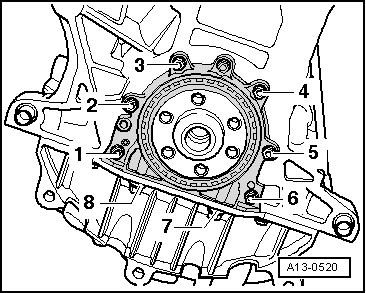
–  Remove bolts -1 ... 8-.
–  Pull off sealing flange (rear).
Installing
l  Tightening torques → Chapter
  Note
Place a cloth over the exposed section of the sump.
–  Carefully remove any sealant residue on the cylinder block and sump.
–  Clean sealing surfaces; they must be free of oil and grease.
  A13-0520
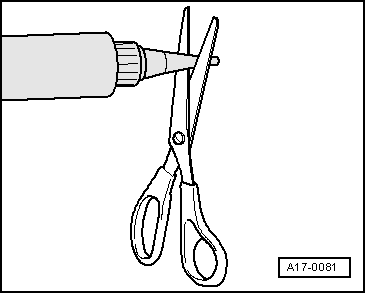
–  Cut off tube nozzle at front marking (diameter of nozzle approx. 2 mm).
  A17-0081
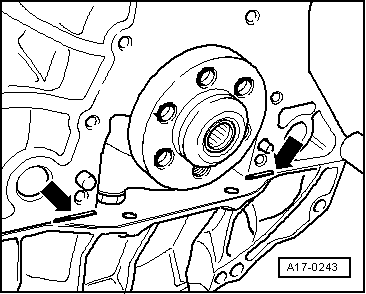
–  Apply a thin bead of sealant at the edge of the joint between the cylinder block and the sump -arrows-.
  A17-0243
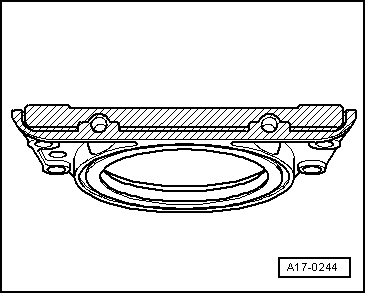
–  Coat the lower sealing surface on the sealing flange lightly with sealant -hatched area-.
  Caution
Make sure oil strainer is not clogged by excess sealant.
The bead of sealant must not be thicker than specified.
  Note
The sealing flange must be installed within 5 minutes after applying sealant.
  A17-0244
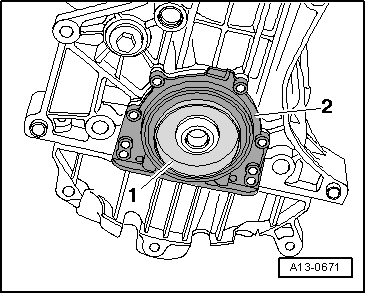
–  Carefully push sealing flange -2- together with guide sleeve -1- (fitted on replacement part) onto crankshaft when installing.
–  Push the sealing flange carefully onto the dowel sleeves on the cylinder block.
  A13-0671
–  Tighten bolts in the specified sequence:
1.  Screw in bolts -1 ... 8- hand-tight.
2.  Tighten bolts -1 ... 6- in diagonal sequence and in stages.
3.  Tighten bolts -7 ... 8-.
  A13-0520
Remaining installation steps are carried out in reverse sequence; note the following:
–  Fit intermediate plate on sealing flange and push onto dowel sleeves -arrows-.
–  Install dual-mass flywheel → Chapter.
  A10-0129

Crankshaft > < Removing and installing dual-mass flywheel