audi Workshop Repair Guides

Audi Workshop Service and Repair Manuals

Renewing valve stem oil seals with cylinder head installed > < Renewing camshaft oil seal
Removing and installing camshaft
Special tools and workshop equipment required
   
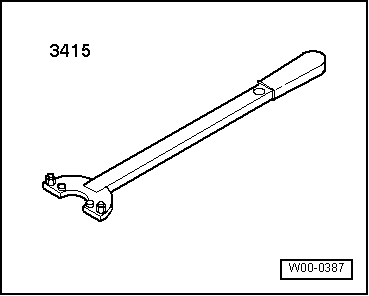
t  Counterhold tool -3415-
t  Electric drill with plastic brush attachment
t  Safety goggles
t  Sealant → Electronic parts catalogue
Removing
l  Cylinder head installed.
  Note
t  Sealing surfaces at retaining frame and cylinder head may be cleaned but not machined.
t  Camshaft bearings are integrated into cylinder head/retaining frame. Toothed belt must be detached before removing retaining frame.
t  Renew camshaft oil seal and sealing cap at rear if retaining frame has been unfastened.
–  Remove intake manifold → Rep. gr.24.
–  Remove toothed belt from camshaft sprocket → Chapter.
  W00-0387
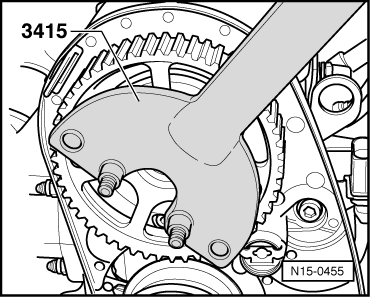
–  Loosen camshaft sprocket using counterhold -3415-.
–  Detach camshaft sprocket.
–  Remove parallel key from camshaft.
–  Remove cylinder head cover → Chapter.
  N15-0455
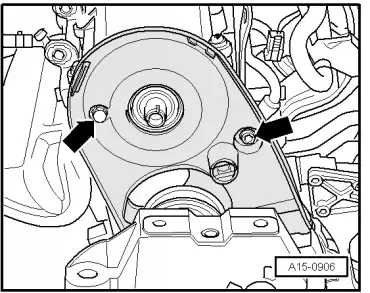
–  Unbolt toothed belt cover (rear) from cylinder head -arrows-.
  A15-0906
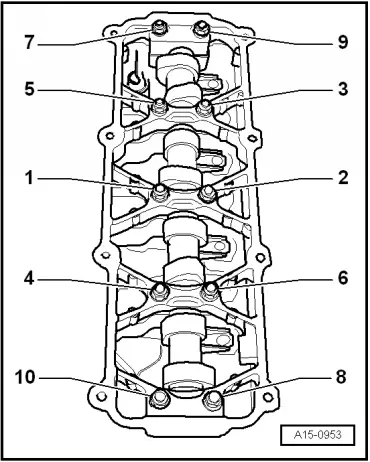
–  Unscrew nuts -1, 2, 7, 8, 9, 10-.
–  Unscrew nuts -3, 4, 5, 6- in several stages and in diagonal sequence.
–  Remove retaining frame.
–  Remove camshaft.
–  Ensure that the rocker fingers and the supporting elements are not interchanged.
Installing
  Note
Renew gaskets and seals.
l  Pistons must not be at TDC.
l  Make sure dirt and remnants of sealant do not drop into cylinder head.
  A15-0953
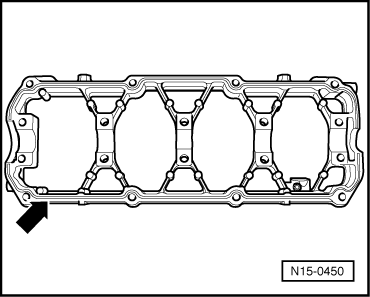
–  Remove old sealant from groove in retaining frame -arrow- and from sealing surfaces.
–  Remove sealant residues from cylinder head, e.g. with rotating plastic brush or similar.
  WARNING
Wear safety goggles.
–  Clean sealing surfaces; they must be free of oil and grease.
  Note
  N15-0450
Note the use-by date of the sealant.
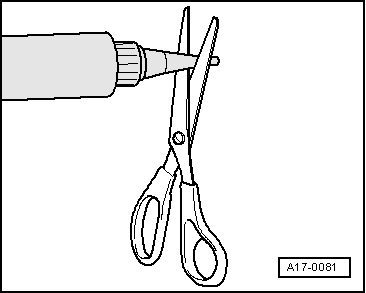
–  Cut off tube nozzle at front marking (diameter of nozzle approx. 1 mm).
  A17-0081
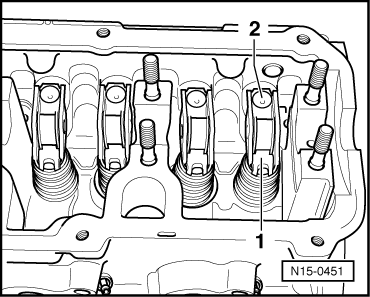
–  Ensure all roller rocker fingers contact the valve ends -1- correctly and are clipped into their respective support elements -2-.
  N15-0451
–  Lubricate running surfaces of the camshaft.
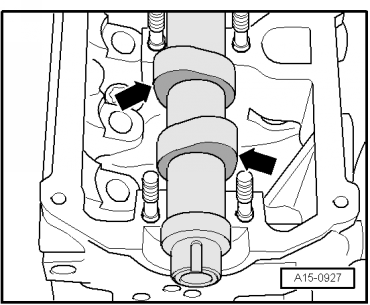
–  Install camshaft in TDC position for cylinder 1:
l  The cams for cylinder 1 must point upwards evenly on camshaft -arrows-.
  A15-0927
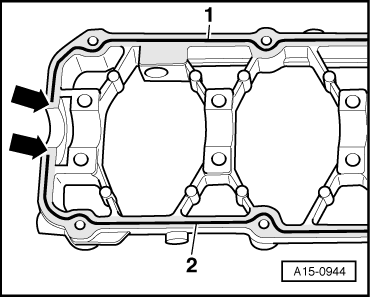
–  Apply an even bead of sealant -1- and -2- onto the clean groove of the retaining frame (slightly projecting from the groove).
–  Apply a thin coat of sealant onto the sealing surface in front of the ends of the beads of sealant -arrows-.
  Note
t  Do not apply the sealant thicker than prescribed. If necessary remove excess sealant with a lint-free cloth.
t  No time should be allowed to elapse when fitting and securing retaining frame, as sealant starts to harden immediately.
–  Insert rear sealing cap → Item so that it is flush.
  A15-0944
–  Fit retaining frame and lightly tighten nuts -3, 4, 5, 6- diagonally in several stages.
–  Then tighten nuts -1, 2, 7, 8, 9, 10- lightly.
–  Finally tighten nuts to specified torque in the sequence -1 ... 10-.
–  Install cylinder head cover → Chapter.
–  Renew camshaft oil seal → Chapter.
–  Install toothed belt (adjust valve timing) → Anchor.
  Note
t  After fitting retaining frame and cylinder head cover, allow sealant to dry for approx. 30 minutes.
t  After installing the camshaft, the engine must NOT be started for about 30 minutes. Hydraulic valve compensation elements have to settle (otherwise valves will strike pistons).
t  After working on the valve gear, turn the engine carefully at least 2 rotations to ensure that none of the valves make contact when the starter is operated.
Tightening torque
  A15-0953
ComponentNm
Retaining frame to cylinder head23


Renewing valve stem oil seals with cylinder head installed > < Renewing camshaft oil seal