
A3 Mk2
| Assembly mountings - exploded view |

| 1 - | Centre hex stud |
| q | Engine support to engine |
| q | Renew |
| q | Tightening torque and sequence → Fig. |
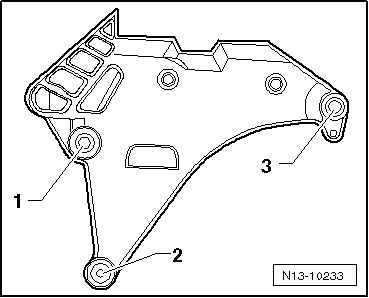
| 2 - | Engine support |
| 3 - | Bolt |
| q | Engine support to engine |
| q | Renew |
| q | Tightening torque and sequence → Fig. |
| 4 - | Centre hex stud |
| q | Engine mounting to body |
| q | Renew |
| q | 40 Nm + turn 90° further |
| 5 - | Connecting bracket |
| 6 - | Bolt |
| q | Connecting bracket to body |
| q | Renew |
| q | 20 Nm + turn 90° further |
| 7 - | Bolt |
| q | Connecting bracket to engine mounting |
| q | Renew |
| q | 20 Nm + turn 90° further |
| 8 - | Bolts |
| q | Engine mounting to engine support |
| q | Renew |
| q | 60 Nm + turn 90° further |
| 9 - | Engine mounting |
| q | With support arm |
| q | Removing and installing → Chapter |
| 10 - | Pendulum support |
| 11 - | Bolt |
| q | Pendulum support to subframe |
| q | Tightening torque → Rep. gr.34 |
| 12 - | Bolt |
| q | Pendulum support to gearbox |
| q | Tightening torque → Rep. gr.34 |
| 13 - | Bolt |
| q | Pendulum support to gearbox |
| q | Tightening torque → Rep. gr.34 |
| 14 - | Bolt |
| q | Gearbox mounting to gearbox support |
| q | Tightening torque → Rep. gr.34 |
| 15 - | Bolt |
| q | Gearbox mounting to body |
| q | Tightening torque → Rep. gr.34 |
| 16 - | Gearbox mounting |
| q | With support arm |
| 17 - | Gearbox support |
| 18 - | Bolt |
| q | Gearbox support to gearbox |
| q | Tightening torque → Rep. gr.34 |
| 19 - | Bolt |
| q | Support to gearbox |
| q | Tightening torque → Rep. gr.34 |
| 20 - | Support |
| 21 - | Bolt |
| q | Support to gearbox mounting |
| q | Tightening torque → Rep. gr.34 |
 Note
Note
|
|
| Stage | Bolts | Tightening torque/angle specification |
| 1. | -1 … 3- | 7 Nm |
| 2. | -1 … 3- | 40 Nm |
| 3. | -1 … 3- | turn 180° further |