audi Workshop Repair Guides

Audi Workshop Service and Repair Manuals

Adjusting assembly mountings > < Assembly mountings - exploded view
Checking adjustment of assembly mountings (engine/gearbox mountings)
   
Procedure
–  Remove engine cover panel -arrows-.
  A10-11002
–  Remove bolt -1-.
–  Push filler pipe with filler neck -2- for washer fluid reservoir to side.
  Note
t  Disregard -item 3-.
t  For illustration purposes, the installation position is shown with the fuel filter removed.
  A92-10118
–  Disengage fuel hose -2- at bracket.
–  Pull off bracket for fuel lines upwards -arrow- and move clear to one side.
–  Unplug electrical connector -1- at supplementary fuel pump -V393-.
–  Remove bolts -3-, detach bracket with supplementary fuel pump -V393- and move clear to one side.
  A23-10241
–  Loosen bolt -1-.
–  Remove bolt -2- and nut -3-.
–  Detach hose retainer -4- from fuel filter, move fuel filter -7- clear to one side with fuel hoses -5- and -6- connected.
  A20-10395
The following specifications must be obtained:
l  
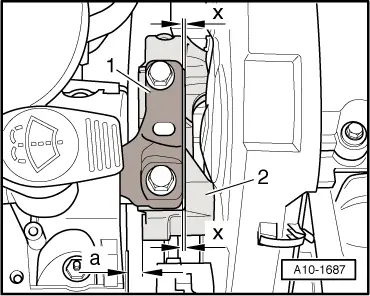
There must be a distance of -a- = 13.5 mm between engine support -2- and longitudinal member (right-side).
l  The side of the engine support casting -2- must be aligned parallel to the support arm -1- (distance -x- = distance -x-).
  Note
Distance -a- = 13.5 mm can also be checked with a metal rod of suitable size, or similar.
–  If the distance measured is too large or small, the assembly mountings must be adjusted → Chapter.
Assembling
Installation is carried out in the reverse order; note the following:
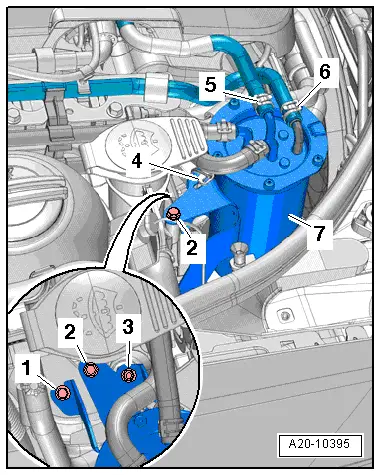
–  Install supplementary fuel pump -V393- and fuel filter → Rep. gr.20.
–  Install filler pipe with filler neck for washer fluid reservoir → Electrical system; Rep. gr.92.
  A10-1687

Adjusting assembly mountings > < Assembly mountings - exploded view