audi Workshop Repair Guides

Audi Workshop Service and Repair Manuals

Oil pump - exploded view > < Oil pump and sump - exploded view
Removing and installing sump
Special tools and workshop equipment required
   
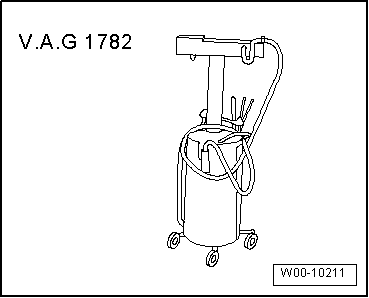
t  Used oil collection and extraction unit -V.A.G 1782-
t  Electric drill with plastic brush attachment
t  Safety goggles
t  Sealant → Electronic parts catalogue
  W00-10211
Removing
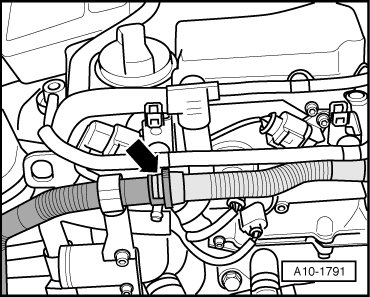
–  Disconnect secondary air hose at the position marked with an -arrow-.
  A10-1791
–  Remove centre noise insulation -fasteners 1 ... 3-.
  A10-1565
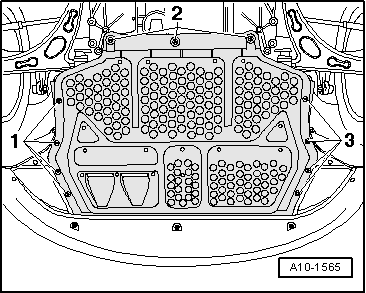
–  Remove noise insulation (right-side) -fasteners 1 ... 3-.
–  Drain off engine oil.
  A10-1643
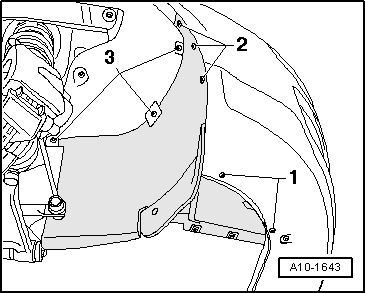
–  Move coolant hose at bottom of radiator cowl clear.
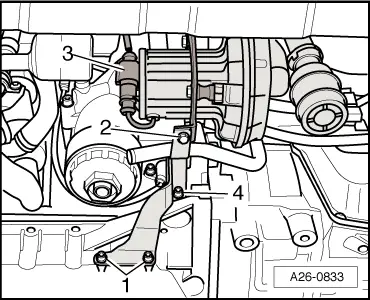
–  Detach electrical connector -3- at secondary air pump motor -V101- and move wire clear.
–  Unscrew bracket -2- for coolant pipe going to gearbox oil cooler on vehicles with direct shift gearbox.
–  Remove bolts -1-.
–  Loosen bolt -4- and remove secondary air pump with bracket.
  A26-0833
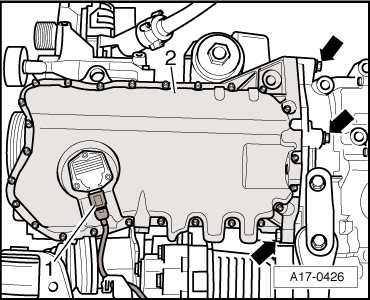
–  Unplug electrical connector -1- at oil level and oil temperature sender -G266-.
–  Unscrew sump/gearbox bolts -arrows-.
–  Unscrew bolts for sump -2- in diagonal sequence and remove.
–  Take off sump; if necessary loosen it by striking lightly with a rubber hammer.
Installing
l  Tightening torques → Chapter, → Fig..
Installation is carried out in the reverse order; note the following:
  A17-0426
–  Carefully remove sealant residue from cylinder block.
  WARNING
Protect eyes against injuries.
Wear safety goggles.
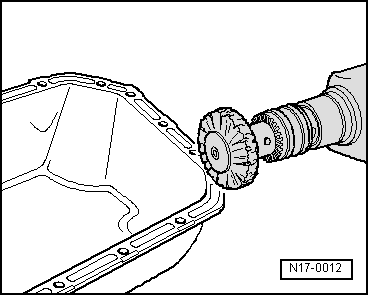
–  Remove sealant residue from sump, e.g. with rotating plastic brush or similar.
–  Clean sealing surfaces; they must be free of oil and grease.
  N17-0012
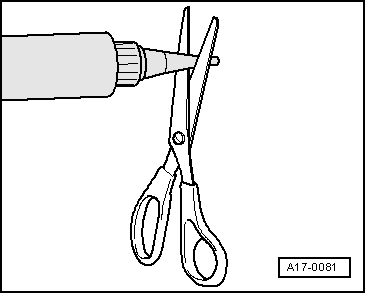
–  Cut off tube nozzle at front marking (nozzle approx. 2 mm Ø).
  A17-0081
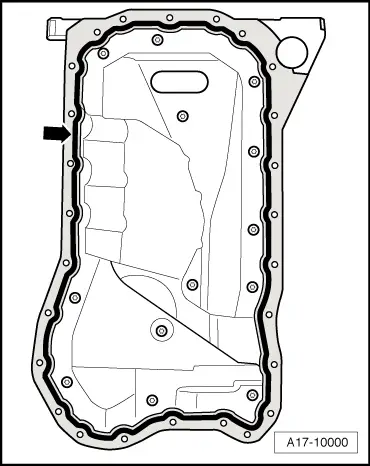
–  Apply the sealant onto the clean sealing surface of the sump as illustrated -arrow-.
l  Width of sealant bead: 2 mm.
  Caution
Make sure oil strainer is not clogged by excess sealant.
The bead of sealant must not be thicker than specified.
  Note
t  Take extra care when applying sealant bead in the area around the lower cover for timing chains.
t  The sump must be installed within 5 minutes after applying sealant.
  A17-10000
–  Tighten bolts securing sump -2- → Fig..
1 - 
–  Plug in electrical connector -1- for oil level and oil temperature sender -G266-.
  Caution
Take care to avoid leakage at sump.
After fitting sump assembly, the sealant must dry for approx. 30 minutes. Then (and only then) fill the engine with engine oil.
–  Fill up with engine oil and check oil level → Chapter.
  A17-0426

Oil pump - exploded view > < Oil pump and sump - exploded view