| –
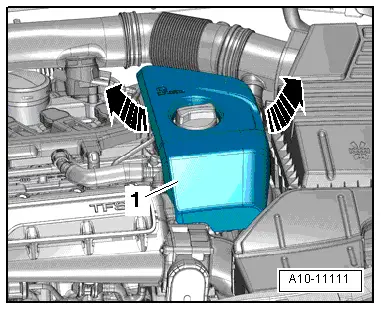
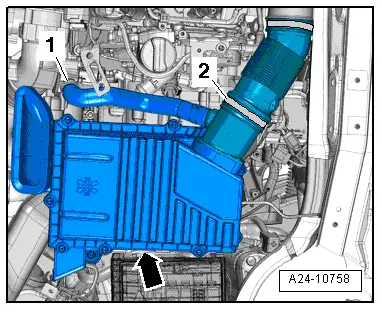
| Remove all bolts from air cleaner (top section) -arrow- and swivel air cleaner (top section) away upwards with hoses -1- and -2- connected. |
| –
| Take out air filter element. |
| Installation is carried out in the reverse order; note the following: |

Note | t
| Always use genuine part for air filter element. |
| t
| The inside of the air cleaner housing must be clean. |
| t
| To prevent malfunctions, cover the air pipes etc. with clean cloths when blowing out the air cleaner housing with compressed air. |
| t
| Hose connections and air pipes and hoses must be free of oil and grease before assembly. |
| t
| Do not use any lubricants containing silicone when assembling. |
| t
| To ensure that the air hoses can be properly secured at their connections, spray rust remover onto the worm thread of used hose clips before installing. |
| –
| Blow out water drain (small hole in bottom section of air cleaner housing) with compressed air. |
| –
| Clean salt residue, dirt and leaves out of air cleaner housing (top and bottom sections), using a vacuum cleaner if necessary. |
| –
| Check for salt residue, dirt and leaves in air hoses (engine intake side). |
| –
| Check for dirt and leaves in air duct going from lock carrier to air cleaner housing. |
| –
| When fitting air filter element, check that it is properly centred in the retainer in the air cleaner (bottom section). |
| –
| Carefully fit top section of air cleaner onto bottom section, without using any force. When doing so, make sure that the air cleaner (top section) is fitted straight on the air filter element (note the position of the sealing lip on the air filter element). |
|
|
|