Audi Workshop Service and Repair Manuals
HOME
FEATURES
MENU
INDEX
ABOUT US
Removing and installing injectors >
< Intake manifold (bottom section), fuel rail and injectors - exploded view
A3 Mk2
Power unit
Direct petrol injection and ignition system (5-cyl. 2.5 ltr. 4-valve turbo) / Mixture preparation system, electronic inj.,Gas
Intake manifold, fuel rail and injectors
Removing and installing intake manifold (bottom section) with fuel rail
Removing and installing intake manifold (bottom section) with fuel rail
Removing and installing intake manifold (bottom section) with fuel rail
Removing
–
Remove intake manifold (top section)
→ Chapter
.
–
Remove high-pressure pipe
→ Chapter
.
–
Remove noise insulation
-1-
→ Rep. gr.66
.
Note
Fit all cable ties in the original positions when installing.
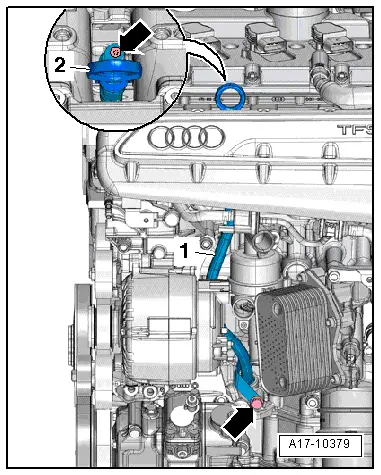
–
Pull out oil dipstick
-2-
.
–
Remove bolts
-arrows-
and lift off guide tube
-1-
for oil dipstick.
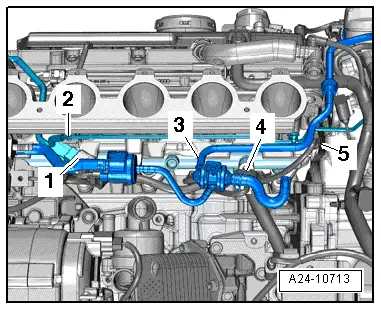
–
Unplug electrical connectors:
1 -
Intake manifold flap valve -N316-
4 -
Fuel pressure sender -G247-
5 -
Intake manifold flap potentiometer -G336-
–
Disconnect vacuum hose
-2-
and hose
-3-
from activated charcoal filter and move clear.
–
Move electrical wiring clear.
–
Loosen bolts in the sequence
-11 ... 1-
.
–
Remove bolts and detach intake manifold (bottom section).
Caution
Risk of irreparable damage to engine.
Block off the openings of the intake ports in the cylinder head with a clean cloth to prevent small items from dropping into the engine.
Note
Injectors must be removed before gasket for intake manifold (bottom section) can be detached.
–
Remove injectors
→ Chapter
.
Installing
Installation is carried out in the reverse order; note the following:
l
Tightening torque
→ Fig. „„Intake manifold (bottom section) - tightening torque and tightening sequence““
Note
t
Renew gaskets and O-rings.
t
Injectors must be installed after gasket for intake manifold (bottom section) has been attached.
–
Install injectors
→ Chapter
.
–
Secure dipstick guide tube
→ Rep. gr.17
.
–
Install high-pressure pipe
→ Chapter
.
–
Install intake manifold (top section)
→ Chapter
.
–
Install noise insulation
→ Rep. gr.66
.
Power unit
Direct petrol injection and ignition system (5-cyl. 2.5 ltr. 4-valve turbo) / Mixture preparation system, electronic inj.,Gas
Intake manifold, fuel rail and injectors
Removing and installing intake manifold (bottom section) with fuel rail
Removing and installing injectors >
< Intake manifold (bottom section), fuel rail and injectors - exploded view
 Note
Note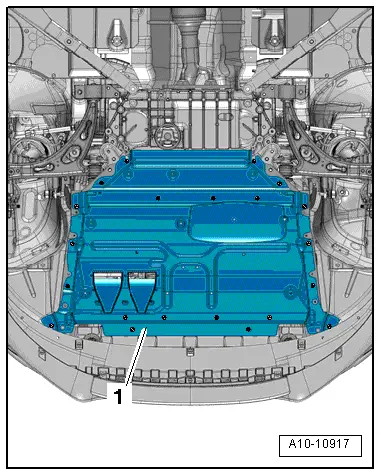
 Note
Note
Note
Note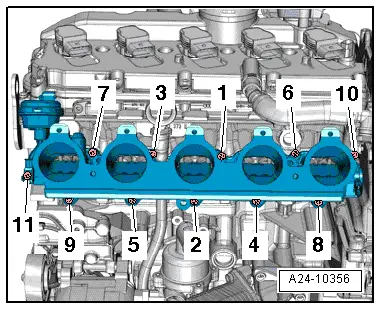
 Note
Note
Note
Note
Note
Note
 Caution