audi Workshop Repair Guides

Audi Workshop Service and Repair Manuals

Removing and installing fuel gauge sender 2G169 > < Removing and installing fuel gauge senderG - vehicles from approx. 10.2004 onwards
Checking fuel gauge sender 2G169
Checking fuel gauge sender 2 -G169-
Special tools and workshop equipment required
   
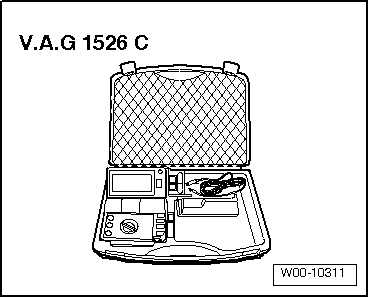
t  Hand-held multimeter -V.A.G 1526C-
  W00-10311
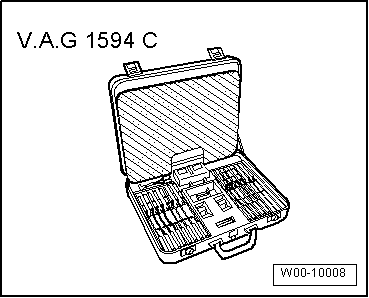
t  Auxiliary measuring set -V.A.G 1594C-
  W00-10008
Procedure
–  Remove rear seat bench → Rep. gr.72.
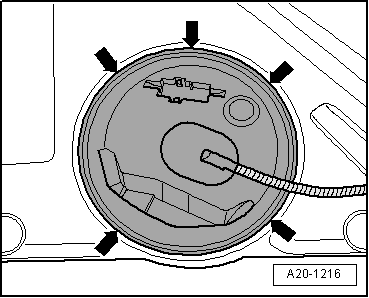
–  Unclip the retaining tabs -arrows- for the flange cover (left-side).
  A20-1216
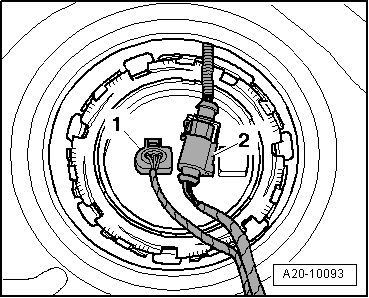
–  Unplug electrical connector -1- at flange.
  Note
Disregard -item 2-.
  A20-10093
Vehicles up to 10.2004:
  Note
In vehicles with two-wire sender, 2 contacts are connected in the electrical connector for fuel gauge sender 2 -G169-.
–  Connect multimeter (resistance test) between contacts -1- and -2-.
With fuel gauge sender 2 -G169- installed:
l  Sender at lower stop: 265 ... 291 Ω.
l  Sender at upper stop: 47.5 ... 73 Ω.
  Note
t  In order to test the maximum and minimum values for „tank full“ and „tank empty“, remove the fuel gauge sender 2 -G169- → Chapter and move the float all the way to its top or bottom position.
t  If the resistance is 0 Ω, there is a short circuit. If the resistance is ∞ Ω, there is an open circuit in the wiring.
t  The following values are obtained with the fuel gauge sender 2 -G169- removed, due to the greater travel of the float arm:
With fuel gauge sender 2 -G169- removed:
l  Sender at lower stop: approx. 299 Ω.
l  Sender at upper stop: approx. 36.6 Ω.
Assembly is carried out in the reverse order; note the following:
–  Install rear seat bench → Rep. gr.72.
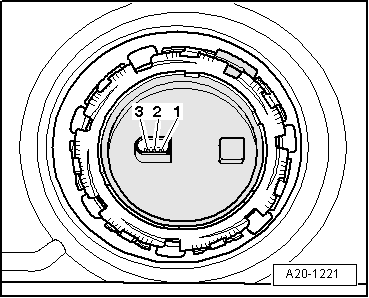
  A20-1221
Vehicles from 10.2004 onwards:
  Note
In vehicles with three-wire sender, 3 contacts are connected in the electrical connector for fuel gauge sender 2 -G169-.
–  Connect multimeter (resistance test) between contacts -1- and -2-.
With fuel gauge sender 2 -G169- installed:
l  Sender at lower stop: approx. 270 Ω.
l  Sender at upper stop: approx. 70 Ω.
  Note
t  In order to test the maximum and minimum values for „tank full“ and „tank empty“, remove the fuel gauge sender 2 -G169- → Chapter and move the float all the way to its top or bottom position.
t  If the resistance is 0 Ω, there is a short circuit. If the resistance is ∞ Ω, there is an open circuit in the wiring.
t  The following values are obtained with the fuel gauge sender 2 -G169- removed, due to the greater travel of the float arm:
With fuel gauge sender 2 -G169- removed:
l  Sender at lower stop: approx. 286 Ω.
l  Sender at upper stop: approx. 50 Ω.
–  Connect multimeter (resistance test) between contacts -2- and -3-.
With fuel gauge sender 2 -G169- installed or removed:
l  Sender in any position: approx. 340 Ω.
Assembly is carried out in the reverse order; note the following:
–  Install rear seat bench → Rep. gr.72.
  A20-1221

Removing and installing fuel gauge sender 2G169 > < Removing and installing fuel gauge senderG - vehicles from approx. 10.2004 onwards