audi Workshop Repair Guides

Audi Workshop Service and Repair Manuals

Removing and installing trailing arm with mounting bracket > < Renewing bonded rubber bush for wheel bearing housing
Removing and installing wheel bearing unit
   
Removing and installing wheel bearing unit
Special tools and workshop equipment required
t  Hub grease cap puller -VW 637/2-
t  Fitting sleeve -3241/4-
t  Torque wrench -V.A.G 1332-
t  Torque wrench -V.A.G 1410-

   
t  Bit XZN 18 -T10162-
Removing
–  Raise the vehicle.
–  Remove wheel.
  W00-10017
Loosen grease cap from seat by tapping lightly on the claw of grease cap puller -VW 637/2-.
  A42-0095
–  Pry off grease cap.
–  Detach brake carrier with brake caliper and tie to body with wire → Brake system; Repair group 46.
  Note
Do not suspend the brake caliper from the brake hose.
–  Remove cross-head screw for brake disc and take off brake disc.
–  Remove multi-point socket head bolt using bit XZN 18 -T10162-.
–  Pull wheel bearing unit off stub axle.
  Caution
Avoid dirtying or damaging the seal when laying down or storing the wheel bearing.
  A42-0096
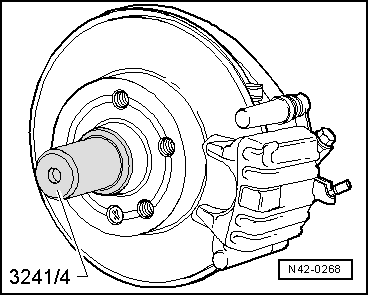
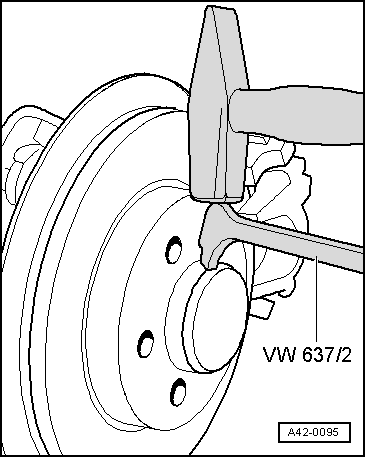
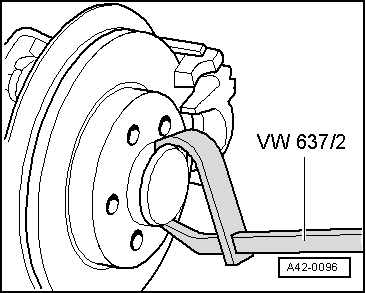
The wheel bearing -1- must always be pointing upwards.
–  Always put down the wheel bearing unit with the wheel hub -2- facing downwards.
Installing
Installation is performed in reverse sequence; note the following:
Tightening torques → Chapter „Exploded view of subframe, diagonal strut, lower transverse link, upper transverse link, track rod, vehicle level senders“
Tightening torques → Chapter „Part II: Wheel bearing housing, wheel bearing unit, trailing arm with mounting bracket, stone deflector“
Tightening torques → Chapter „Exploded view of shock absorbers, coil springs“
Tightening torques → Chapter „Exploded view of anti-roll bar“
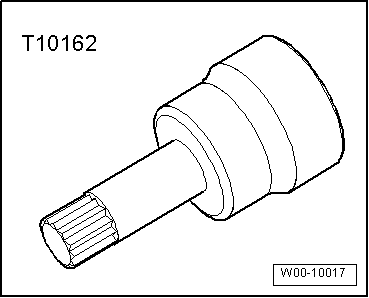
–  Carefully slide wheel hub/wheel bearing unit onto stub axle.
Take care to keep wheel hub/wheel bearing unit straight.
–  Fit new multi-point socket head bolt and tighten bolt → Item.
  Note
t  First tighten bolt with torque wrench to specified tightening torque.
t  Use fixed wrench to turn bolt further through specified angle.
  A42-10246
–  Drive in grease cap.
  Note
t  Always renew grease caps.
t  Damaged grease caps allow moisture to enter the bearing. For this reason it is important to use the tool shown in the illustration.
Remaining installation steps are carried out in reverse sequence.
–  Fit and secure wheel → Wheels and tyres; Rep. gr.44.
  N42-0268

Removing and installing trailing arm with mounting bracket > < Renewing bonded rubber bush for wheel bearing housing