audi Workshop Repair Guides

Audi Workshop Service and Repair Manuals

Brake pedal on LHD models: exploded view of components > < Adjusting handbrake
Removing and installing handbrake lever
Removing
–  Remove centre console extension. → Rep. Gr.68
   
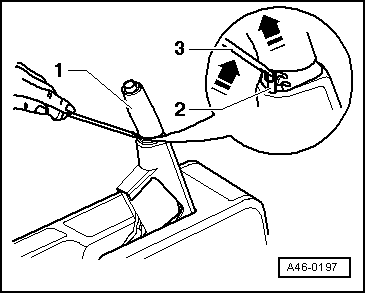
–  Release handle -1- with a screwdriver -3- and remove.
  A46-0197
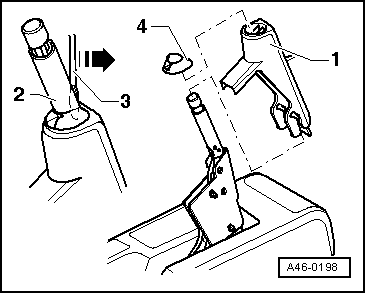
–  Remove cover -4- and handle -1-.
  A46-0198
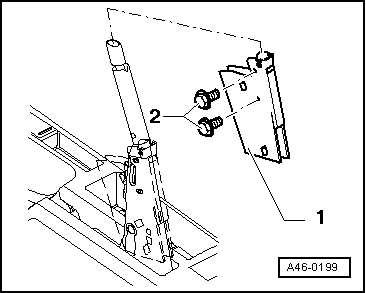
–  Unscrew hexagon bolts -2- and remove carrier -1- (tightening torque: 6 Nm).
With two cables attached
–  Insert screwdriver into release opening.
–  Push screwdriver in direction of “centre adjustment”.
–  Keep screwdriver in this position and slowly operate the handbrake lever.
  Note
Make sure that the cable eyelets do not come off the hooks.
–  Remove screwdriver.
–  Unhook handbrake cables.
With one cable attached
  A46-0199
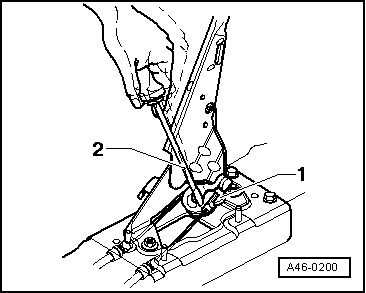
–  Release mechanism with a screwdriver -2-, at the same time pressing back the second spring-loaded hook -1- with another screwdriver.
–  Remove flange nuts -1- (tightening torque 25 Nm).
–  Disconnect the handbrake contact switch.
  A46-0200
–  Detach handbrake lever -2- from mounting plate.
Resetting the adjustment mechanism
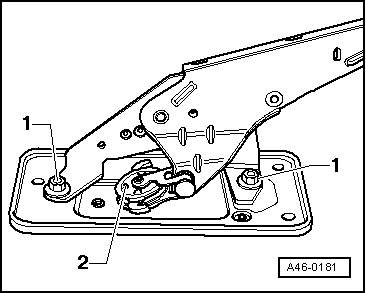
–  Clamp one of the spring-loaded hooks in a vice.
  A46-0181
–  Release mechanism with a screwdriver -2-, at the same time pressing back the second spring-loaded hook with another screwdriver.
Installing
–  Installation is carried out in reverse sequence.
–  Install centre console extension. → Rep. Gr.68
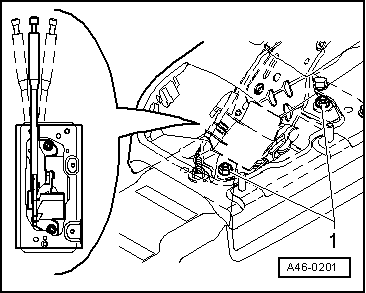
–  Tighten both nuts -1- hand tight.
  Note
The rear nut can be accessed through the ashtray opening, and the front one through a cut-out in the bottom of the storage compartment.
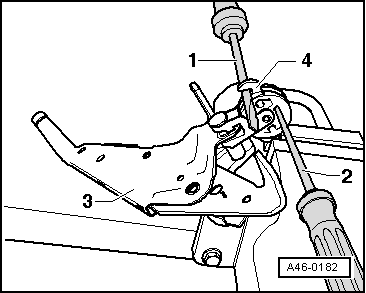
  A46-0182
–  Align handbrake lever centrally in slot in centre console.
–  Tighten nuts, tightening torque: 25 Nm
–  Adjust handbrake → Chapter.
  A46-0201

Brake pedal on LHD models: exploded view of components > < Adjusting handbrake