
A4 Cabriolet Mk2
| Servicing gearbox housing |
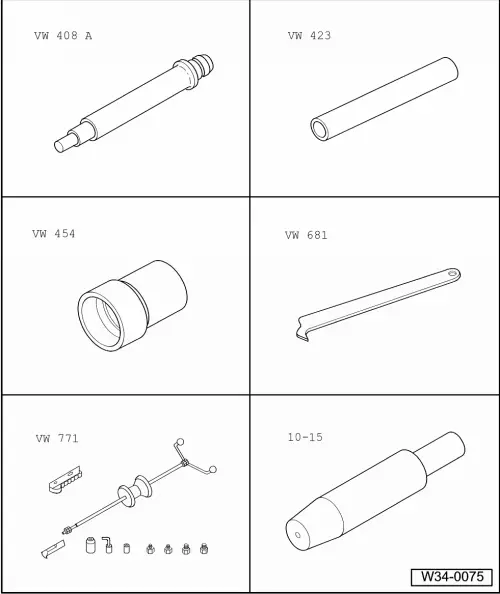
| Special tools and workshop equipment required |
| t | Press tool -VW 408 A- |
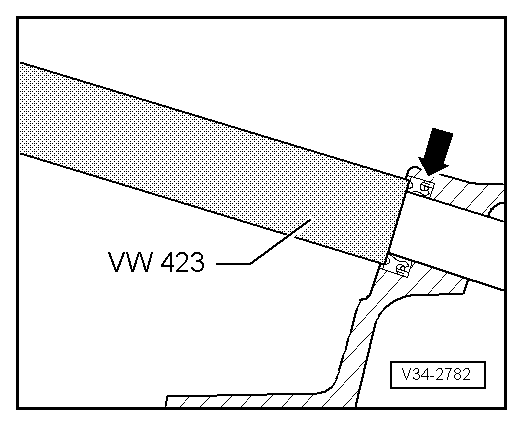
| t | Tube -VW 423- |
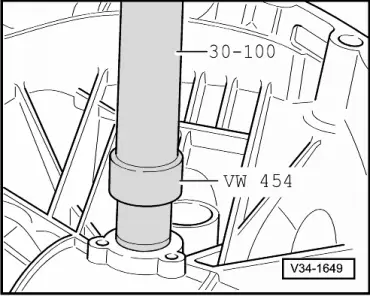
| t | Press tool -VW 454- |
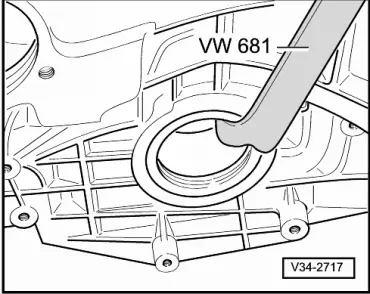
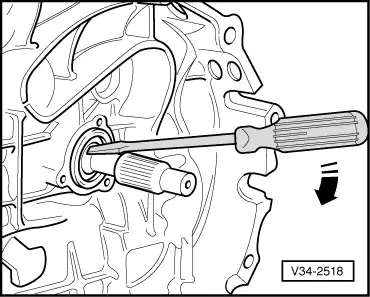
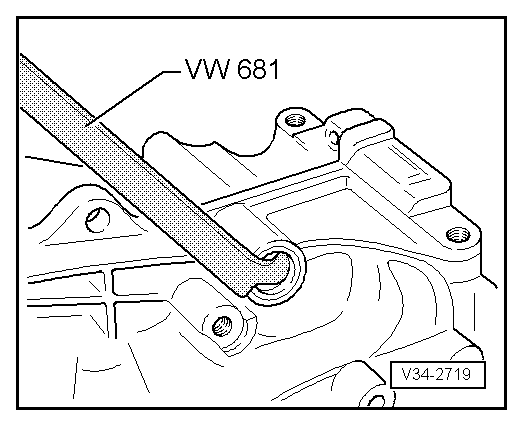
| t | Oil seal extractor lever -VW 681- |
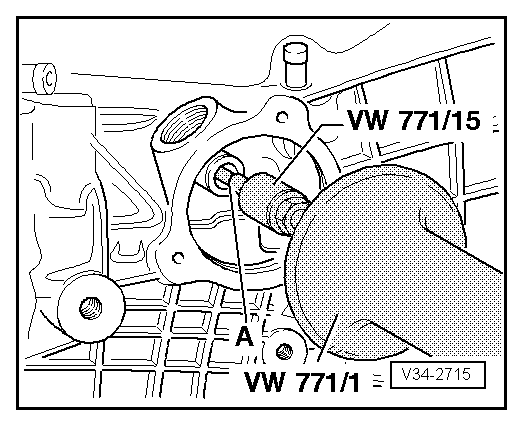
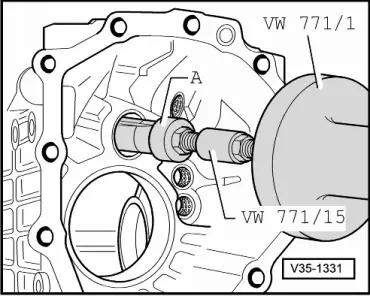
| t | Multi-purpose tool -VW 771- |
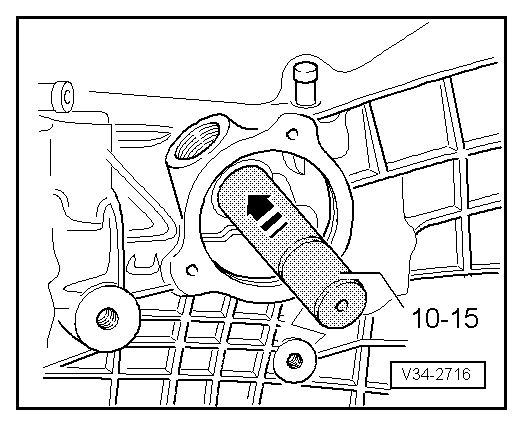
| t | Guide pin -10-15- |
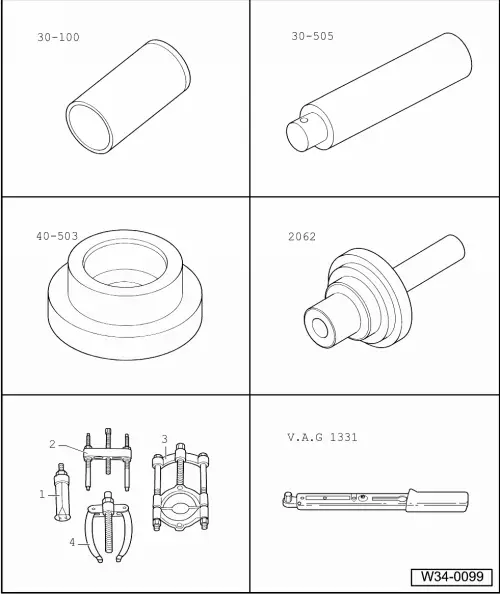
| t | Drift sleeve -30-100- |
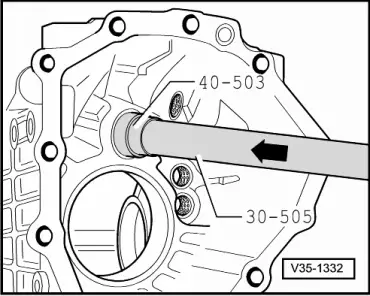
| t | Mandrel -30-505- |
| t | Installing tool -40-503- |
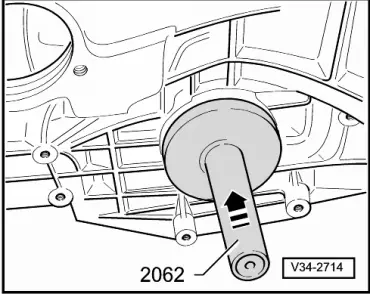
| t | Punch -2062- |
| t | -1-Internal puller -Kukko 21/2- and -Kukko 21/5- |
| t | Torque wrench -V.A.G 1331- |
| t | Depth gauge |
| t | Assembly sleeve -01E 311 120- |
| Exploded view |
 Note
Note| t | Refer to general repair instructions → Chapter. |
| t | Adjustment work is required when renewing the parts marked with 1) → Anchor. |
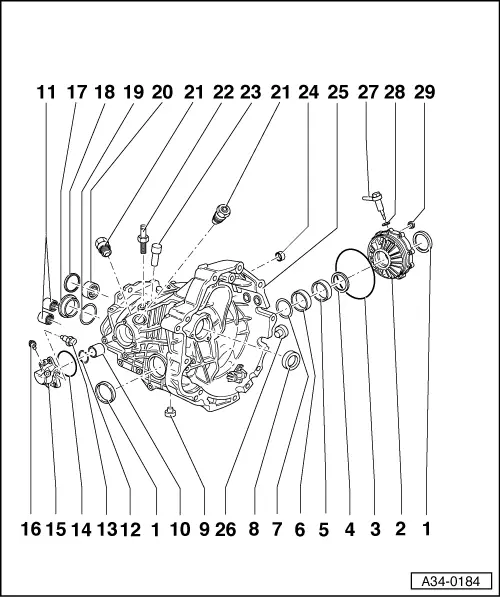
| 1 - | Flange shaft oil seal |
| q | Pulling out → Fig. |
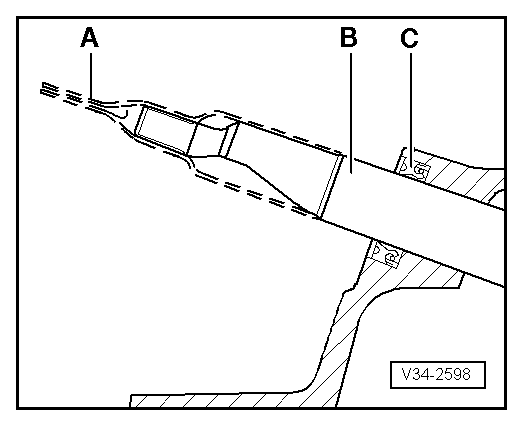
| q | Driving in → Fig. |
| q | Pack space between sealing lips and dust lip half full with sealing grease -G 052 128 A1-. |
| q | Renewing with gearbox installed → Chapter |
| 2 - | Cover for final drive 1) |
| 3 - | O-ring |
| q | For cover for final drive |
| q | Renew |
| 4 - | Shim “S1” |
| q | Note thickness |
| q | Table of adjustments → Anchor |
| 5 - | Outer race for large tapered roller bearing 1) |
| q | For differential |
| q | Driving out → Fig. |
| q | Driving in → Fig. |
| 6 - | Outer race for small tapered roller bearing 1) |
| q | For differential |
| q | Driving out → Fig. |
| q | Driving in → Fig. |
| 7 - | Shim “S2” |
| q | Note thickness |
| q | Table of adjustments → Anchor |
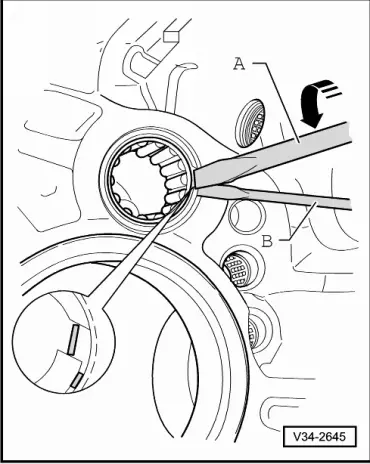
| 8 - | Input shaft oil seal |
| q | Levering out → Fig. |
| q | Driving in → Fig. |
| q | Always renew if input shaft is removed |
| q | Renewing when gearbox is not dismantled → Fig. and → Fig. |
| 9 - | Oil drain plug, 40 Nm |
| 10 - | Ball sleeve |
| q | For selector shaft |
| q | Pulling out → Fig. |
| q | Driving in → Fig. |
| 11 - | Ball sleeves |
| q | For selector shafts |
| q | Pulling out → Fig. |
| q | Renew |
| q | Driving in → Fig. |
| 12 - | Circlip |
| q | Installation position: eyes facing up |
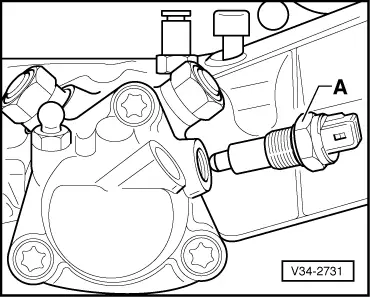
| 13 - | Reversing light switch -F4- |
| q | Removing and installing → Fig. |
| 14 - | O-ring |
| q | For cover for selector shaft |
| q | Renew |
| 15 - | Selector shaft cover |
| q | Removing → Anchor |
| q | Installing → Anchor |
| 16 - | Ball head stud, 20 Nm |
| q | For connecting rod |
| 17 - | Outer race for large tapered roller bearing 1) |
| q | For pinion shaft |
| q | Pulling out → Fig. |
| q | Pressing in → Fig. and → Fig. |
| 18 - | Circlip |
| q | Removing → Fig. |
| 19 - | Shim “S3” |
| q | Note thickness |
| q | Table of adjustments → Anchor |
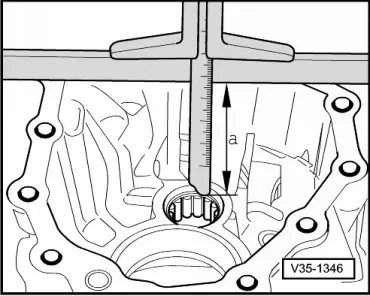
| 20 - | Needle bearing for input shaft |
| q | Pulling out → Fig. |
| q | Driving in → Fig. |
| q | Measuring installation depth → Fig. |
| 21 - | Locking bolt for selector shaft, 50 Nm |
| q | Removing → Anchor |
| q | Installing → Anchor |
| q | Apply sealing paste -AMV 188 001 02- when installing |
| 22 - | Trunnion bolt, 40 Nm |
| q | For push rod |
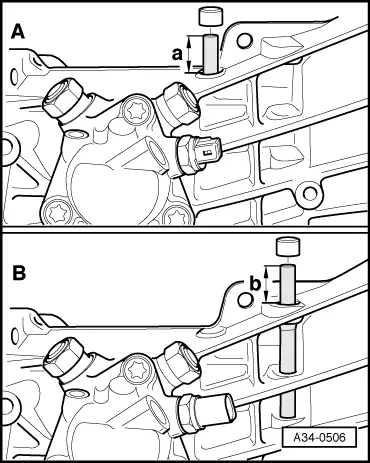
| 23 - | Breather |
| q | Clip cap on |
| q | Installation depth of sleeve → Fig. |
| 24 - | Oil seal for selector shaft |
| q | Can be renewed when gearbox is removed but not dismantled |
| q | Renew |
| q | Pulling out → Fig. |
| q | Driving in → Fig. |
| q | Always use assembly sleeve for installing → Fig. |
| 25 - | Gearbox housing 1) |
| 26 - | Magnet |
| q | Clean |
| q | When renewing gearbox housing drive in with e.g. press tool -VW 408 A- |
| 27 - | Speedometer sender -G22- |
| q | Removing and installing → Chapter |
| q | Not fitted from 07.2002. The bore for -G22- is sealed with a sealing plug. |
| 28 - | O-ring |
| q | Renew |
| 29 - | Oil filler plug, 40 Nm |
Note
|
|
|

|
Note
|
|
|
|
|
|
|
|
Note
|
|
|
|
|
|
|
|
|
|
|
|
|
|
|
|
|
|