audi Workshop Repair Guides

Audi Workshop Service and Repair Manuals

Renewing oil seal for flange shaft (rear) > < Servicing transfer box
Removing and installing cover for self-locking centre differential
Special tools and workshop equipment required
   
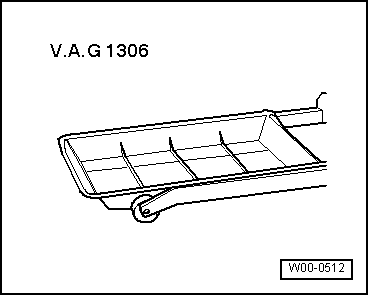
t  Drip tray -V.A.G 1306-
t  Safety goggles
Removing
l  Gearbox in vehicle
  Caution
The engine must not be run and the vehicle must not be towed without gear oil.
  Note
t  General repair instructions → Chapter.
t  Rules for cleanliness when working on the automatic gearbox → Chapter.
  W00-0512
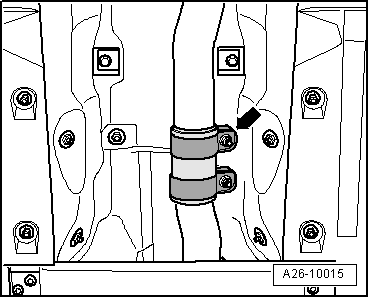
Vehicles with 2.0 ltr. TFSI engine or 3.0 ltr. TDI engine
  Note
The flexible pipe connection (de-coupling element) on the front exhaust pipe must not be bent more than 10° – otherwise it can be damaged.
–  Slacken nuts on front clamp -arrows-.
–  Push clamp towards rear of vehicle to disconnect exhaust system.
  A26-10015
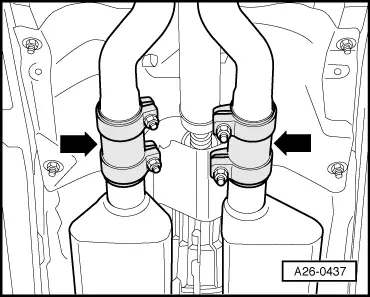
Vehicles with 4.2 ltr. MPI engine:
  Note
To prevent damage, the flexible couplings in the front exhaust pipes must not be bent further than 10°.
–  Disconnect exhaust system at clamps -arrows-.
–  Disengage rear section of exhaust system at rubber mountings and remove.
  Note
A second mechanic is required for removing the rear section of the exhaust system.
  A26-0437
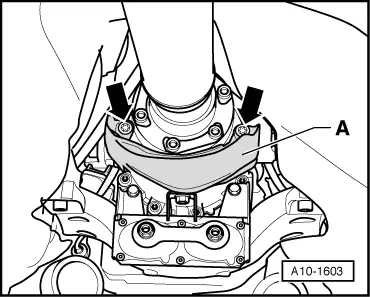
–  Unbolt heat shield -A- for propshaft -arrows-.
–  Unscrew bolts at gearbox/propshaft flange.
–  Slide propshaft together towards rear final drive. The constant velocity joints can be moved axially.
  A10-1603
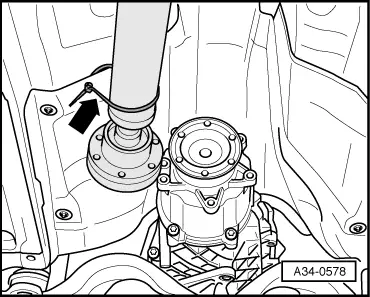
–  Tie propshaft up to side onto heat shield -arrow-.
  A34-0578
–  Place drip tray -V.A.G 1306- under the gearbox.
  WARNING
Wear safety goggles.
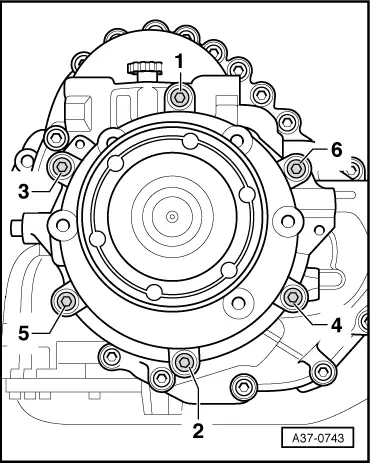
–  Slacken and remove securing bolts for cover for self-locking centre differential in sequence -6 ... 1-; allow gear oil to drain out.
  Note
The cover is not equipped with a drain plug; drain gear oil by removing the cover.
  Caution
Pull the cover for the self-locking centre differential carefully towards the rear off the gearbox. Take care that self-locking centre differential does not drop out of gearbox.
  A37-0743
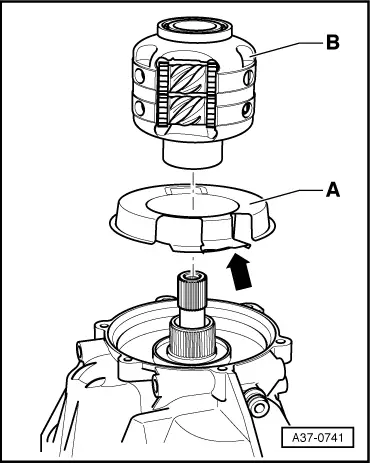
–  Secure self-locking centre differential -B- and baffle plate -A- to prevent them dropping out, or pull them off the output shaft towards the rear.
  A37-0741
Installing
Installation is carried out in reverse sequence; note the following:
  Note
Renew O-ring on cover for transfer box.
Note the following if the self-locking centre differential -B- and the baffle plate -A- have been removed:
–  Clean baffle plate, lubricate with gear oil and insert in gearbox.
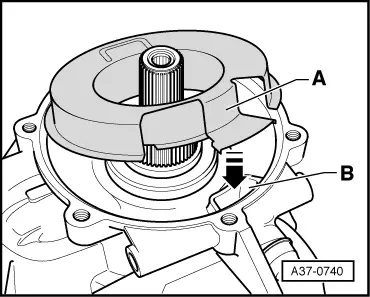
l  Installation position: tongue on baffle plate should be positioned on the gearbox so that the side lugs are located above opening -B--arrow-.
  A37-0740
–  Fit self-locking centre differential -B- onto splines of output shaft (turn slightly at the same time).
  Note
Check installation position of tongue on baffle plate -arrow- again.
–  Check that self-locking centre differential can be turned by hand when it is in position.
–  Check whether the tongue -arrow- on the baffle plate is still located properly.
–  Place cover onto self-locking centre differential with shaft installed; turn slightly if necessary.
  A37-0741
–  Tighten bolts of cover for self-locking centre differential as follows:
  A37-0743
StageTightening sequence
I
–  Tighten bolts -1- and -2- to 3 Nm.
II
–  Tighten bolts -1 ... 6- to 23 Nm in the sequence indicated.

–  Install propshaft → Rear final drive 01R; Rep. Gr.39.
–  Install exhaust system so it is free of stress → Rep. Gr.26.
–  Fill up gear oil in transfer box → Chapter
Tightening torques
   
ComponentNm
Cross member to body23
Heat shield for drive shaft to gearbox23


Renewing oil seal for flange shaft (rear) > < Servicing transfer box