audi Workshop Repair Guides

Audi Workshop Service and Repair Manuals

Removing and installing automatic gearbox control unit J217 > < Dismantling and assembling gearbox
Removing and installing end cover
  Note
t  Rules for cleanliness when working on the automatic gearbox → Chapter.
t  General repair instructions → Chapter.
Special tools and workshop equipment required
   
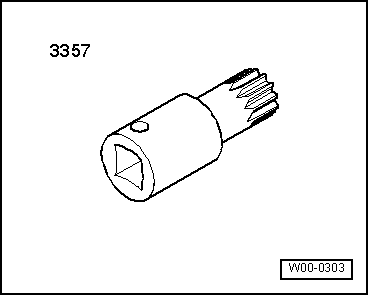
t  Multi-point bit -3357-
  W00-0303
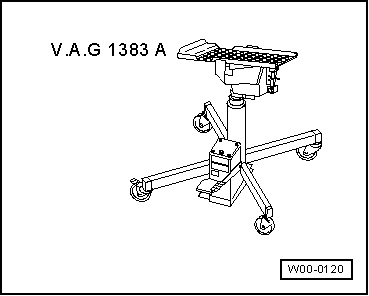
t  Engine and gearbox jack -V.A.G 1383 A-
t  Block of wood
Removing
  WARNING
t  The lock carrier must remain installed throughout the procedure, and must not be moved to the service position.
t  This is the only way to ensure that the engine/gearbox assembly does not drop out towards the rear when the tunnel cross member is released.
t  The torque reaction support on the lock carrier takes up the weight of the assembly.
  W00-0120
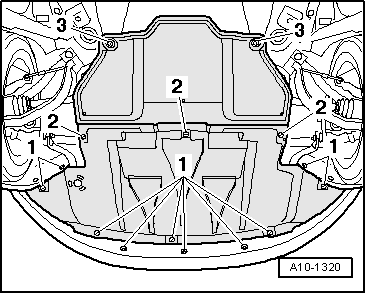
–  Remove rear noise insulation (loosen fasteners -2- and -3-).
–  Remove front exhaust pipe → Rep. Gr.26.
–  Drain off ATF → Chapter.
  A10-1320
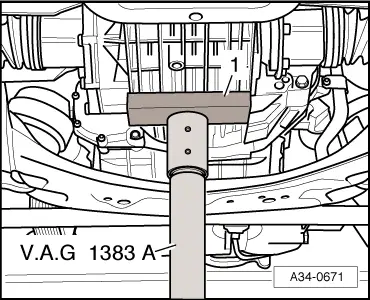
–  Apply lifting column of engine and gearbox jack -V.A.G 1383 A- to gearbox from below (place a block of wood -1- between lifting column and gearbox).
–  Use engine and gearbox jack -V.A.G 1383 A- to lift gearbox up slightly.
  WARNING
Risk of injury
The lock carrier must remain installed, and must not be moved to the service position.
  A34-0671
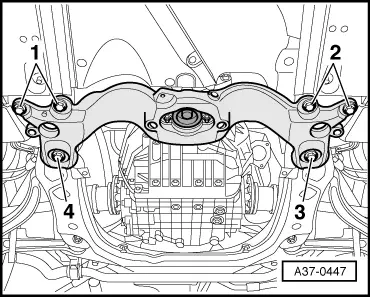
–  First unscrew bolts -1- and -2-, then bolts -3- and -4-.
–  Slowly lower tunnel cross member with engine and gearbox jack -V.A.G 1383 A-.
  A37-0447
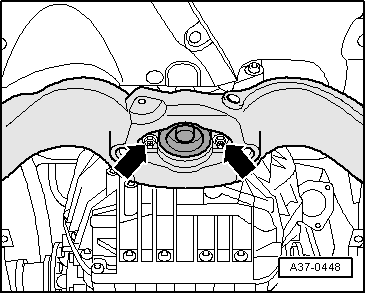
–  Unscrew nuts -arrows- and detach tunnel cross member.
  A37-0448
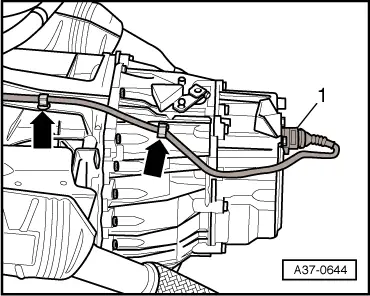
–  Release electrical connector -1- and detach from gearbox.
  Note
-Arrows- can be disregarded.
  A37-0644
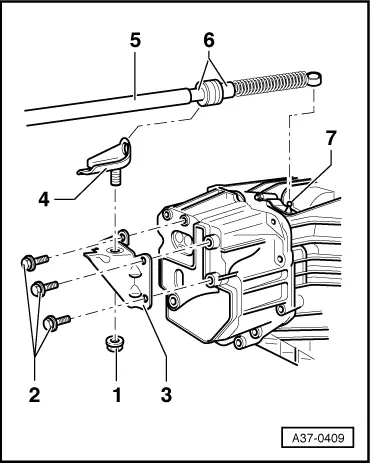
–  Remove bolts -2- and detach bracket -3- for selector lever cable from gearbox.
  A37-0409
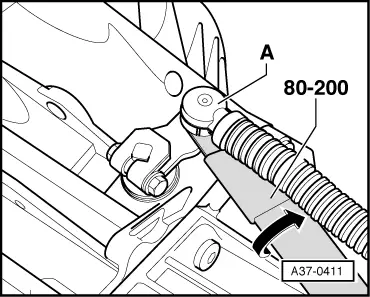
–  Use removal lever -80 - 200- to prise selector lever cable -A- off selector shaft lever -arrow-.
  Note
Do not bend or kink the selector lever cable.
  A37-0411
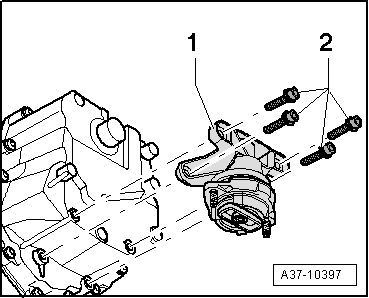
–  Remove bolts -2- and take off gearbox support -1- together with gearbox mounting.
  A37-10397
–  Place used oil collection and extraction unit -V.A.G 1782- below gearbox.
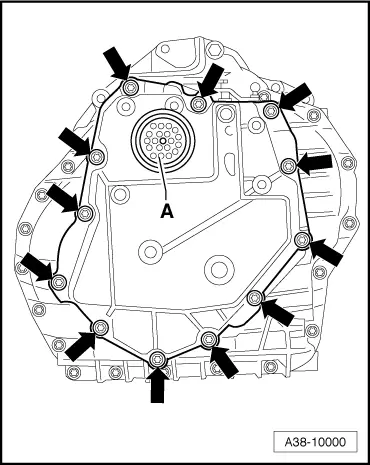
–  Remove bolts -arrows- and take off end cover.
  A38-10000
Installing
l  Tightening torque → Chapter
Installation is carried out in reverse sequence; note the following:
  Note
Renew seals/gaskets and bolts for end cover.
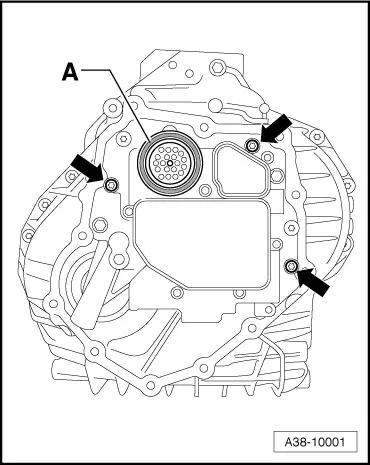
–  Slide new seal -A- onto connector of automatic gearbox control unit -J217-, with twin lips facing outwards.
  Note
-Arrows- can be disregarded.
–  Clean sealing surfaces on gearbox housing and end cover.
–  If any dowel sleeves were removed from gearbox housing or cover, these must be re-fitted in same places.
  A38-10001
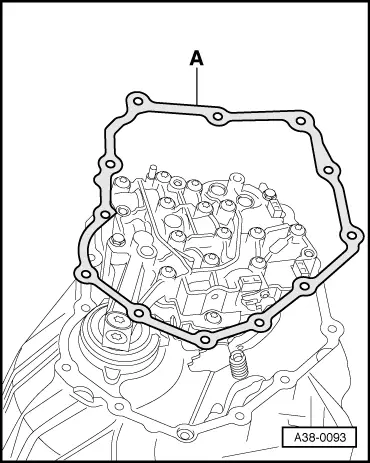
–  Place new gasket for end cover -A- onto gearbox housing.
  Note
t  The gasket can be either metal or paper. The new gasket must be made of the same material as the old one → Parts catalogue.
t  Make sure dowel sleeves are correctly seated.
  A38-0093
–  Fit end cover and make sure that gasket does not move out of position.
–  Screw in new bolts -arrows- in diagonal sequence until hand-tight and then tighten to specified torque.
–  Check installation position of seal -A-:
l  Seal must be flush fitted (the sealing lips must not be kinked).
  A38-10000
–  Tighten bolts -2- for bracket -3- for selector lever cable.
  Note
t  Do not bend or kink the selector lever cable.
t  Before installing, lightly grease cable eye and ball socket on selector lever cable with polycarbamide grease -G 052 142 A2-.
  A37-0409
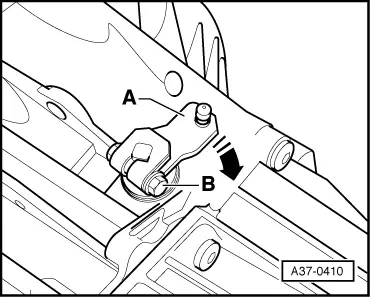
–  Press selector shaft lever -A- at gearbox to rear as far as it will go -arrow- until parking lock engages.
  A37-0410
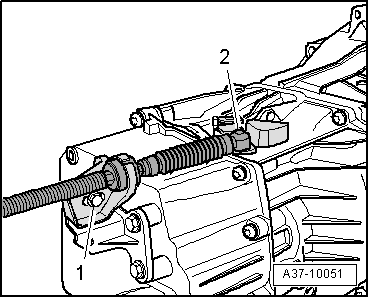
–  Check whether selector lever is in position “P” and carefully press socket end of selector lever cable -2- onto selector shaft lever.
  Note
t  Take care not to bend selector shaft lever when pressing on cable; support lever if necessary, as otherwise selector mechanism can no longer be adjusted accurately.
t  -Item 1- can be disregarded.
–  Install gearbox support with gearbox mounting → Chapter.
–  Install tunnel cross member → Rep. Gr.40.
–  Install front exhaust pipe → Rep. Gr.26.
–  Adjust selector lever cable → Chapter.
–  Fill up with ATF → Chapter.
Tightening torque
  A37-10051
ComponentNm
End cover to gearbox15 + 90° 1)2)
l  1) Renew bolts.
l  2) Tighten in diagonal sequence.


Removing and installing automatic gearbox control unit J217 > < Dismantling and assembling gearbox