audi Workshop Repair Guides

Audi Workshop Service and Repair Manuals

Removing and installing radiator fan - vehicles from 11.2004 onwards > < Removing and installing radiator fan - vehicles up to 10.2004
Removing and installing radiator cowl - vehicles from 11.2004 onwards
   
Removing
  Note
All cable ties which are released or cut open when removing must be fitted in the same position when installing.
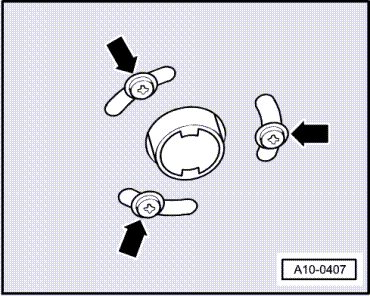
–  Vehicles with auxiliary heater: remove bolts -arrows- securing exhaust pipe for auxiliary/additional heater to noise insulation.
  A10-0407
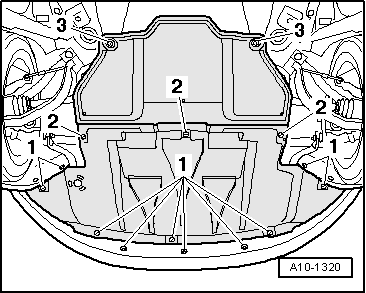
–  Release quick-fasteners -1- and -2- and take off front noise insulation. Leave rear noise insulation in position.
–  Remove bumper cover (front) → Rep. Gr.63.
–  Move lock carrier to service position → Rep. Gr.50.
  A10-1320
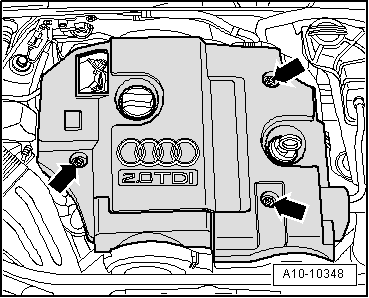
–  Unclip cover caps.
–  Unscrew nuts -arrows- and detach engine cover panel.
–  Remove insulation beneath cover panel (if fitted).
  A10-10348
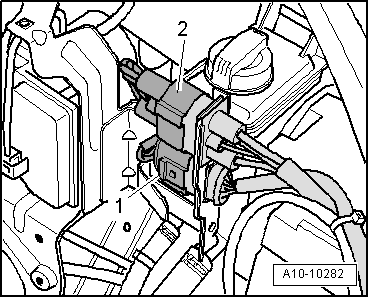
–  Detach electrical connectors -1- and -2- from bracket and unplug.
–  Move wiring clear.
  A10-10282
–  Unplug electrical connector -1- for bonnet lock and move wiring clear.
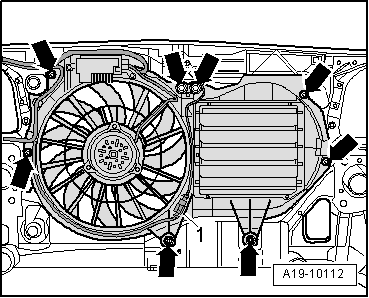
–  Unscrew bolts -arrows- and lift out radiator cowl.
Installing
Installation is carried out in the reverse order; note the following:
–  Install lock carrier with attachments → Rep. Gr.50.
–  Install bumper cover (front) → Rep. Gr.63.
Tightening torques
  A19-10112
ComponentNm
Radiator cowl toM611
Lock carrierPanel bolt2


Removing and installing radiator fan - vehicles from 11.2004 onwards > < Removing and installing radiator fan - vehicles up to 10.2004