audi Workshop Repair Guides

Audi Workshop Service and Repair Manuals

Removing and installing oil pump > < Removing and installing balance shaft assembly with chain drive
Removing and installing chain tensioner for balance shaft assembly
Special tools and workshop equipment required
   
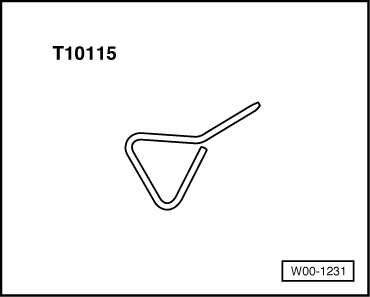
t  Locking pin -T10115-
Removing
–  Move lock carrier to service position → Chapter.
–  Remove toothed belt → Chapter.
–  Remove sump → Chapter.
–  Remove sealing flange (front) → Chapter.
  W00-1231
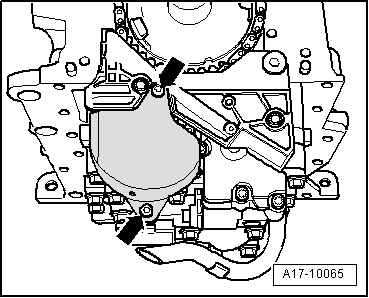
–  Unscrew bolts -arrows- and detach chain sprocket cover.
  A17-10065
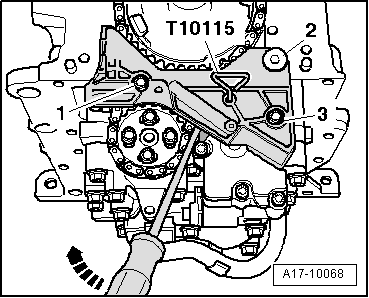
–  Press guide rail for chain tensioner in -direction of arrow- using a screwdriver and lock chain tensioner with locking pin -T10115-.
–  Remove bolts -1- and -3-.
–  Then unscrew bolt -2- and remove chain tensioner.
Installing
–  Initially bolt chain tensioner (locking pin inserted) onto cylinder block with fitted bolt -2-.
–  Then tighten bolts -1- and -3-.
–  Remove locking pin -T10115- from chain tensioner.
  A17-10068
–  Fit chain tensioner cover -arrows-.
Remaining installation steps are carried out in reverse sequence; note the following:
  Note
t  Hose connections and hoses for charge air system must be free of oil and grease before assembly.
t  Secure all hose connections with the correct type of hose clips (same as original equipment) → Electronic parts catalogue.
t  To ensure that the charge air hoses can be properly secured at their connections, spray rust remover onto the worm thread of used hose clips before installing.
–  Install sealing flange (front) → Chapter.
–  Install sump → Chapter.
–  Install toothed belt (adjust valve timing) → Anchor.
–  Install vibration damper → Chapter.
–  Install poly V-belt → Chapter.
–  Install lock carrier with attachments → Rep. Gr.50.
  A17-10065
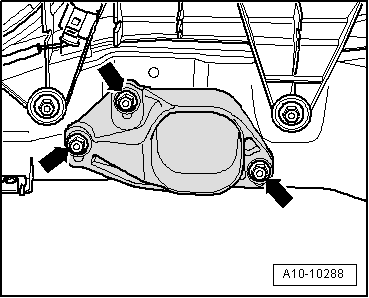
–  Allow stop for torque reaction support to rest on rubber buffer for torque reaction support under its own weight and tighten nuts -arrows-.
–  Install bumper cover (front) → Rep. Gr.63.
–  Fill up with engine oil and check oil level → Booklet803 or → Booklet805.
Tightening torques
  A10-10288
ComponentNm
Chain tensionerCylinder block20
to:Balance shaft assembly9
Cover forChain tensioner5 1)
Drive chain to:Oil pump5 1)
Stop for torque reaction support to lock carrier28
Hose clips (9 mm wide)3
Hose clips (13 mm wide)5,5
l  1) Apply locking fluid when installing bolts; for locking fluid refer to → Electronic parts catalogue.


Removing and installing oil pump > < Removing and installing balance shaft assembly with chain drive