audi Workshop Repair Guides

Audi Workshop Service and Repair Manuals

Removing and installing bracket for ancillaries > < Removing and installing tensioner for poly V-belt
Removing and installing vibration damper
Special tools and workshop equipment required
   
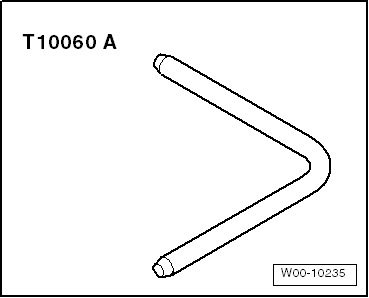
t  Locking pin -T10060 A-
  W00-10235
Removing
–  Move lock carrier to service position → Chapter.
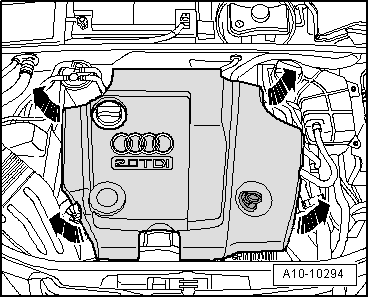
–  Pull off engine cover panel -arrows-.
  Note
  A10-10294
Before removing, mark direction of rotation of poly V-belt with chalk or felt-tipped pen. If the belt runs in the opposite direction when it is refitted, this can cause breakage.
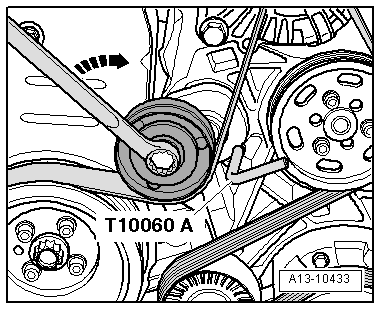
–  Turn tensioner in -direction of arrow- and lock with locking pin -T10060 A- to slacken the poly V-belt.
–  Remove poly V-belt.
  A13-10433
–  Lever off cover cap from vibration damper.
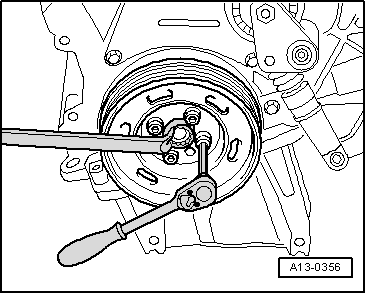
–  Unbolt vibration damper; counterhold on centre bolt with ring spanner.
Installing
Installation is carried out in the reverse order; note the following:
  Note
t  Hose connections and hoses for charge air system must be free of oil and grease before assembly. Do NOT use lubricant.
t  Secure all hose connections with the correct type of hose clips (same as original equipment) → Electronic parts catalogue.
t  To ensure that the charge air hoses can be properly secured at their connections, spray rust remover onto the worm thread of used hose clips before installing.
  A13-0356
–  Install vibration damper, using only new genuine bolts (same as original equipment) → Electronic parts catalogue.
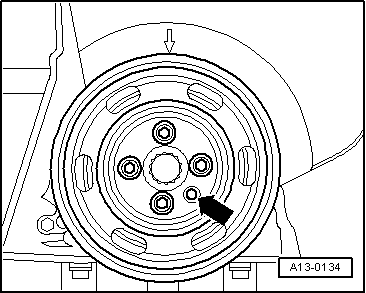
l  The vibration damper can only be installed in one position. The hole in the vibration damper must be located over the projection on the toothed belt sprocket -arrow-.
–  Install poly V-belt → Chapter.
–  Install lock carrier with attachments → Rep. Gr.50.
  A13-0134
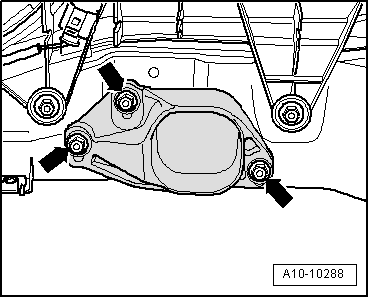
–  Allow stop for torque reaction support to rest on rubber buffer for torque reaction support under its own weight and tighten nuts -arrows-.
–  Install bumper cover (front) → Rep. Gr.63.
Tightening torques
  A10-10288
ComponentNm
Vibration damper to crankshaft10 + 90° 1)2)
Stop for torque reaction support to lock carrier28
Hose clips (9 mm wide)3
Hose clips (13 mm wide)5.5
l  1) Renew bolts.
l  2) 90° = one quarter turn.


Removing and installing bracket for ancillaries > < Removing and installing tensioner for poly V-belt