audi Workshop Repair Guides

Audi Workshop Service and Repair Manuals

Removing and installing radiator > < Removing and installing coolant pipes (left-side)
Removing and installing coolant pipe (top) - not applicable for USA vehicles
   
Removing and installing coolant pipe (top) - not applicable for USA vehicles
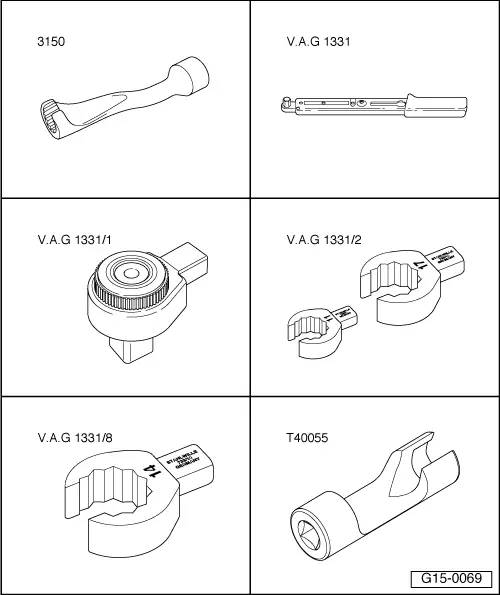
Special tools and workshop equipment required
t  Socket, 14 mm -3150-
t  Torque wrench -V.A.G 1331-
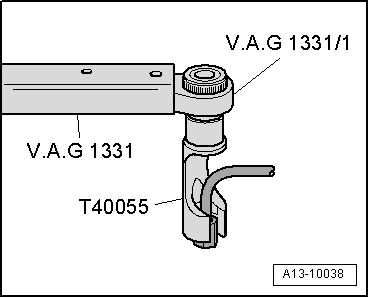
t  Ratchet -V.A.G 1331/1-
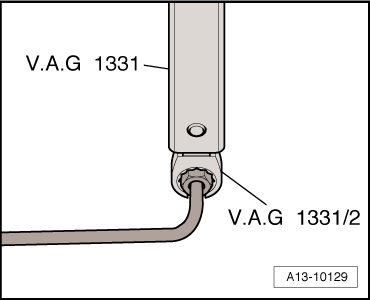
t  Ring insert (open-end; 17 mm) -V.A.G 1331/2-
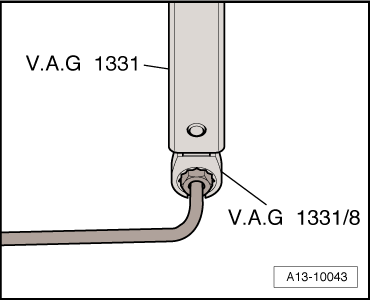
t  Ring insert (open-end; 14 mm) -V.A.G 1331/8-
t  Socket, 17 mm -T40055-

Removing
  Note
All cable ties which are released or cut open when removing must be refitted in the same position when installing.
–  Drain off coolant → Chapter.
–  Remove intake manifold (top section) → Rep. Gr.24.
  WARNING
The fuel system operates under high pressure. The pressure in the high-pressure part of the injection system must be reduced to a residual pressure prior to opening the system → Chapter. A clean cloth must then be wrapped around the connection and the residual pressure dissipated by carefully loosening the connection.
   
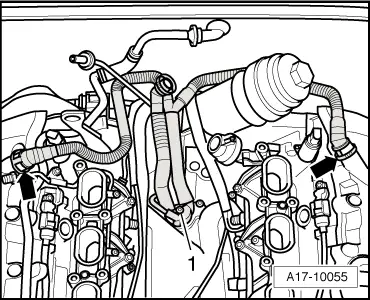
–  Disconnect crankcase breather hoses -arrows- from cylinder head covers.
–  Move the crankcase breather hoses clear.
–  Unscrew bolt -1- and take out hose connection with crankcase breather hoses.
  A17-10055
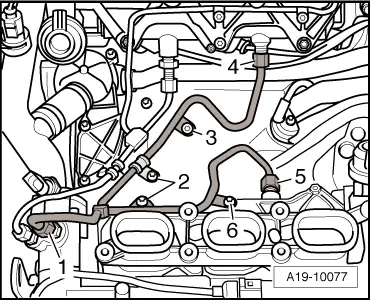
–  Remove high-pressure pipe by unscrewing bolts and union nuts -1 … 6-.
  A19-10077
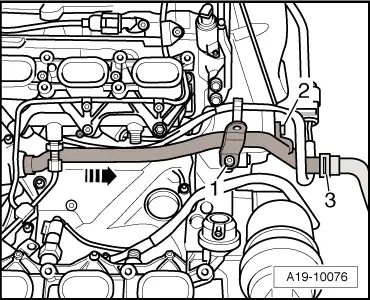
–  Lay a cloth under coolant pipe to catch escaping coolant.
–  Detach coolant hose -3- from coolant pipe.
–  Unscrew bolts -1- and -2- and pull coolant pipe out of cylinder block towards the rear -arrow-.
Installing
Installation is carried out in the reverse order; note the following:
  Note
t  Renew O-ring.
t  Fit all cable ties in the original positions when installing.
–  Before installing, clean and smoothen sealing surface for O-ring.
–  Lubricate new O-ring with coolant additive and slide onto coolant pipe.
  A19-10076
–  First hand-tighten union nuts -1-, -4- and -5- for high-pressure pipes, then hand-tighten pipe mountings -2-, -3- and -6-.
–  Ensure that high-pressure pipes are not under tension.
  A19-10077
–  To secure high-pressure pipe (14 mm) to fuel rail, use torque wrench -V.A.G 1331- with ring insert (open-end, 14 mm) -V.A.G 1331/8-.
  A13-10043
–  To secure high-pressure pipe (17 mm) to fuel rail, use torque wrench -V.A.G 1331- with ring insert (open-end, 17 mm) -V.A.G 1331/2-.
  A13-10129
–  To secure high-pressure pipe (17 mm) to high-pressure pump, use torque wrench -V.A.G 1331- with ratchet -V.A.G 1331/1- and socket, 17 mm -T40055-.
–  Install intake manifold (top section) → Rep. Gr.24.
–  Install high-pressure pipes → Rep. Gr.24.
–  Fill cooling system → Anchor.
Tightening torques
  A13-10038
ComponentNm
Coolant pipe to engine9
Hose connection for crankcase breather hoses to cover6


Removing and installing radiator > < Removing and installing coolant pipes (left-side)