audi Workshop Repair Guides

Audi Workshop Service and Repair Manuals

Removing and installing sealing flange and dual-mass flywheel/flywheel/drive plate > < Removing and installing tensioner for poly V-belt
Removing and installing vibration damper
   
Removing
–  Move lock carrier to service position → Chapter.
–  Remove poly V-belt → Chapter.
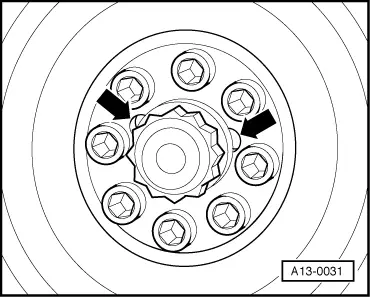
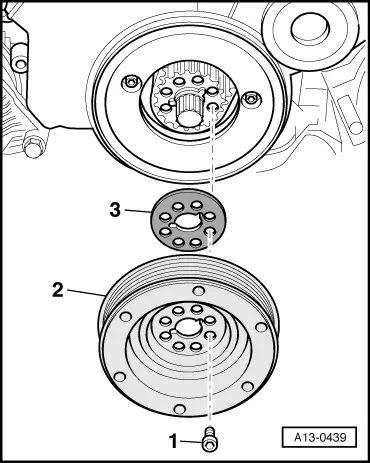
–  Unscrew the 8 bolts -1-.
–  Remove vibration damper -2- and thrust washer -3-, if fitted.
  Note
The thrust washer -3- is only fitted in conjunction with toothed belt sprocket -06C 105 063 A-. If toothed belt sprocket -06C 105 063 B- is fitted, do NOT install thrust washer.
Installing
Installation is carried out in the reverse order; note the following:
–  If fitted, install the thrust washer -3- so that the curved rim faces towards the vibration damper.
  A13-0439
–  When installing vibration damper, ensure that notches -arrows- in vibration damper are aligned with locating lugs on toothed belt sprocket.
–  Install poly V-belt → Chapter.
–  Install lock carrier with attachments → Rep. Gr.50.
–  Install bumper cover (front) → Rep. Gr.63.
Tightening torque
  A13-0031
ComponentNm
Vibration damper to crankshaft23


Removing and installing sealing flange and dual-mass flywheel/flywheel/drive plate > < Removing and installing tensioner for poly V-belt