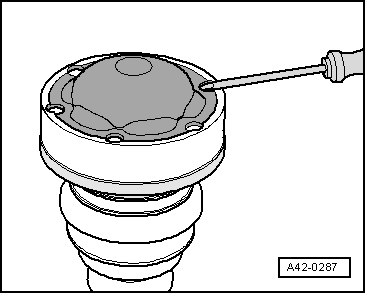
audi Workshop Repair Guides

Audi Workshop Service and Repair Manuals

Servicing outer constant velocity joint > < Exploded view of components
Servicing inner constant velocity joint
Removing inner constant velocity joint
–  Clamp drive shaft in vice.
Use jaw protectors.
   
–  Pry off cover using a screwdriver or similar.
  A42-0287
–  Remove gasket -arrow-.
  A42-0288
–  Knock off cap (attached to boot) using a brass or copper drift.
Do not open hose clip.
  A42-0289
–  Remove circlip.
  A42-0290
–  Press inner constant velocity joint off drive shaft using special tools shown in illustration.
–  Pull inner CV joint boot off drive shaft.
Installing inner constant velocity joint
  A42-0291
–  Apply sealant on clean inner surface of cap on CV joint boot (hatched area) → Item. Sealant bead: continuous, 2 ... 3 mm Ø. Route around inside of holes -arrow-.
–  Use sealant D 454 300 A2.
–  Push joint boot onto drive shaft.
  A42-0277
–  Grease splines -A- on drive shaft lightly with grease used in joint before fitting joint or triple roller spider onto drive shaft.
Boot and contact surface of cap must be free of grease.
  A42-10049
–  Press on joint as far as stop.
Chamfer on internal diameter of ball hub (splines) must face contact collar of drive shaft.
Use the special tools shown in the illustration.
Special tool 40-204 A and the clamping surface on drive shaft must be free from grease.
  V40-0860
–  Fit circlip.
–  Check that circlip is properly seated.
Always renew circlip.
–  Insert 50 g of drive shaft grease into boot.
Take care not to damage sealant bead.
  A42-0290
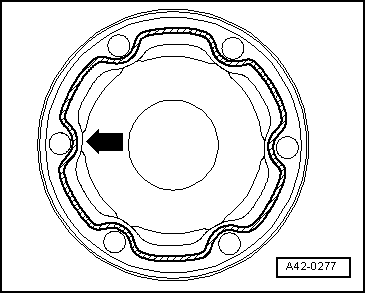
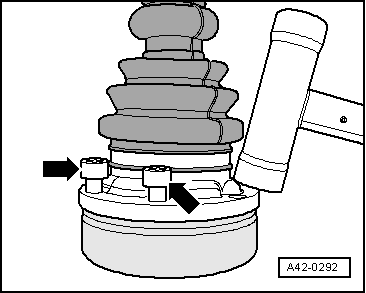
–  Using bolts -arrows-, align CV joint boot with cap in relation to bolt holes.
The alignment must be very accurate, because no further alignment is possible once the part has been hammered on.
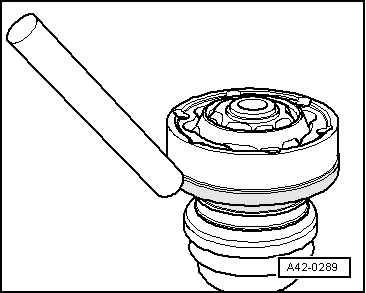
–  Drive on CV joint boot with cap using a plastic hammer.
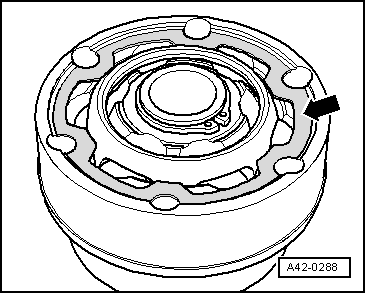
–  Remove surplus sealant immediately as it is pressed out.
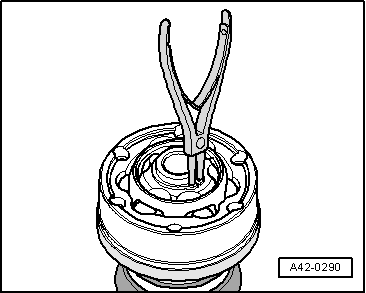
–  Insert 30 g of drive shaft grease through the ball raceways into the constant velocity joint.
  A42-0292
–  Degrease contact surface for gasket -arrow-.
–  Remove adhesive foil from gasket and glue into constant velocity joint.
–  Align new cover with bolt holes.
The alignment must be very accurate, because no further alignment is possible once the cover has been pressed on.
  A42-0288
–  Press on cover using special tools shown in illustration.
  A40-0435
–  Position CV joint boot between arrows.
  A42-0293

Servicing outer constant velocity joint > < Exploded view of components