Audi Workshop Service and Repair Manuals
HOME
FEATURES
MENU
INDEX
ABOUT US
Removing and installing amplifier R12 >
< Removing and installing mid-range loudspeaker, front left R103
A4 Cabriolet Mk2
Vehicle electrics
Communication / Infotainment / Radio system / moving_and_installing_loudspeakers_in_dash_panel/">Removing and installing loudspeakers in dash panel
Removing and installing internal loudspeaker R70
Removing and installing internal loudspeakerR70
Removing and installing internal loudspeaker -R70-
–
Switch off all electrical equipment.
–
Remove ignition key.
Removing
–
Carefully pry off trim
-A-
for sunlight penetration photosensor -G107-.
–
Unscrew bolt
-B-
(1 Nm).
–
Detach electrical connector at sunlight penetration photosensor -G107- and remove sunlight penetration photosensor -G107-.
–
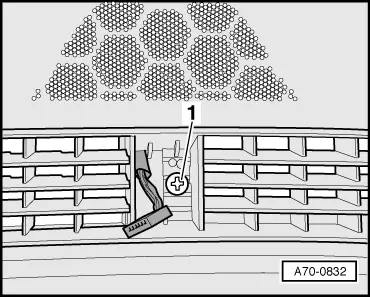
Unscrew bolt
-1-
(1 Nm).
–
Remove defroster vent.
–
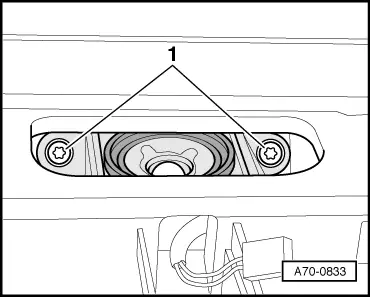
Unscrew both bolts
-1-
(2 Nm) at internal loudspeaker -R70-.
–
Pivot the internal loudspeaker -R70- outwards and detach electrical connector at internal loudspeaker -R70-.
Installing
–
Installation is performed in reverse sequence.
Vehicle electrics
Communication / Infotainment / Radio system / moving_and_installing_loudspeakers_in_dash_panel/">Removing and installing loudspeakers in dash panel
Removing and installing internal loudspeaker R70
Removing and installing amplifier R12 >
< Removing and installing mid-range loudspeaker, front left R103