A4 Cabriolet Mk2
|
|
|
|
|
 Note
Note
|
|
| Component | Nm |
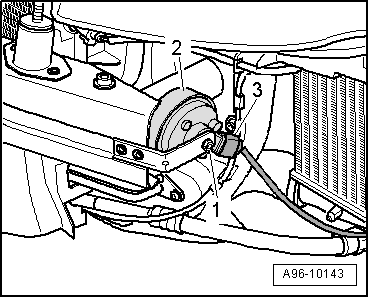
| Horn/dual tone horn -H1- to bracket | 5 |

|
|
|
|
|
Note
|
|
| Component | Nm |
| Horn/dual tone horn -H1- to bracket | 5 |