A4 Cabriolet Mk2
|
|
|
|
|
 Note
Note
|
|
|
|
| Component | Nm |
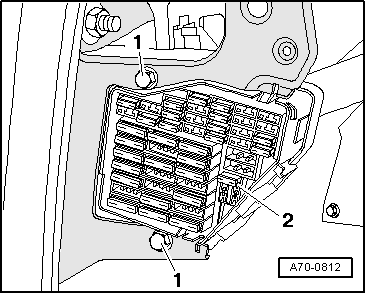
| 4-position relay carrier to body | 2.4 |
| Screw connection for electrical wires | 9 |

|
|
|
|
|
Note
|
|
|
|
| Component | Nm |
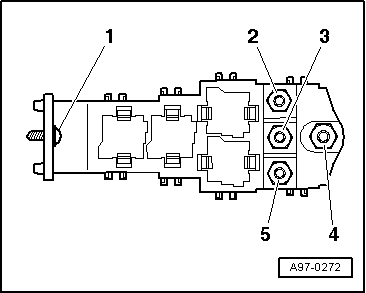
| 4-position relay carrier to body | 2.4 |
| Screw connection for electrical wires | 9 |