audi Workshop Repair Guides

Audi Workshop Service and Repair Manuals

Removing and installing front door handle > < Removing door handle
General Body Assembly
Front door handle - Assembly overview
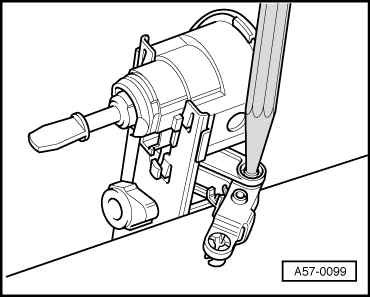
Front door handle pre-assembly
 
A57-0101

Note:

Replacement door handles must be painted and pre-assembled prior to installation.

  • Door handle
    • ◆ For assembly insert spring -4- in mount.
    • ◆ For pre-assembly insert door handle in mount -3- and push on hinged lever -8-.
    • ◆ Insert pivot pins -5- and -6- and caulk with centre punch as shown in Fig.1.
    • ◆ Insert spring -4- as shown in Fig. 2.
  • Buffer
    • ◆ Insert after painting.
  • Door handle mount
 
A57-0101
  • Spring
    • ◆ Installation position => Fig.2.
    • ◆ Lubricate spring with grease
      Lubricate G 052 745 A3.
  • Pivot pin
    • ◆ Note different lengths.
    • ◆ Caulking => Fig.1.
  • Pivot pin
    • ◆ Note different lengths.
    • ◆ Caulking => Fig.1.
  • Clip
  • Hinged lever
  • Locking pin
    • ◆ Assembly => Fig.3.
 
A57-0099

Fig.1    → Caulking pivot pin

Note:

Before caulking pivot pins protect painted surfaces with fabric adhesive strip.

  • ‒ Place pre-assembled door handle on a firm base (e.g. vice jaws).
  • ‒ Secure pivot pins by tapping gently with a centre punch to stop them falling out.
  • ‒ Check freedom of movement of hinged lever after caulking.
 
A57-0097

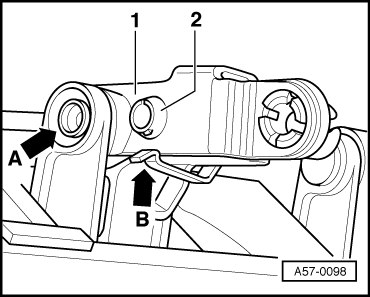
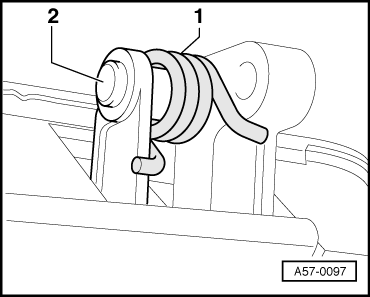
Fig.2    → Installation position of spring

  • ‒ Fit spring -1- as shown.
  • ‒ Lubricate with G 052 745 A3.
  • ‒ Pivot pin -2-.
 
A57-0098

Fig.3    → Installation of locking pin

  • ‒ Use locally manufactured tool to fully insert locking pin.
  • ‒ Spring clip at locking pin, -arrow B- must engage behind hinged lever.
  • ‒ Arrow -A- = caulked pivot pin.

Removing and installing front door handle > < Removing door handle