audi Workshop Repair Guides

Audi Workshop Service and Repair Manuals

Removing and installing air-flow flap positioning motor -V71 > < Removing and installing central flap positioning motor -V70
Heating, Air Conditioner
Components for the control and regulation of the air conditioner from Model Year 1997
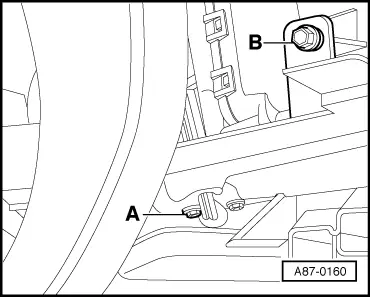
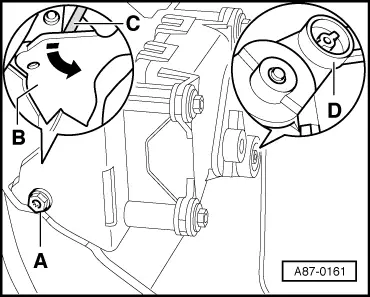
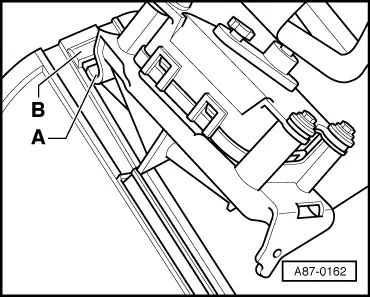
Removing and installing footwell/defrost flap positioning motor -V85

Removing

 
A87-0160
  • ‒ Removing driver's stowage compartment:
  • ‒ → Screw out the bolts -A- and -B- for the left dash-panel support.
  • ‒ Remove the footwell vents .

 
A87-0161
  • ‒ Detach the connector from the positioning motor.
  • ‒ → Remove bolt -A-.
  • ‒ Use a screwdriver -C- to prise out the lower tab -B- of holder.
  • ‒ Remove the positioning motor.
  • ‒ Unclip the reversing lever -D- (colour code: white).

Installing

Installation is carried out in the reverse order; note the following:

  • ‒ When installing the positioning motor, check that the reversing lever -C- is correctly seated.
 
A87-0162
  • ‒ → First, place the tab -A- (on the holder for the positioning motor) in the mount -B- (on the air conditioner).
  • ‒ If the lever is so unfavourably positioned that the reversing lever or motor cannot be installed, connect the motor to the wiring harness.
  • ‒ Connect the ignition and actuate the lever by pressing the air distribution keys on the -E87 until the reversing lever may be engaged.
  • ‒ Lay the wiring harness so that it cannot come into contact with moving components (e.g. the positioning motor lever)
  • ‒ Interrogate fault memory => Page 01-63.

Removing and installing air-flow flap positioning motor -V71 > < Removing and installing central flap positioning motor -V70