
A4 Mk1
|
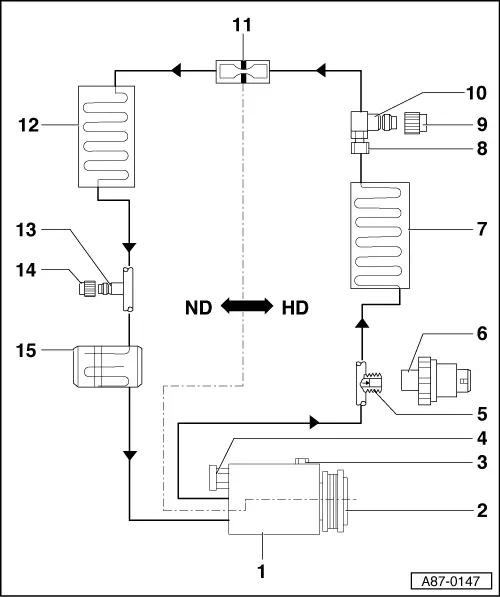
Repairing refrigerant circuit - vehicles from Model Year 1997
Assignment of air conditioner compressors
|
 |
|
|
HD = High-pressure end ND = Low-pressure end
=> Relevant Workshop Manual Engine, Mechanical Components; Repair group 13 |
|
|
|
|
|
|
|
|
|
|
|
|
|
|
|
|
|
Note: The Audi RS4 currently uses reservoirs with block connections.
|
|
|