-
◆ Do not overstretch circlips.
-
◆ Always renew circlips which have been damaged or over-tensioned.
-
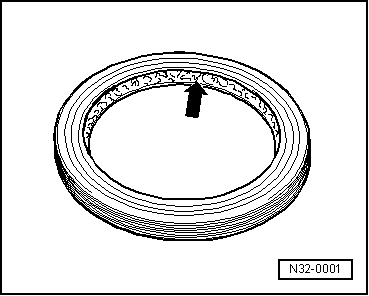
◆ Circlips must be properly seated in the base of the groove.
-
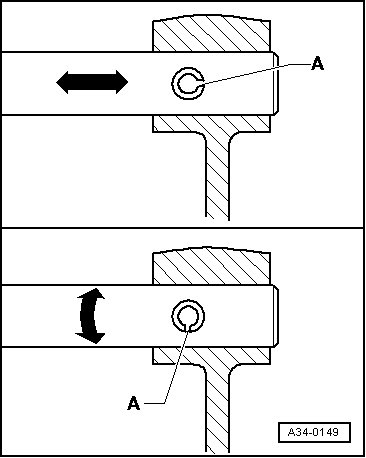
◆ → Renew spring pins. Position: slit -A- should be in line with the line of force -arrow-.
Note:
The spring pin or roll pin which secures the selector fork to the selector rail for 5th and 6th gear may only be removed and installed using special tool 3276.
Nuts, bolts
-
◆ Loosen nuts or bolts, opposite to tightening sequence.
-
◆ Tighten and loosen bolts and nuts for securing covers and housings in a diagonal sequence.
-
◆ Especially delicate parts, such as clutch pressure plates, must not be distorted. Loosen and tighten bolts and nuts in stages in a diagonal sequence.
-
◆ The tightening torques stated apply to non-oiled nuts and bolts.
-
◆ Always renew self-locking nuts and bolts.
-
◆ The threads of bolts which are secured by a locking fluid should be cleaned with a wire brush. Then apply AMV 185 101 A1 when inserting.
-
◆ Threaded holes into which self-locking bolts or bolts coated with locking fluid are screwed, must be cleaned (e.g. tap). Otherwise there is a danger of bolts shearing when subsequently being removed.
Bearings
-
◆ Install needle bearings with the lettering on the bearing (the side with thicker metal) facing towards the drift or other tool used for installing.
-
◆ Mark needle bearings of 1st to 6th speed sliding gears when removing, this ensures that when installing, the same installation position can be guaranteed.
-
◆ Grease needle bearing for gearbox input shaft in flywheel.
-
◆ Lubricate all bearings in gearbox housing with gear oil before installing.
-
◆ Heat inner races of taper roller bearings to approx. 100 °C before installing. Press in onto stop when installing so there is no axial clearance.
-
◆ Do not interchange the outer or inner races of bearings of the same size.
-
◆ Always replace the taper roller bearings on one shaft together and use new bearings from a single manufacturer.
-
◆ The taper roller bearings for the output shaft and the differential in the gearbox are low-friction bearings. Do not additionally oil new taper roller bearings when measuring friction torque. The bearings are pre-treated at the factory with a special type of oil for this purpose.
Shims
-
◆ Use a micrometer to measure the shims at several points. Different tolerances make it possible to obtain the exact shim thickness required.
-
◆ Check for burrs and damage.
-
◆ Only install perfect, undamaged shims.
Gears, synchro-hubs, inner races for sliding gears
-
◆ Heat gears and synchro-hubs to approx. 100 °C before installing. Press in onto stop when installing so there is no axial clearance.
-
◆ Heat inner races for sliding gears to approx. 100 °C when installing.
-
◆ The temperature can be checked with Temperature tester V.A.G 1558.
-
◆ Observe installation position.
Sliding gears
-
◆ After installing, check 1st to 6th speed sliding gears for axial clearance of 0.15 ... 0.35 mm and check that they rotate freely.
Synchroniser rings
-
◆ Do not interchange synchroniser rings. When reusing always fit to the same gear.
-
◆ Check for wear, renew if necessary.
-
◆ Lubricate with gear oil before installing.
Clutch mechanism
-
◆ When removing gearbox, remove clutch slave cylinder without disconnecting pipes.
-
◆ If the slave cylinder is removed with the hydraulic pipe attached, do not depress clutch pedal. Otherwise the piston will be pressed out of the slave cylinder.
-
◆ Ensure that the pressure plate is kept straight: loosen and tighten bolts in a diagonal sequence and in several gradual stages.
-
◆ If the clutch has burnt out, thoroughly clean the bellhousing, flywheel and parts of the engine facing the gearbox in order to reduce the smell of burnt linings.
|