audi Workshop Repair Guides

Audi Workshop Service and Repair Manuals

Ribbed belt drive for vane pump, alternator and viscous fan > < Dismantling and assembling engine
4-Cyl. TDI®Engine, Mechanics
Dismantling and assembling engine
Moving lock carrier to service position
 
W00-0198

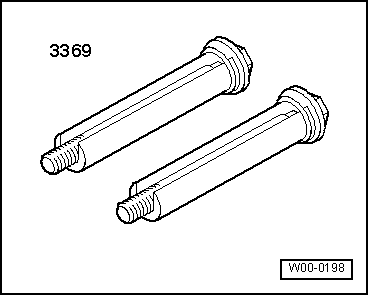
Special tools and workshop equipment required
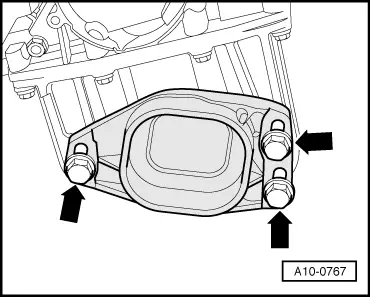
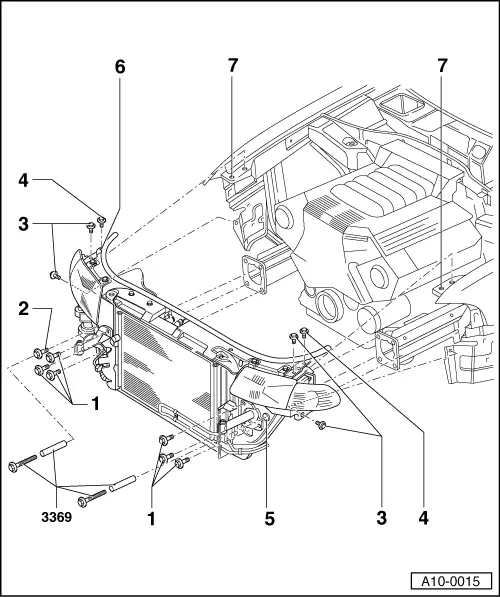
  • ◆ Special tool 3369
 
A10-0015
  • 45 Nm
  • 45 Nm
  • 10 Nm
  • 10 Nm
  • Bore
    • ◆ For special tool 3369
  • Hole in lock carrier
  • Hole in wing
 
A10-0015

Removing

  • ‒ Remove front noise insulation => Fig.13-6.
  • ‒ Remove front bumper.

=> General Body Repairs, Exterior; Repair Group 63; Front Bumper; Removing and installing front bumper

  • ‒ Disconnect air hose from bottom of charge air cooler => Fig.13-6.
  • ‒ Remove air duct between lock carrier and air cleaner on lock carrier => Fig.13-7.
  • ‒ Where fitted, detach wiring harness clamps on left side of radiator cowl.
 
A10-0015
  • ‒ Screw out bolt -2- hand insert special tool 3369.
  • ‒ Screw special tool 3369 into hole -5-.
  • ‒ Remove bolts -1- and -3-.
  • ‒ Screw out bolts -4-, fully withdraw lock carrier complete.
  • ‒ To secure the lock carrier, insert suitable M6 bolts into the rear lock carrier holes -6- and wing holes -7-.
 
A10-0015

Installing

Install in reverse order, paying attention to the following:

  • ‒ After installing lock carrier, check wiring near coolant fan.
  • ‒ Adjust stop for torque reaction support
    => Fig.13-7.
  • ‒ Install front bumper:

=> General Body Repairs, Exterior; Repair Group 63; Front Bumper; Removing and installing front bumper

  • ‒ Adjust headlights:

=> Electrical system; Repair Group 94; Servicing headlights; Adjusting headlights

 
A10-0658

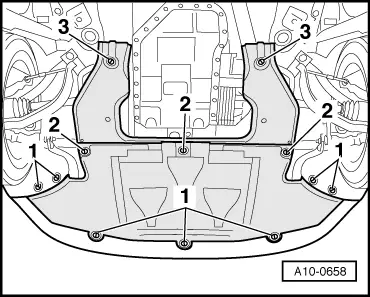
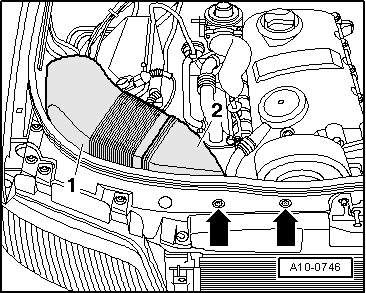
→ Fig.1    Removing front noise insulation

  • ‒ Release quick-release fasteners -1- and -2- and detach front noise insulation. Do not remove rear noise insulation.

 
A10-0747

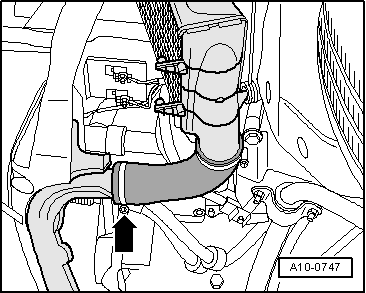
→ Fig.2    Removing air hose

  • ‒ Detach air hose to charge air cooler at bottom of lock carrier -arrow-.
 
A10-0746

→ Fig.3    Removing air duct between lock carrier and air cleaner

  • ‒ Screw out bolts -arrows-.
  • ‒ Remove air duct -1- and -2-.

 
A10-0767

→ Fig.4    Adjusting stop for torque reaction support

  • ‒ Allow stop for torque reaction support to rest on rubber buffer for torque reaction support under its own weight, and tighten bolts
    -arrows- to 28 Nm.

Ribbed belt drive for vane pump, alternator and viscous fan > < Dismantling and assembling engine