audi Workshop Repair Guides

Audi Workshop Service and Repair Manuals

Mixture preparation system, electronic inj.,Gas > < Read out readiness code
Motronic Fuel Injection and Ignition System (4-cyl) Turbo
Readiness code
Produce readiness code

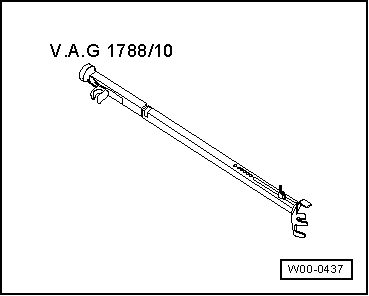
Special tools and workshop equipment required

 
W00-0437
  • ◆ Speed adjuster V.A.G 1788/10

Preconditions:

  • ● Vehicle stationary.
  • ● Vehicles with automatic gearbox: Selector lever in position P or N
  • ● Electrical consumers switched off (radiator fan must not run during the test)
  • ● Air conditioning switched off.
  • ● Coolant temperature at least 80 °C=> display group 004, display zone 3. Important: Run engine warm possibly through test drive.

Important note:

If the test result "OK" is displayed immediately within a test step after selecting the display group the test has already run and the next operating step can be carried out.

Operating step 1: Interrogating fault memory

Test conditions:

  • ● Engine stopped, ignition switched on
  • ‒ Connect vehicle diagnostic, testing and information system VAS 5051 or fault reader V.A.G 1551 and select engine electronics control unit with "Address word" 01
 
→ When adjacent display appears:
Rapid data transfer    HELP
Select function XX
  • ‒ Enter "02" for the function "Interrogate fault memory" and confirm entry with Q key.
 
→ The display shows the number of stored faults or "No fault detected!".
X fault(s) detected

If no fault is stored:

  • ‒ Rectify any faults and erase the fault memory. Perform a road test and interrogate the fault memory again as a check.

If no fault is stored:

  • ‒ Press the ⇒key.

Operating step 2: Erasing fault memory

Test conditions:

  • ● Engine stopped, ignition switched on
 
→ When adjacent display appears:
Rapid data transfer    HELP
Select function XX
  • ‒ Enter "05" for the function "Erase fault memory" and confirm entry with Q key.

Note:

When erasing the fault memory the readiness code is reset and therefore must be produced again.

 
→ When indicated on display:
Rapid data transfer    ⇒
Fault memory is erased
  • ‒ Press the ⇒key.

Adaption of throttle valve control unit to the engine control unit

Test conditions:

  • ● Engine stopped, ignition switched on
 
→ When adjacent display appears:
Rapid data transfer    HELP
Select function XX
  • ‒ Enter "04" to select "Start basic setting" and confirm with Q key.
 
→ When adjacent display appears:
Basic setting     Q
Enter display group number XXX
  • ‒ Enter "060" for "display group number 060" and confirm entry with Q key.
 
→ Display readout:
System in basic setting 60    ⇒
    1    2    3    4
  • ‒ Check specified values in display zones 3 and 4:

Display zones

1

2

3

4

Display group 060: Adaption of throttle valve control unit

Display

xx %

xx %

x

---

Display

Throttle valve angle
(angle sender 1)

Throttle valve angle
(angle sender 2)

Learning stage counter

Adaption status

Range

0...8

ADP process running
ADP OK
ERROR

Specified value

3...93 %

97...3 %

8

ADP OK

Note:

After adaption the learning stage counter reaches figure 8. (Figures may be skipped)

If "ERROR" is displayed: Interrogate fault memory => Page 24-130

Note on display zone 3:

During adaption different figures are shown in display zone 3 which illustrate the relevant adaption condition. The deciding factor is not how the learning stage counter (display zone 3) behaves during the adaption process, but that specified value in display zone 4 of specified value "ADP OK" has been attained after adaption.

If specified value "ADP OK" is attained:

  • ‒ Press C key.

Operating step 4: Adapt kickdown function 1)

    1)    Only on vehicles with automatic gearbox.

Test conditions:

  • ● Engine stopped, ignition switched on
 
→ When indicated on display:
Basic setting     Q
Enter display group number XXX
  • ‒ Enter "063" for "display group number 063" and confirm entry with Q key.
 
→ Display readout:
System in basic setting 63    ⇒
    1    2    3    4

Note:

You will now be instructed to: "Confirm kickdown".

  • ‒ Fully depress accelerator pedal beyond kickdown point and keep it pressed.

Note:

During adaption the kick-down point "Kick-down ADP is running" is displayed on V.A.G 1551. After successful adaption of the kick-down point the V.A.G 1551 shows "Kick-down ADP OK".

  • ‒ Check specified value in display zone 4:

Display zones

1

2

3

4

Display group 063: Adaption of kickdown function

Display

xx %

xx %

Kickdown

---

Display

Sender 1 for
accelerator pedal position

Adapted kickdown value sender 1 for accelerator pedal position

Kickdown

Adaption status

Range

Kickdown

Starting
ADP process running
ADP OK
ERROR

Specified value

79...94 %

79...94 %

Kickdown

ADP OK

Note:

If "ERROR" is displayed: Interrogate fault memory => Page 01-9.

Note on display zone 4:

If "ERROR" can be displayed, if e.g. accelerator pedal is not pressed when instructed by tester, or if accelerator pedal was released while adaption was already running but process was not yet complete.

In both cases it is necessary to exit the "Basic setting" mode and restart the adaption process afresh.

If specified value "ADP OK" is attained:

  • ‒ Press C key.

Operating step 5: Check operating status of lambda control

  • ‒ Start the engine (in vehicle with manual gearbox: press clutch pedal).

Note:

If necessary, reselect the engine control unit with "address word" 01 after starting the engine and initiate function "basic setting" with "04".

  • ‒ Adjust speedometer V.A.G 1788/10 on accelerator pedal and increase speed to 2600 rpm.

Test conditions:

  • ● Engine runs at 2600 rpm.
 
→ When adjacent display appears:
Basic setting     Q
Enter display group number XXX
  • ‒ Enter "030" for "display group number 030" and confirm entry with Q key.
 
→ When adjacent display appears:
System in basic setting 30    ⇒
    1    2    3    4
  • ‒ Check lambda probe status in display zones 1 to 2.

Note:

Several minutes may pass until reaching a diagnostic result.

Display zones

1

2

3

4

Display group 030: Lambda probe status

Display

X X X

X X X

Display

Lambda probe status, bank 1, probe 1

Lambda probe status, bank 1, probe 2

Range

0 = off
1 = on

0 = off
1 = on

Specified value

1 1 1

1 1 0

Significance of 3-digit readout of display group 030

X

X

X

Display zones 1 and 2

X

Lambda control 0 = not active, 1 = active

X

Lambda probe condition: 0 = not active, 1 = active

X

Condition of lambda probe heating: 0 = not active, 1 = active

Notes:

  • ◆ The first digit of the 3-digit display (heating) fluctuates between 0 and 1 at certain operating points.
  • ◆ The lambda control of lambda probe downstream of catalytic converter (bank 1, probe 2) is not active without engine load, i.e. the display of the 3-digit display is 0.
  • ‒ Only continue with the test if the displays have reached "111" in display zone 1 and "110" in display zone 2 at least once.

Operating step 6: Diagnosis of ageing of lambda probe upstream of catalytic converter

Test conditions:

  • ● Engine continues running at 2600 rpm.
 
→ When indicated on display:
Basic setting     Q
Enter display group number XXX
  • ‒ Enter "034" for "display group number 034" and confirm entry with Q key.
 
→ Display readout:
System in basic setting 34    ⇒
    1    2    3    4
  • ‒ Check specified value in display zone 4:

Note:

Several minutes may pass until reaching a diagnostic result.

Display zones

1

2

3

4

Display group 034: Diagnosis Lambda probe ageing, lambda probe upstream of catalytic converter (bank 1)

Display

xxxx rpm

xxx °C

x.x

---

Display

Engine speed

Exhaust gas temperature

Dynamics factor

Diagnosis status

Range

Test OFF
Test ON
B1-P1 OK
B1-P1 not OK

Specified value

2600 rpm

greater than 350 °C

0.5...2.5

B1-P1 OK

Note:

If "B1-S1 not OK" is displayed: Interrogate fault memory => Page 01-9.

If specified value "B1-S1 OK" is attained:

  • ‒ Press C key.

Operating step 7: Diagnosis of lambda probe condition downstream of catalytic converter

Test conditions:

  • ● Engine continues running at 2600 rpm.
 
→ When adjacent display appears:
Basic setting     Q
Enter display group number XXX
  • ‒ Enter "036" for "display group number 036" and confirm entry with Q key.
 
→ Display readout:
System in basic setting 36    ⇒
    1    2    3    4
  • ‒ Check specified value in display zone 2:

Display zones

1

2

3

4

Display group 036: Lambda probe condition downstream of catalytic converter (Bank 1)

Display

x.xxx V

---

Display

Lambda probes-
voltage
Bank 1, probe 2

Diagnosis status

Range

Test OFF
Test ON
B1-P2 OK
B1-P2 not OK

Specified value

0.100...0.950 V:

B1-P2 OK

Note:

If "B1-S2 not OK" is displayed: Interrogate fault memory

If specified value "B1-P2 OK" is attained:

  • ‒ Press C key.

Operating step 8: Diagnosis of lambda control system

Test conditions:

  • ● Engine continues running at 2600 rpm.
 
→ When indicated on display:
Basic setting     Q
Enter display group number XXX
  • ‒ Enter "037" for "display group number 037" and confirm entry with Q key.
 
→ Display readout:
System in basic setting 37    ⇒
    1    2    3    4
  • ‒ Check specified value in display zone 4:

Display zones

1

2

3

4

Display group 037: Lambda control system diagnosis (bank 1)

Display

xxx %

x.xxx V

x.xx

---

Display

Load

Lambda probe-
voltage
Bank 1, probe 2

Lambda correction value
between
Bank 1, Probe 1 and Bank 1, Probe 2

Diagnosis status

Range

Test OFF
Test ON
Syst. OK
Syst. not OK

Specified value

13...40 %

0.100...0.950 V:

lower than 0.02

Syst. OK

Note:

IF "Syst. not OK" is displayed: Interrogate fault memory

If specified value "Syst. OK" is attained:

  • ‒ Press C key.

Operating step 9: Diagnosis of ageing of lambda probes downstream of catalytic converter

Test conditions:

  • ● Engine continues running at 2600 rpm.
 
→ When indicated on display:
Basic setting     Q
Enter display group number XXX
  • ‒ Enter "043" for "display group number 043" and confirm entry with Q key.
 
→ Display readout:
System in basic setting 43    ⇒
    1    2    3    4
  • ‒ Check specified value in display zone 4:

Display zones

1

2

3

4

Display group 043: Diagnosis Lambda probe ageing, lambda probe downstream of catalytic converter (bank 1)

Display

xxxx rpm

xxx °C

x.xxx V

---

Display

Engine speed

Exhaust gas temperature

Lambda probe-
voltage
Bank 1, probe 2

Diagnosis status

Range

Test OFF
Test ON
B1-P2 OK
B1-P2 not OK

Specified value

2600 rpm

greater than 350 °C

0.100...0.950 V:

B1-P2 OK

Note:

If "B1-S2 not OK" is displayed: Interrogate fault memory

If specified value "B1-P2 OK" is attained:

  • ‒ Press C key.

Operating step 10: Diagnosis catalytic converter

Test conditions:

  • ● Engine continues running at 2600 rpm.
 
→ When indicated on display:
Basic setting     Q
Enter display group number XXX
  • ‒ Enter "046" for "display group number 046" and confirm entry with Q key.
 
→ Display readout:
System in basic setting 46    ⇒
    1    2    3    4
  • ‒ Check specified values in display zones 2 and 4:

Note:

The time of the test of the catalytic converter diagnosis is approx. 60 seconds.

Display zones

1

2

3

4

Display group 046: Diagnosis catalytic converter (Bank 1)

Display

xxxx rpm

xxx °C

x.xx

---

Display

Engine speed

Exhaust gas temperature

Measurement
Cat conversion

Diagnosis status

Range

0...8

Test OFF
Test ON
Cat B1 OK
Cat B1 not OK

Specified value

2600 rpm

550...700 °C

higher than 1.0

Cat B1 OK

Note:

As long as the exhaust temperature is not within the specified range the test is not initiated. If necessary, increase or decrease speed.

If "Cat B1. not OK" is displayed: Interrogate fault memory => Page 01-9. If no fault is stored replace the catalytic converter.

If the specified value "Cat B1 OK" is attained:

  • ‒ Press C key.

Operating step 11: Diagnosis of fuel tank breather valve

  • ‒ Remove speedometer V.A.G 1788/10 and let engine run at idling speed.

Test conditions:

  • ● Engine running at idling speed
 
→ When indicated on display:
Basic setting     Q
Enter display group number XXX
  • ‒ Enter "070" for "display group number 070" and confirm entry with Q key.
 
→ Display readout:
System in basic setting 70    ⇒
    1    2    3    4
  • ‒ Check specified value in display zone 4:

Note:

If the test is not initiated or if the display jumps from "Test ON" to Test "OFF" accelerate briefly, test is repeated.

Display zones

1

2

3

4

Display group 070: Diagnosis fuel tank breather valve

Display

xx %

xx %

---

Display

Degree of opening of
fuel tank breather valve

Lambda control
Diagnosis value

Diagnosis status

Range

Test OFF
Test ON
TEV OK
TEV not OK
Termination

Specified value

0...99 %

less than -7 %
or greater than 7%

TEV OK

Note:

If "TEV. not OK" is displayed: Interrogate fault memory => Page 24-114

If specified value "TEV OK" is attained:

  • ‒ Press C key.

Operating step 12: Diagnosis of secondary air system

Test conditions:

  • ● Engine running at idling speed

Note:

If the diagnosis of the secondary air system the secondary air pump runs several seconds.

 
→ When adjacent display appears:
Basic setting     Q
Enter display group number XXX
  • ‒ Enter "077" for "display group number 077" and confirm entry with Q key.
 
→ Display readout:
System in basic setting 77    ⇒
    1    2    3    4
  • ‒ Abruptly floor the accelerator pedal and release again (brief burst of throttle). 2500 rpm.
  • ‒ Check specified value in display zone 4:

Note:

The time of the test of the secondary air system is approx. 60 seconds.

Display zones

1

2

3

4

Display group 077: Diagnosis secondary air system (Bank 1)

Display

xxxx rpm

xx.x g/s

xx %

---

Display

Engine speed

Air mass

Relative air mass Bank 1, secondary air system

Diagnosis status

Range

Test OFF
Test ON
Syst. OK
Syst. not OK
Termination

Specified value

Front: 740..860 rpm
four-wheel drive: 760..880 rpm

2..0.5 g/s

greater than -20 %

Syst. OK

Note:

If "Syst. not OK" is displayed: Interrogate fault memory

If specified value "Syst. OK" is attained:

  • ‒ Press the ⇒key.
 
→ Display readout (function selection):
Rapid data transfer    HELP
Select function XX

Operating step 13: Read out readiness code

  • ‒ Read out readiness code => Page 01-65.

Mixture preparation system, electronic inj.,Gas > < Read out readiness code