audi Workshop Repair Guides

Audi Workshop Service and Repair Manuals

Removing and installing connector point in electronics box (plenum chamber) > < Removing and installing electronics box (plenum chamber)
Removing and installing 3-position relay carrier in electronics box (plenum chamber)
   
Removing
–  Operate “touch-wipe function” and allow wiper arms to move to vertical position.
–  Switch off ignition and take out ignition key.
–  With ignition switched off, disconnect earth cable at battery → Chapter.
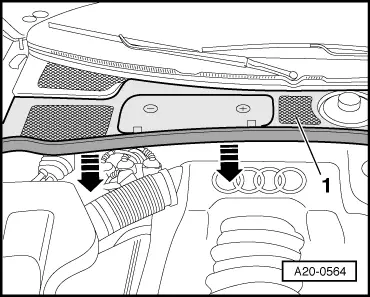
–  If fitted, detach rubber seal of plenum chamber cover in direction of -arrow-.
–  Remove plenum chamber cover -1- to front.
  A20-0564
–  Pry cap out of left section of cowl panel grille.
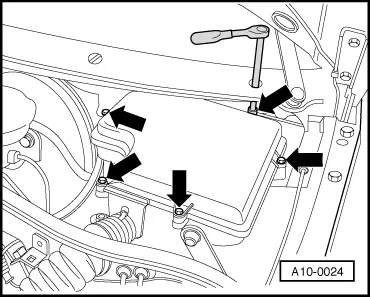
–  Unscrew bolts -arrows-.
–  Remove cover for electronics box (plenum chamber).
  A10-0024
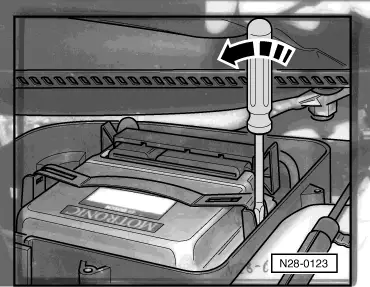
–  Use screwdriver to carefully pry off retaining strap -arrow-.
  N28-0123
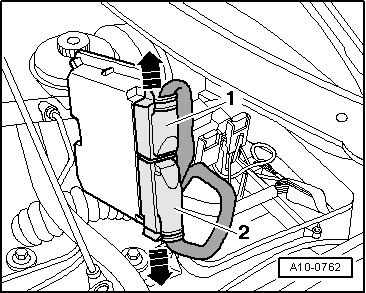
–  Lay aside engine control unit with connectors -1- and -2- attached.
  Note
Disregard -arrows-.
  A10-0762
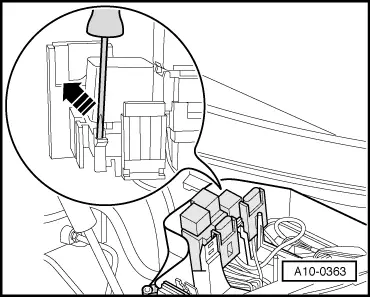
–  Release retaining clip -arrow- and lift 3-position relay carrier out of electronics box.
–  Pull out relays or control units and unclip corresponding sockets for multi-pin connectors.
  Note
  A10-0363
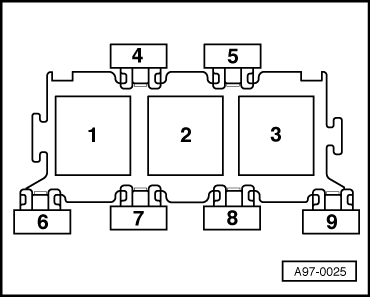
Exact assignment of 3-position relay carrier in electronics box (plenum chamber) can be found in applicable current flow diagram → Current flow diagrams, Electrical fault finding and Fitting locations.
Installing
Installation is carried out in the reverse order; note the following:
–  Connect battery. Additional steps required → Anchor.
Tightening torque
  A97-0025
ComponentNm
Cover to electronics box (plenum chamber)3


Removing and installing connector point in electronics box (plenum chamber) > < Removing and installing electronics box (plenum chamber)