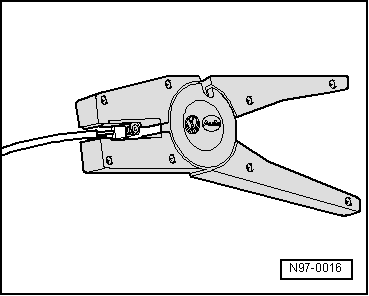
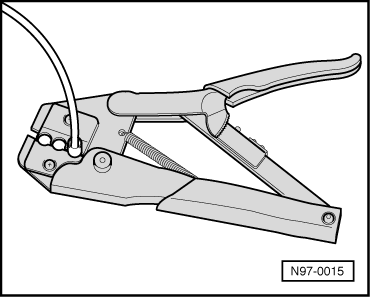
audi Workshop Repair Guides

Audi Workshop Service and Repair Manuals

Renewing aerial wires > < Notes for repairs on CAN bus wires
Repairing wiring with cross-section 0.22 mm2 or 0.35 mm2
Procedure
  Note
t  Wiring harness repair set -VAS 1978- contains repair wires of three different cross-sections (0.5 mm2, 1.5 mm2, 4.0 mm2) and the corresponding crimp connectors.
t  0.5 mm2 repair wire must be used for repairing 0.35 mm2 wire.
Perform the repair as follows:
   
–  Strip the ends of the 0.22 mm2 or 0.35 mm2 wires to a length of 12 ... 14 mm using the stripping pliers -VAS 1978/3-.
–  Fold back half of the stripped wire ends.
–  Strip the ends of the 0.5 mm2 repair wire to a length of 6 ... 7 mm using the stripping pliers -VAS 1978/3-.
  N97-0016
–  Slip crimp connector over ends of wires and crimp on both sides using crimping tool -VAS 1978/1-.
  Note
Be sure to select the correct red crimp insert -VAS 1978/24- for 0.5 mm2 wires.
l  Do NOT crimp the insulation on the wires.
  N97-0015
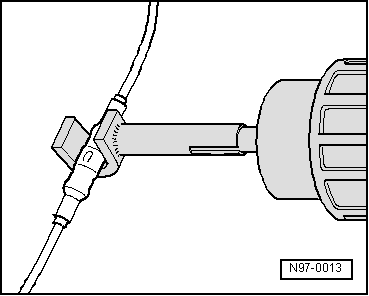
–  After crimping, you must shrink-fit the crimp connector using the hot-air blower, 220 V/ 50 Hz -VAS 1978/14- and hot-air blower shrink fitting -VAS 1978/15-.
l  Crimp connector must be heated working outwards from centre until it is completely sealed and adhesive emerges.
l  Set the hot air blower to the correct temperature; refer to → operating manual for VAS 1978.
–  When shrink-fitting, ensure no other wires, plastic components or insulating materials are damaged by the hot nozzle.
–  If repair wire was previously wrapped, yellow insulating tape must again be wound around this point; reattach wire with a cable tie if necessary.
–  Connect battery. Additional steps required → Anchor.
  N97-0013

Renewing aerial wires > < Notes for repairs on CAN bus wires