
A4 Mk2
|
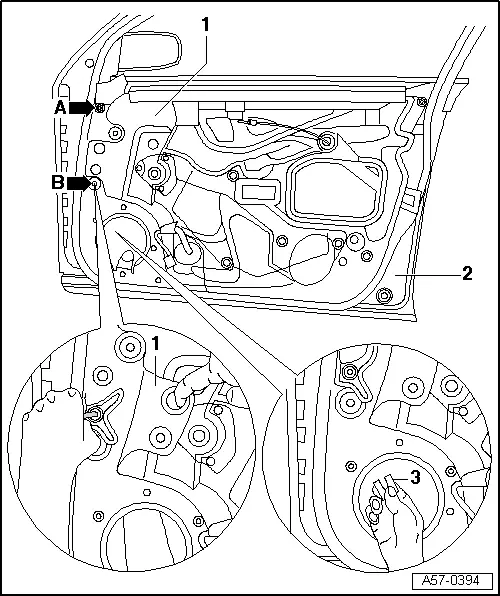
| 1 - | Insulation for door trim |
| q | Does not have to be removed for adjustment procedure |
| 2 - | Front door |
| q | Door trim and loudspeaker must be removed before window frame can be adjusted correctly. |
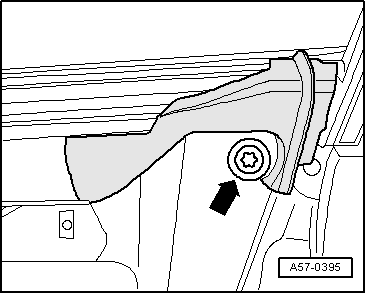
| 3 - | Spacer |
| q | Fit at attachment point -B- if necessary. |
| q | If securing bolts -arrow A- are loosened and spacers are fitted or taken out at attachment point -B- → Fig., it is possible to adjust position (angle) of window frame in area of A-pillar with respect to roof moulding. |
| q | Different thicknesses are available (0.5 mm and 1 mm). |

| 1 - | Fitted bolt (front) |
| q | Replace with standard bolt if necessary to adjust height |
| q | 32 Nm |
| 2 - | Fitted bolt (rear) |
| q | Replace with standard bolt if necessary to adjust height |
| q | 32 Nm |
| 3 - | Longitudinal adjustment bolt (X compensation) |
| q | 32 Nm |
| 4 - | Securing bolt (rear) |
| q | 32 Nm |
| 5 - | Securing bolt (front) |
| q | 32 Nm |
| 6 - | Door seal |
 Note
Note| After installing or adjusting window frame, screw in and tighten securing bolts in sequence indicated below. |
| q | Door window must be lowered half way before installing window frame. |
| q | Insert door frame in door shell. |
| q | Screw in bolts -1- and -2- hand-tight. |
| q | Loosen bolt -3-. |
| q | Fit door seal -6- in window frame. |
| q | Screw in bolt -4- and tighten to 32 Nm. |
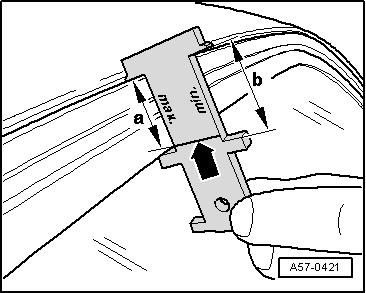
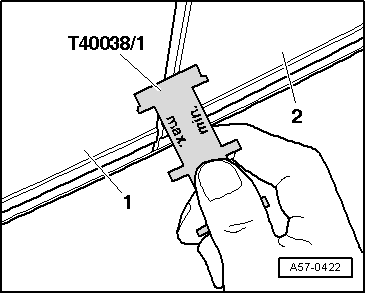
| q | Close door and check angle of window frame using adjustment template → Chapter. |
| q | If necessary, angle can be adjusted by loosening bolt -4-. |
| q | Check contact area of seal in vicinity of A-pillar → Fig.. |
| q | Tighten bolt -5- to 32 Nm. |
|
|
|
|
|
|
|
|

|