audi Workshop Repair Guides

Audi Workshop Service and Repair Manuals

Removing and installing seat rail covers > < Exploded view of modular wire routing for vehicles from 08.2005 onwards
Modular wire routing with corrugated tube at front seat
Special tools and workshop equipment required
   
t  Removal wedge -3409-
General notes
The full sheathing for the entire wiring harness with fabric tape between the seat pan and the connectors to the connector point was discontinued with the introduction of the modular wire routing. Instead, a two-shell corrugated tube is used in which the individual wires are laid separately.
Opening corrugated tube and removing individual wire
  WARNING
Observe safety regulations for pyrotechnic components → Chapter.
–  Move front seat as far up and to the rear as possible.
  W00-0016
–  Unclip cover panel -1- of connector point beneath front seat.
–  To do so, use removal wedge -3409-.
–  Disengage cover panel -1- on corrugated tube end.
  A72-10555
–  Unfasten cable retainer -2- at connector point by pressing retaining tabs -arrows- on both sides.
1 - Wiring harness
3 - Two-shell corrugated tube
  WARNING
Before handling the airbag units (e.g. unplugging the electrical connector) the mechanic must discharge static electricity by briefly touching the door striker plate, or similar.
–  Remove front seat → Chapter.
–  Attach front seat to seat repair stand -VAS 6136-.
  A72-10585
–  Use removal wedge -3409- to unfasten cable retainer -1-.
–  Detach cable retainer -1- from corrugated tube -2-.
  A72-10356
–  Remove bolt -1-.
–  Detach cable clip -2- from corrugated tube -3-.
  A72-10396
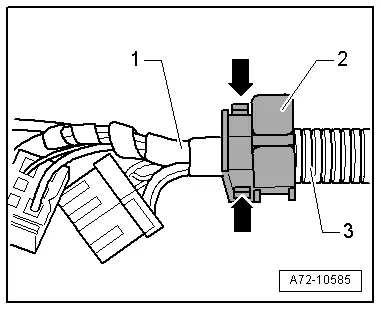
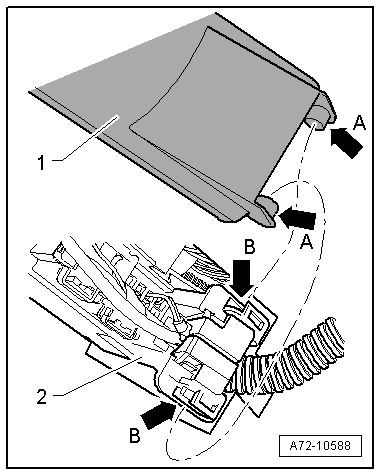
–  Unfasten fabric tape -2- in area of -arrow-.
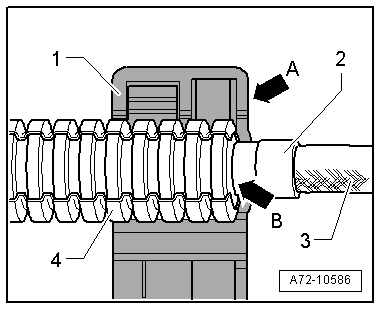
–  Open corrugated tube -1-.
Fitting individual wires and closing corrugated tube
Install in reverse order of removal. Observe the following:
  WARNING
t  Observe safety regulations for pyrotechnic components → Chapter.
t  Before handling the airbag units (e.g. unplugging the electrical connector) the mechanic must discharge static electricity by briefly touching the door striker plate, or similar.
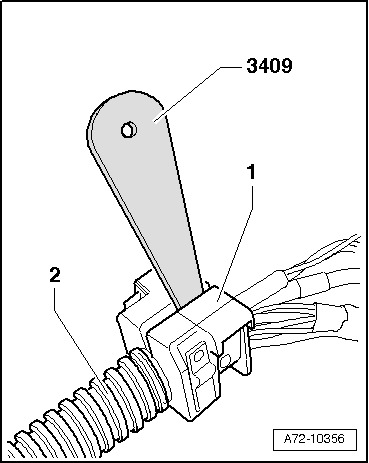
–  Take care not to twist any wires when bunching the individual wires and fitting them in the corrugated tube.
  Note
Note the correct installation position of the two-piece corrugated tube in relation to the wiring harness and the cable retainer.
  A72-10397
–  The start of the corrugated tube -4- should be positioned immediately after the clip -2-/cable tie.
3 - Wiring harness to connector point
–  Make sure the two-piece corrugated tube -4- is properly closed over its entire length.
–  Make sure side -arrow A- of cable retainer -1- follows on immediately from last bead -arrow B- of corrugated tube -4-.
  A72-10586
–  Tie self-adhesive fabric tape -arrow- around transition between corrugated tube on seat end -1- and wiring harness -2-.
  A72-10397
–  Take care to first engage lugs -arrows A- of cover panel -1- properly in mountings -arrows B- of connector point -2-.
–  Cover panel can only be engaged with connector point if it is attached properly.
Tightening torques → Chapter
  A72-10588

Removing and installing seat rail covers > < Exploded view of modular wire routing for vehicles from 08.2005 onwards