
A4 Mk2
|
|

|
|
|
|
|
 WARNING
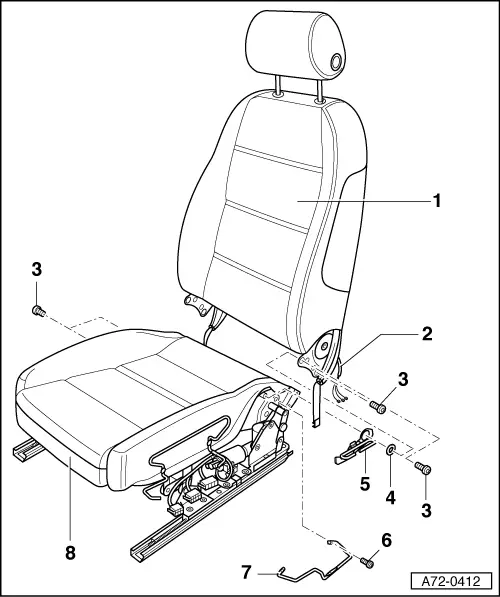
| 1 - | Backrest |
| t | Removing: |
| – | Remove seat → Chapter. |
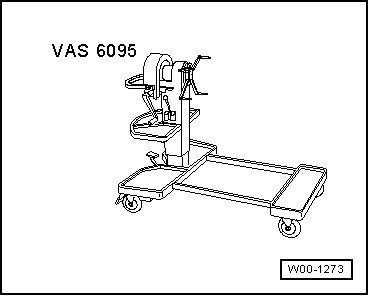
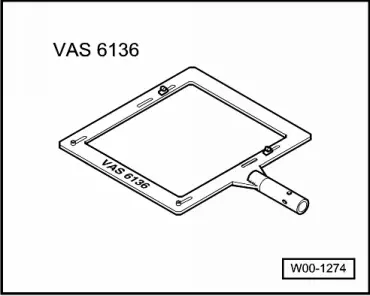
| – | Attach seat repair stand -VAS 6136- to engine and gearbox support -VAS 6095-. |
| – | Attach front seat to seat repair stand -VAS 6136-. |
| – | Remove side trim (sill side) → Chapter. |
| – | Remove side trim (tunnel side) → Chapter. |
| – | Sever/unfasten cable ties, detach adhesive strips and unplug connectors → Item. |
| – | Unscrew bolt -6-. |
| – | Swivel bracket -7- upwards. |
| – | Remove bolts -3- (4x). |
| – | Tilt backrest -1- forwards onto seat. |
| – | Press padding to side and carefully pull wiring harness -2- out of seat pan -8-. |
| – | Detach backrest -1-. |
| t | Installing: |
| Install in reverse order of removal. Observe the following: |
| – | When installing bracket -5-: Secure bolt -6- with plastic washer -4-. |
| – | Always renew bolts -3- (4x). |
| – | Re-cut threads in backrest frame before inserting bolts -3- (4x). |
| Seat with seat memory: |
| – | After installing seat in vehicle, perform basic setting of backrest/seat. |
| 2 - | Wiring harness |
| 3 - | Bolts (4x) |
| q | Tightening torque: 20 Nm |
| 4 - | Plastic washer |
| 5 - | Bracket |
| 6 - | Bolt |
| 7 - | Bracket |
| 8 - | Seat pan |
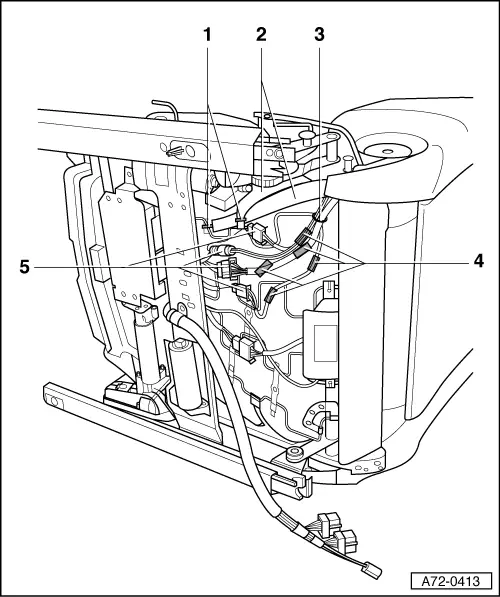
| 1 - | Cable ties (2x) |
| – | Unfasten cable ties -1- (2x). |
| – | Detach rubber straps -2- (2x). |
| – | Unplug connectors -5- (4x). |
| – | Unfasten cable tie -3- at wiring harness. |
| – | Unfasten adhesive strips at mounting rails -4- (5x). |
| 2 - | Rubber straps (2x) |
| 3 - | Cable tie |
| 4 - | Mounting rails (5x) |
| 5 - | Connectors (4x) |