
A4 Mk2
| Exploded view - dismantling and assembling differential |

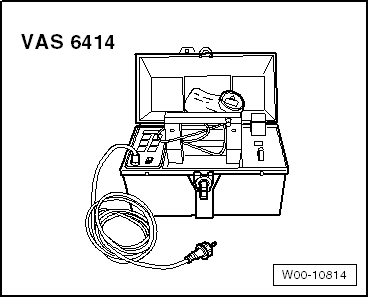
| Special tools and workshop equipment required |
| t | Thrust plate -VW 401- |
| t | Thrust plate -VW 402- |
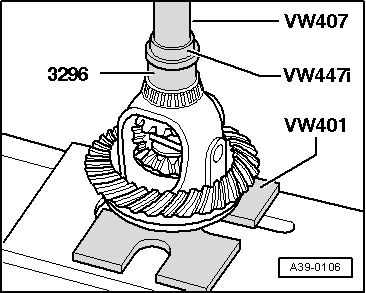
| t | Press tool -VW 407- |
| t | Press tool -VW 408 A- |
| t | Thrust plate -VW 447 H- |
| t | Thrust plate -VW 447 i- |

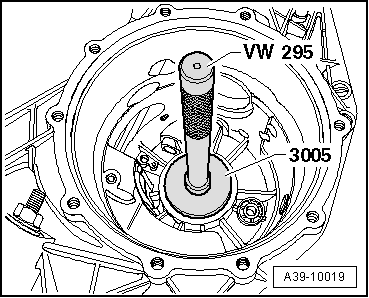
| t | Drift -VW 295- |
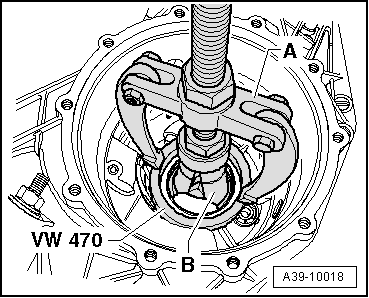
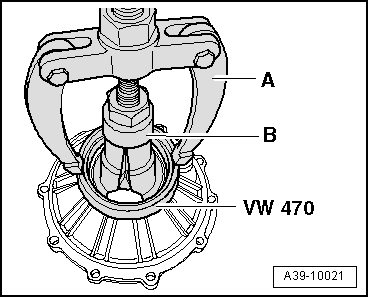
| t | Thrust pieces for pinion shaft bearing -VW 470- |
| t | Tube -30 - 14- |
| t | Thrust piece -2050- |
| t | Thrust plate -3005- |
| t | Tube -3296- |
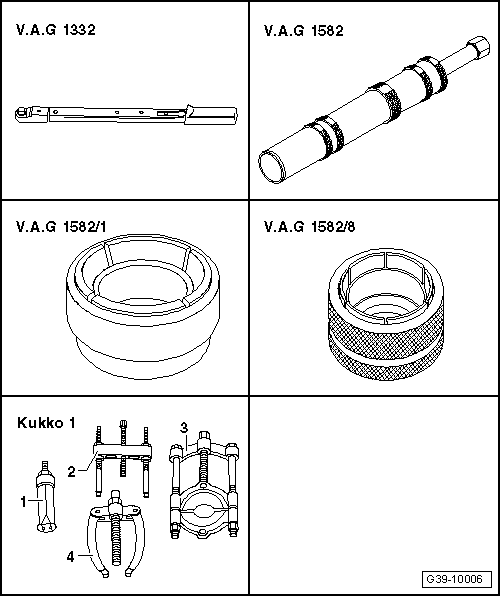
| t | Torque wrench -V.A.G 1332- |
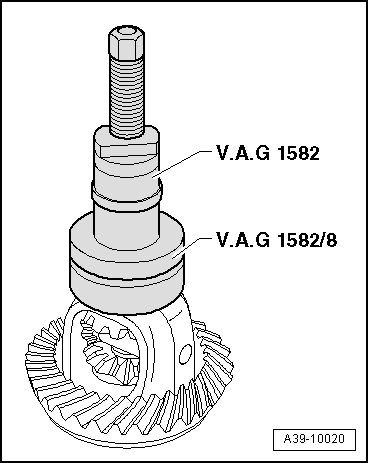
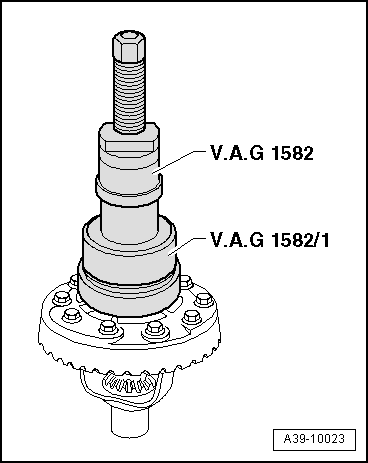
| t | Tapered roller bearing puller -V.A.G 1582- |
| t | Adapter -V.A.G 1582/1- |
| t | Adapter -V.A.G 1582/8- |
| t | -1-Internal puller -Kukko 21/8- |
| t | -4-Counter-support -Kukko 22/2- |
|
|
|
|
| Removing and installing differential → Chapter |
 Note
Note| t | Always renew both tapered roller bearings together. |
| t | Adjustment work is required when renewing the parts marked with 1). Table of adjustments → Chapter |

| 1 - | Gearbox housing 1) |
| 2 - | Shim „S2“ |
| q | Note thickness |
| q | Table of adjustments → Chapter |
| 3 - | Outer race for tapered roller bearing (right-side) 1) |
| q | Pulling out → Fig. |
| q | Driving in → Fig. |
| 4 - | Inner race for tapered roller bearing (right-side) 1) |
| q | Pulling off → Fig. |
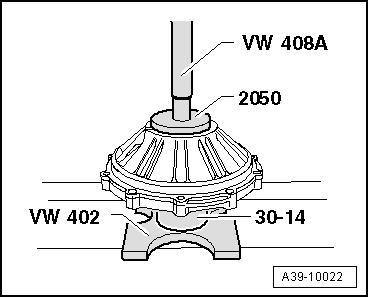
| q | Pressing on → Fig. |
| 5 - | Crown wheel1) |
| q | Is paired with pinion shaft (final drive gear set) |
| q | Select correct version according to gearbox code letters → Electronic parts catalogue |
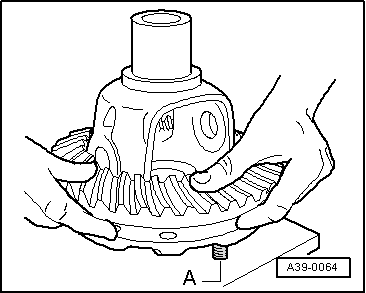
| q | Drive crown wheel off differential cage using a punch → Fig. |
| q | Fitting on differential cage → Fig. |
| 6 - | Differential cage1) |
| 7 - | Bolt |
| q | 60 Nm and turn 45° further |
| q | Renew |
| q | Tighten bolts in stages and in diagonal sequence until crown wheel makes full contact with differential cage. Then tighten to specified torque. |
| 8 - | Inner race for tapered roller bearing (left-side) 1) |
| q | Pulling off → Fig. |
| q | Pressing on → Fig. |
| 9 - | Outer race for tapered roller bearing (left-side) 1) |
| q | Pulling out → Fig. |
| q | Pressing in → Fig. |
| 10 - | Shim „S1“ |
| q | Note thickness |
| q | Table of adjustments → Chapter |
| 11 - | Cover for final drive 1) |
| q | With O-ring |
| 12 - | One-piece thrust washer |
| q | Lubricate with gear oil before installing |
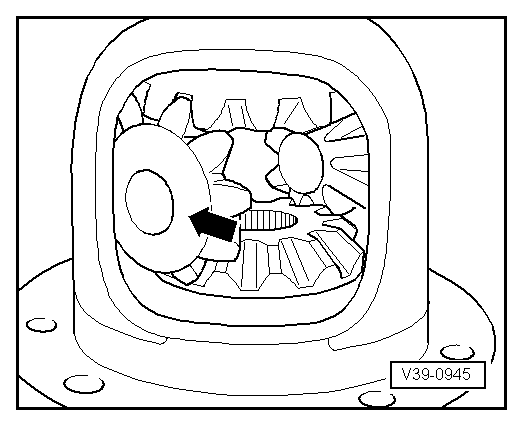
| 13 - | Sun wheel |
| q | Installing → Fig. |
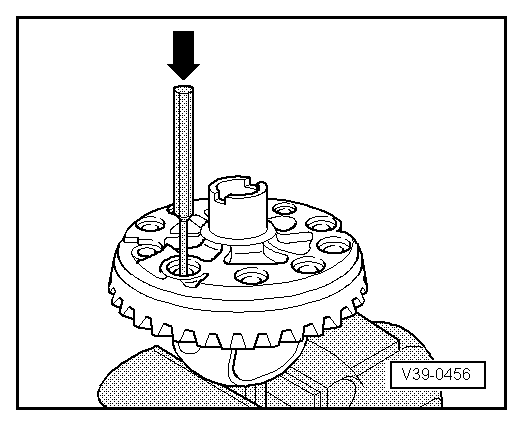
| 14 - | Differential pinion pin |
| q | Drive out with drift after removing spring pin |
| 15 - | Spring pin |
| q | Secures differential pinion pin |
| q | Drive out of differential cage with drift |
| q | Press in until 1.5 mm above differential cage |
| 16 - | Planet pinion |
| q | Installing → Fig. |
|
|
|
|
Note
|
|
 WARNING
|
|
|
|
|
|
|
|
|
|
|
|